従来のメディエーションネットワークガイド
このページでは、さまざまなSDKビッダーネットワークをアドネットワークとしてMAXメディエーションプラットフォームに連携する方法を説明します。
開始する前に
- サポートされているMAX広告フォーマットをアプリに正しく実装します。
- 使用しているプラットフォーム向けの「メディエーションネットワークの準備」ページの手順に従って、連携するネットワークのアダプターを追加します。
この連携の完了後、Mediation Debuggerを使用して連携を検証できます。
Chartboost
ステップ1. Chartboostアカウントを作成
MAXメディエーションプラットフォームを通じてChartboostの広告インベントリを有効化するには、Chartboostの承認済みアカウントが必要です。 アカウントををお持ちでない場合は、Chartboostのサイトから登録してください。 その後、Chartboostのオンボーディングガイドに沿って進めてください。
広告ユニットでアプリを作成済みの場合は、ステップ3に進み、MAX広告ユニットでChartboostを有効化してください。
ステップ2. Chartboostでアプリケーションとキャンペーンを作成
アプリを追加する
Chartboostでアプリの収益化を開始するには、アプリを作成します。
- Chartboostにログインします。
- DASHBOARD > APP SETTINGSを選択します。
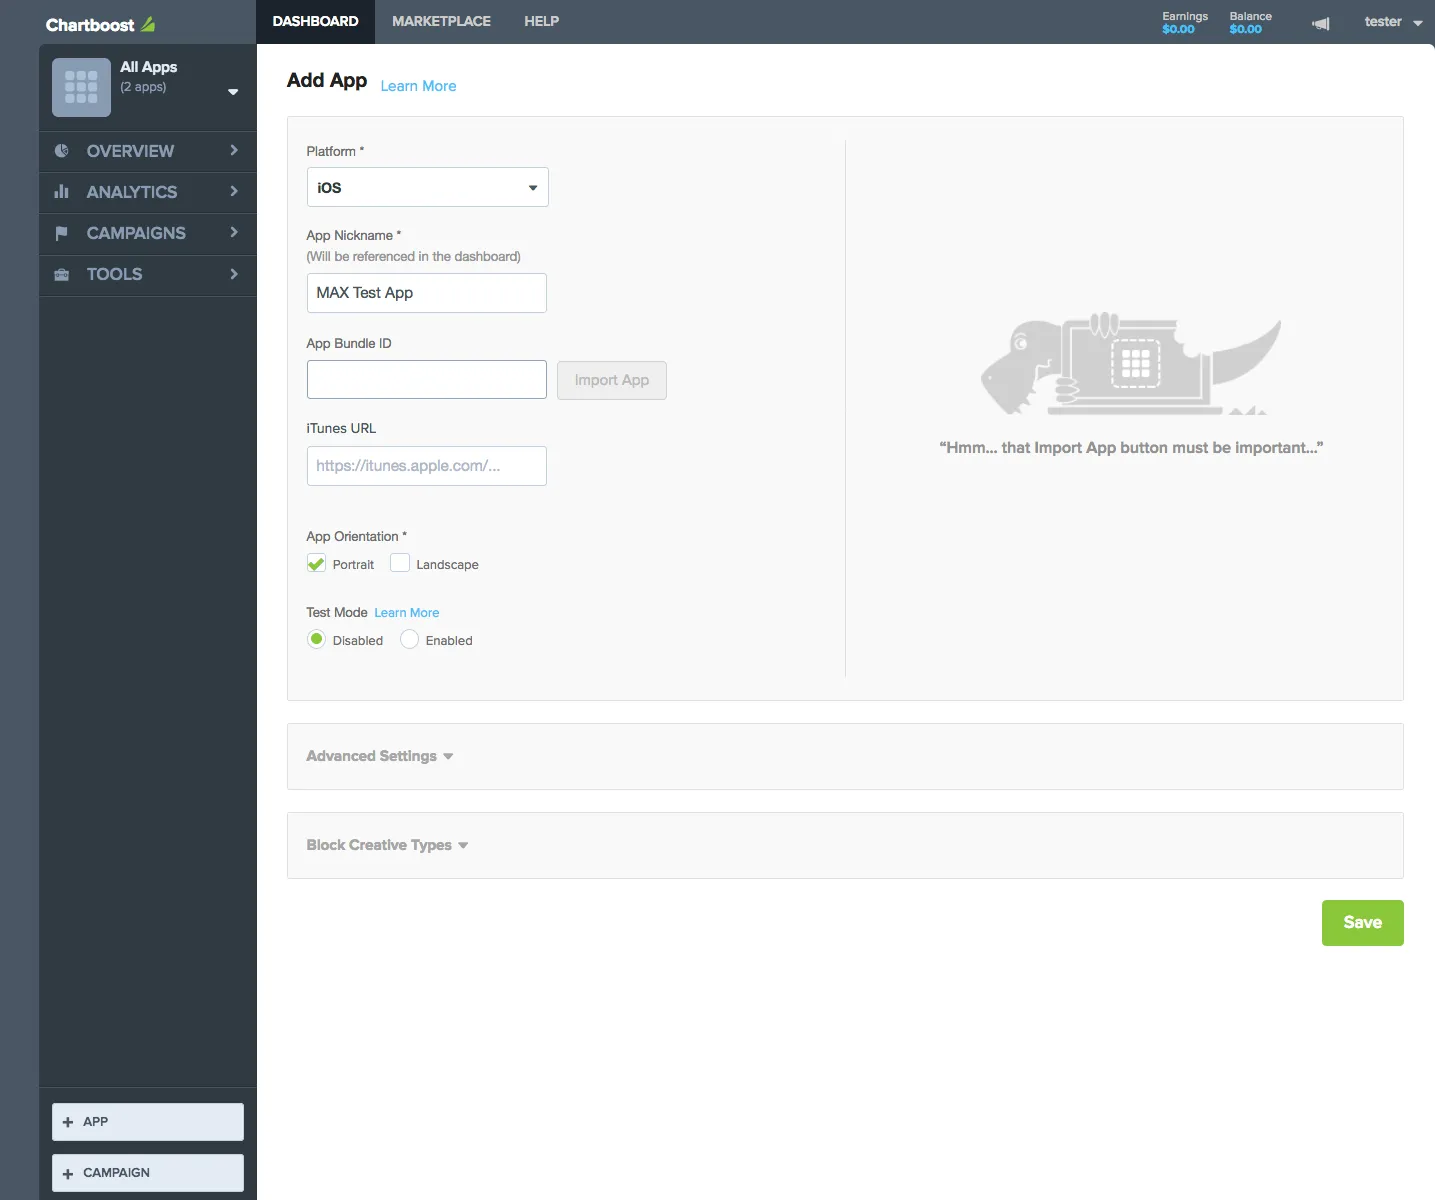
- + APPをクリックします。
- Add App画面で、App Bundle IDフィールドにアプリのバンドルIDまたはASINを入力します(アプリがまだ公開されていない場合は、空白のままにします。Chartboost SDKを連携しテストを実行した後に、このバンドルIDを追加してください)。
- いずれかのチェックボックスにチェックを入れて、アプリ画面の向きを指定します。 アプリが縦向きと横向きの両方になっている場合は、どちらがデフォルトの向きかを指定してください。
- Saveをクリックします。
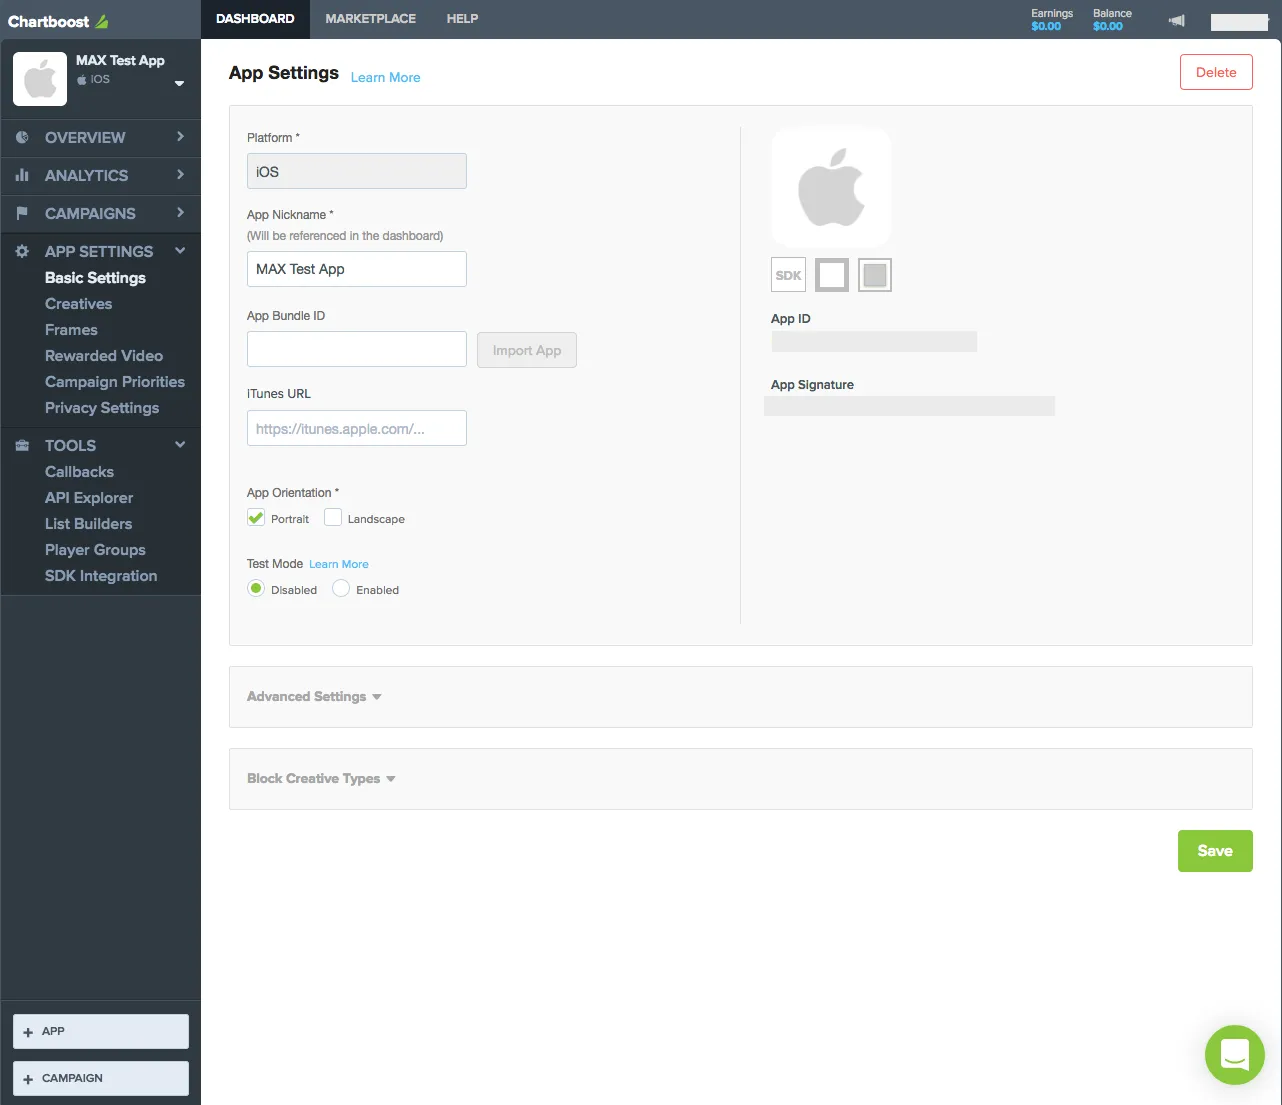
アプリを保存すると、ChartboostはアプリのアプリIDとアプリ署名を生成し、表示します。 MAXメディエーションでChartboostを有効化する際に、広告をリクエストするにはこれらのキーが必要になります。 これらのキーを取得するには、Chartboostアカウントにログインし、DASHBOARD > APP SETTINGS > Basic Settingsを選択します。
新規キャンペーンを開始する
アプリを作成したら、新規キャンペーンを開始します。 これにより、Chartboostのデマンドが有効化されます。
- Chartboostダッシュボードにログインします。
- + CAMPAIGNをクリックします。
- Network Publishingを選択します。 Network Publishing Campaign画面が表示されます。
- 公開するキャンペーンの名前を入力し、キャンペーンで使用するプレースメントタイプを選択して、そのプラットフォームを選択します。 広告フォーマットごとに、個別のネットワーク公開キャンペーンを作成します。
- アプリを選択し、Saveをクリックします。

Chartboostで支払い情報を設定し、任意の方法で支払いができるようにします。 Chartboostからフィル(広告在庫の提供)を受け取るには、お支払い情報の設定が必要です。
ステップ3. MAXアカウントでChartboostを有効化
- Chartboostの設定が完了したら、MAXアカウントにログインします。
- MAX > Manage > Ad Unitsを選択します。
- Chartboostを有効化したいMAX広告ユニットの配置をクリックします。
- 選択したMAX広告ユニットに関連付けられたChartboostアプリIDとアプリ署名の値を入力します。 Chartboostが提供する広告ロケーションの値がある場合は、MAX広告ユニットの設定ページで保存することもできます。
- ステータスバーをクリックして、ネットワークを有効化します。
- ✓ Saveをクリックします。 これにより、この広告ユニットの対応ネットワークリストでChartboostが有効になります。
CSJ
ステップ1. CSJアカウントを作成
MAXメディエーションプラットフォームを通じてCSJの広告インベントリを有効化するには、CSJの承認済みマネタイズアカウントが必要です。 アカウントを持っていない場合は、こちらから登録してください。
CSJダッシュボードですでに広告ユニットを作成済みの場合は、ステップ3に進み、MAX広告ユニットでCSJを有効化してください。
ステップ2. CSJでアプリケーションとプレースメントを作成
アプリを追加する
CSJでアプリの収益化を開始するには、CSJダッシュボードにアプリを追加します。
- CSJダッシュボードにログインします。
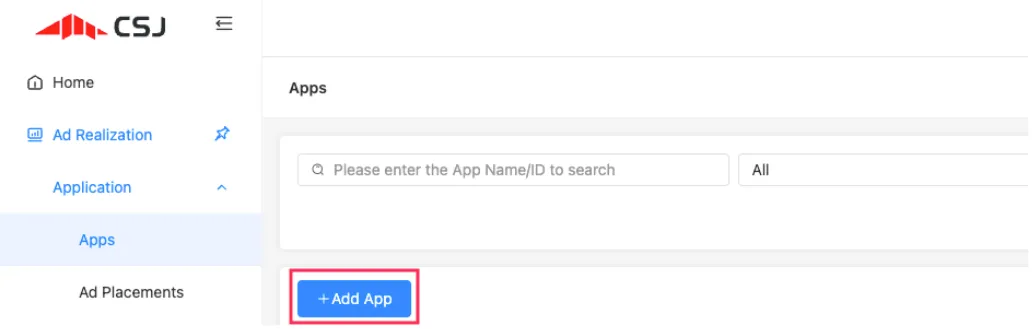
- Ad Realization > Application > Appsを選択します。
- + Add Appをクリックします。
- Add Appフォームで、アプリケーションに関する情報を入力します。
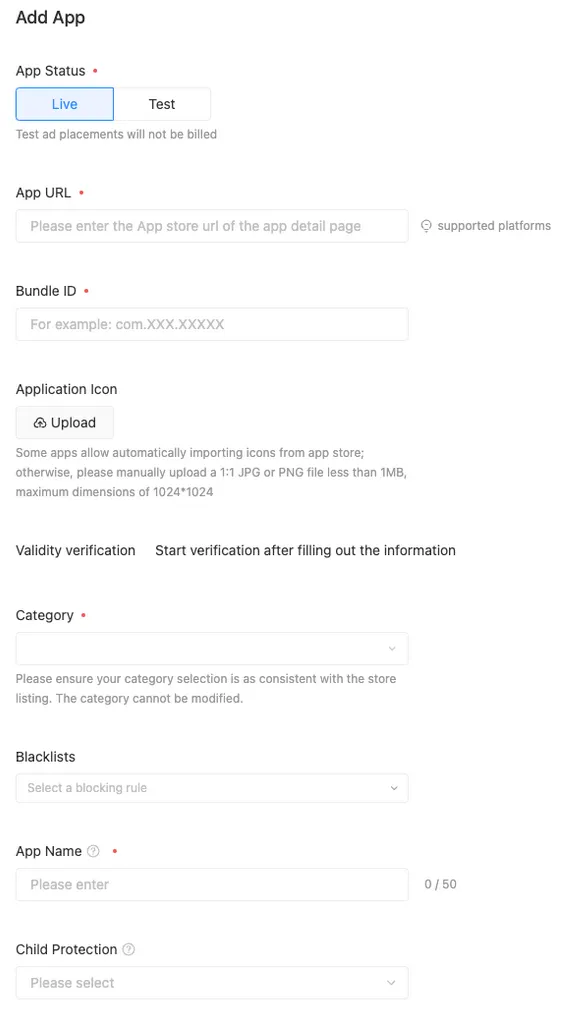
アプリを保存すると、アプリIDを含むアプリのリスティングが表示されます。
広告プレースメントを作成する
- Ad Realization > Application > Ad Placementsを選択します。
- + Add Ad Placementsをクリックします。
- Add Ad Placementセレクターで、アプリの広告フォーマットを選択します。
リクエストされた情報を入力します。
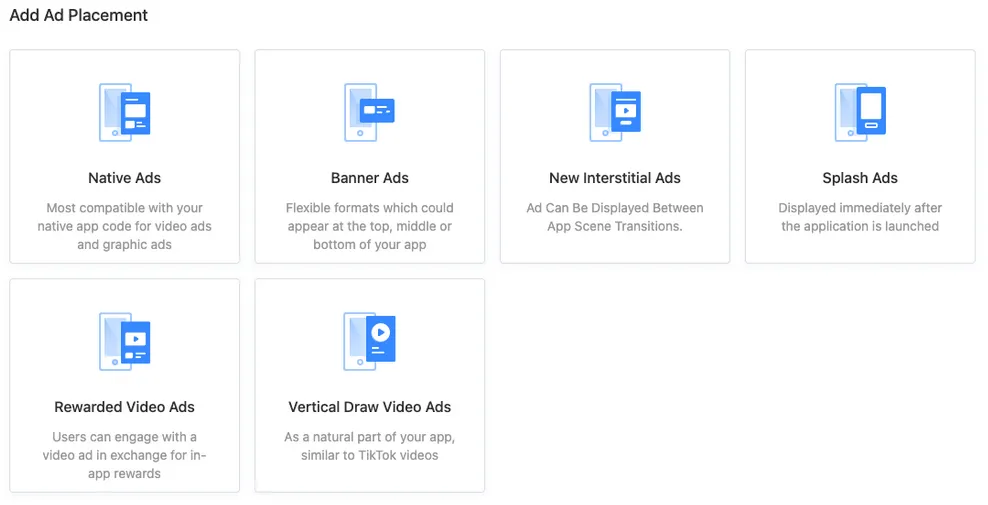
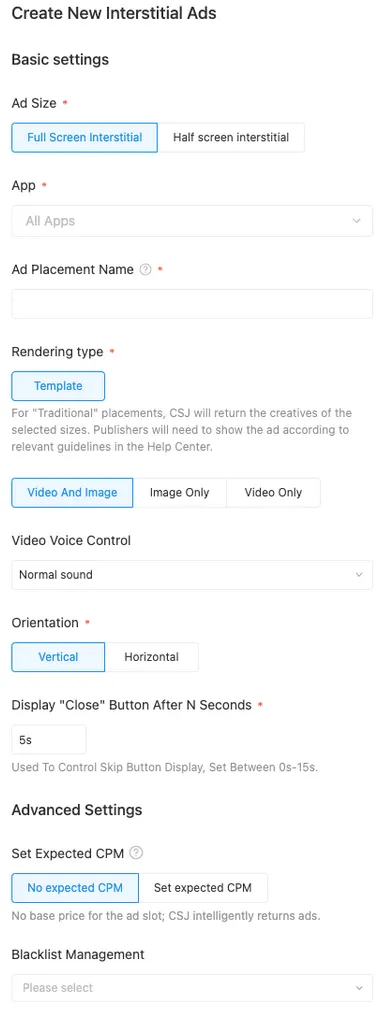
- Submitをクリックしてプレースメントを保存します。
プレースメントが広告プレースメントのリストに表示されます。
プレースメントIDをメモしてください。
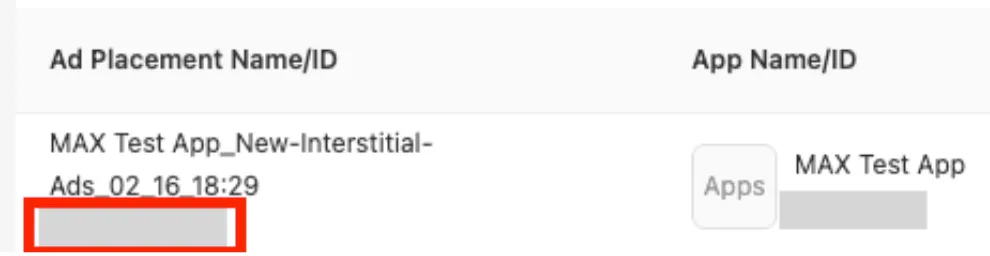
MAXメディエーションでCSJを有効化するには、CSJのアプリIDと、作成したアプリに関連付けられた広告プレースメントIDが必要です。 アプリIDは、CSJダッシュボードのAppsセクションで確認できます。 広告プレースメントIDは、Ad Placementsセクションで確認できます。
Account Informationセクションにお支払い情報を入力します。 CSJからフィル(広告在庫の提供)を受信するには、お支払い情報を設定する必要があります。
ステップ3. MAXアカウントでCSJを有効化
- MAXアカウントにログインします。
- MAX > Manage > Ad Unitsを選択します。
- CSJを有効化したいMAX広告ユニットの配置をクリックします。
- 選択したMAX広告ユニットに関連付けられたCSJアプリIDと広告プレースメントIDを入力します。
- ステータスバーをクリックして、ネットワークを有効化します。
- ✓ Saveをクリックします。 これにより、この広告ユニットの対応ネットワークリストでCSJが有効になります。
Google AdMob
ステップ 1. Google AdMobアカウントを作成
MAXメディエーションプラットフォームを通じてGoogle AdMobの広告インベントリにアクセスするには、Google AdMobの有効なアカウントが必要です。 アカウントをお持ちでない場合は、Google AdMobのサイトから登録してください。
Google AdMobのアカウントをすでにお持ちの場合は、ステップ3に進み、MAX広告ユニットでGoogle AdMobを有効化してください。 AppLovinは、新しいプレースメントIDを作成することを推奨します。これにより、MAXがレポートする内容の正確性が向上するためです。
ステップ 2. Google AdMobでアプリケーションと広告ユニットを作成
アプリを追加する
-
Google AdMobアカウントにログインします。
-
左側のナビゲーションバーのAppボタンをクリックします。
-
MAXメディエーションを使用して収益化を行うには、3つの方法があります。
- 既存のアプリを検索する。
- 新規アプリを追加する。
- 既存のアプリを選択する。
プラットフォーム(iOSおよびAndroid)ごとに一意のGoogle AdMobアプリケーションを作成する必要があります。

-
Google AdMobアカウントでアプリを設定したら、CPMの最低単価を含む個別の広告ユニットを作成します。 各広告フォーマットごとに以下の手順に従ってください。

フォーマット別の手順
-
Create ad unitセクションで、Bannerフォーマットを選択します。
-
Ad Unit Nameフィールドにこの広告ユニットの名前を入力します。
-
Advanced Settingsセクションで以下を設定します。
- Ad Type:Text, image, and rich mediaとVideoの両方を確認します。
- Automatic Refresh:Disabledを選択します。
- eCPM Floor:MAXバナー広告ユニットページに記載された金額を入力します。
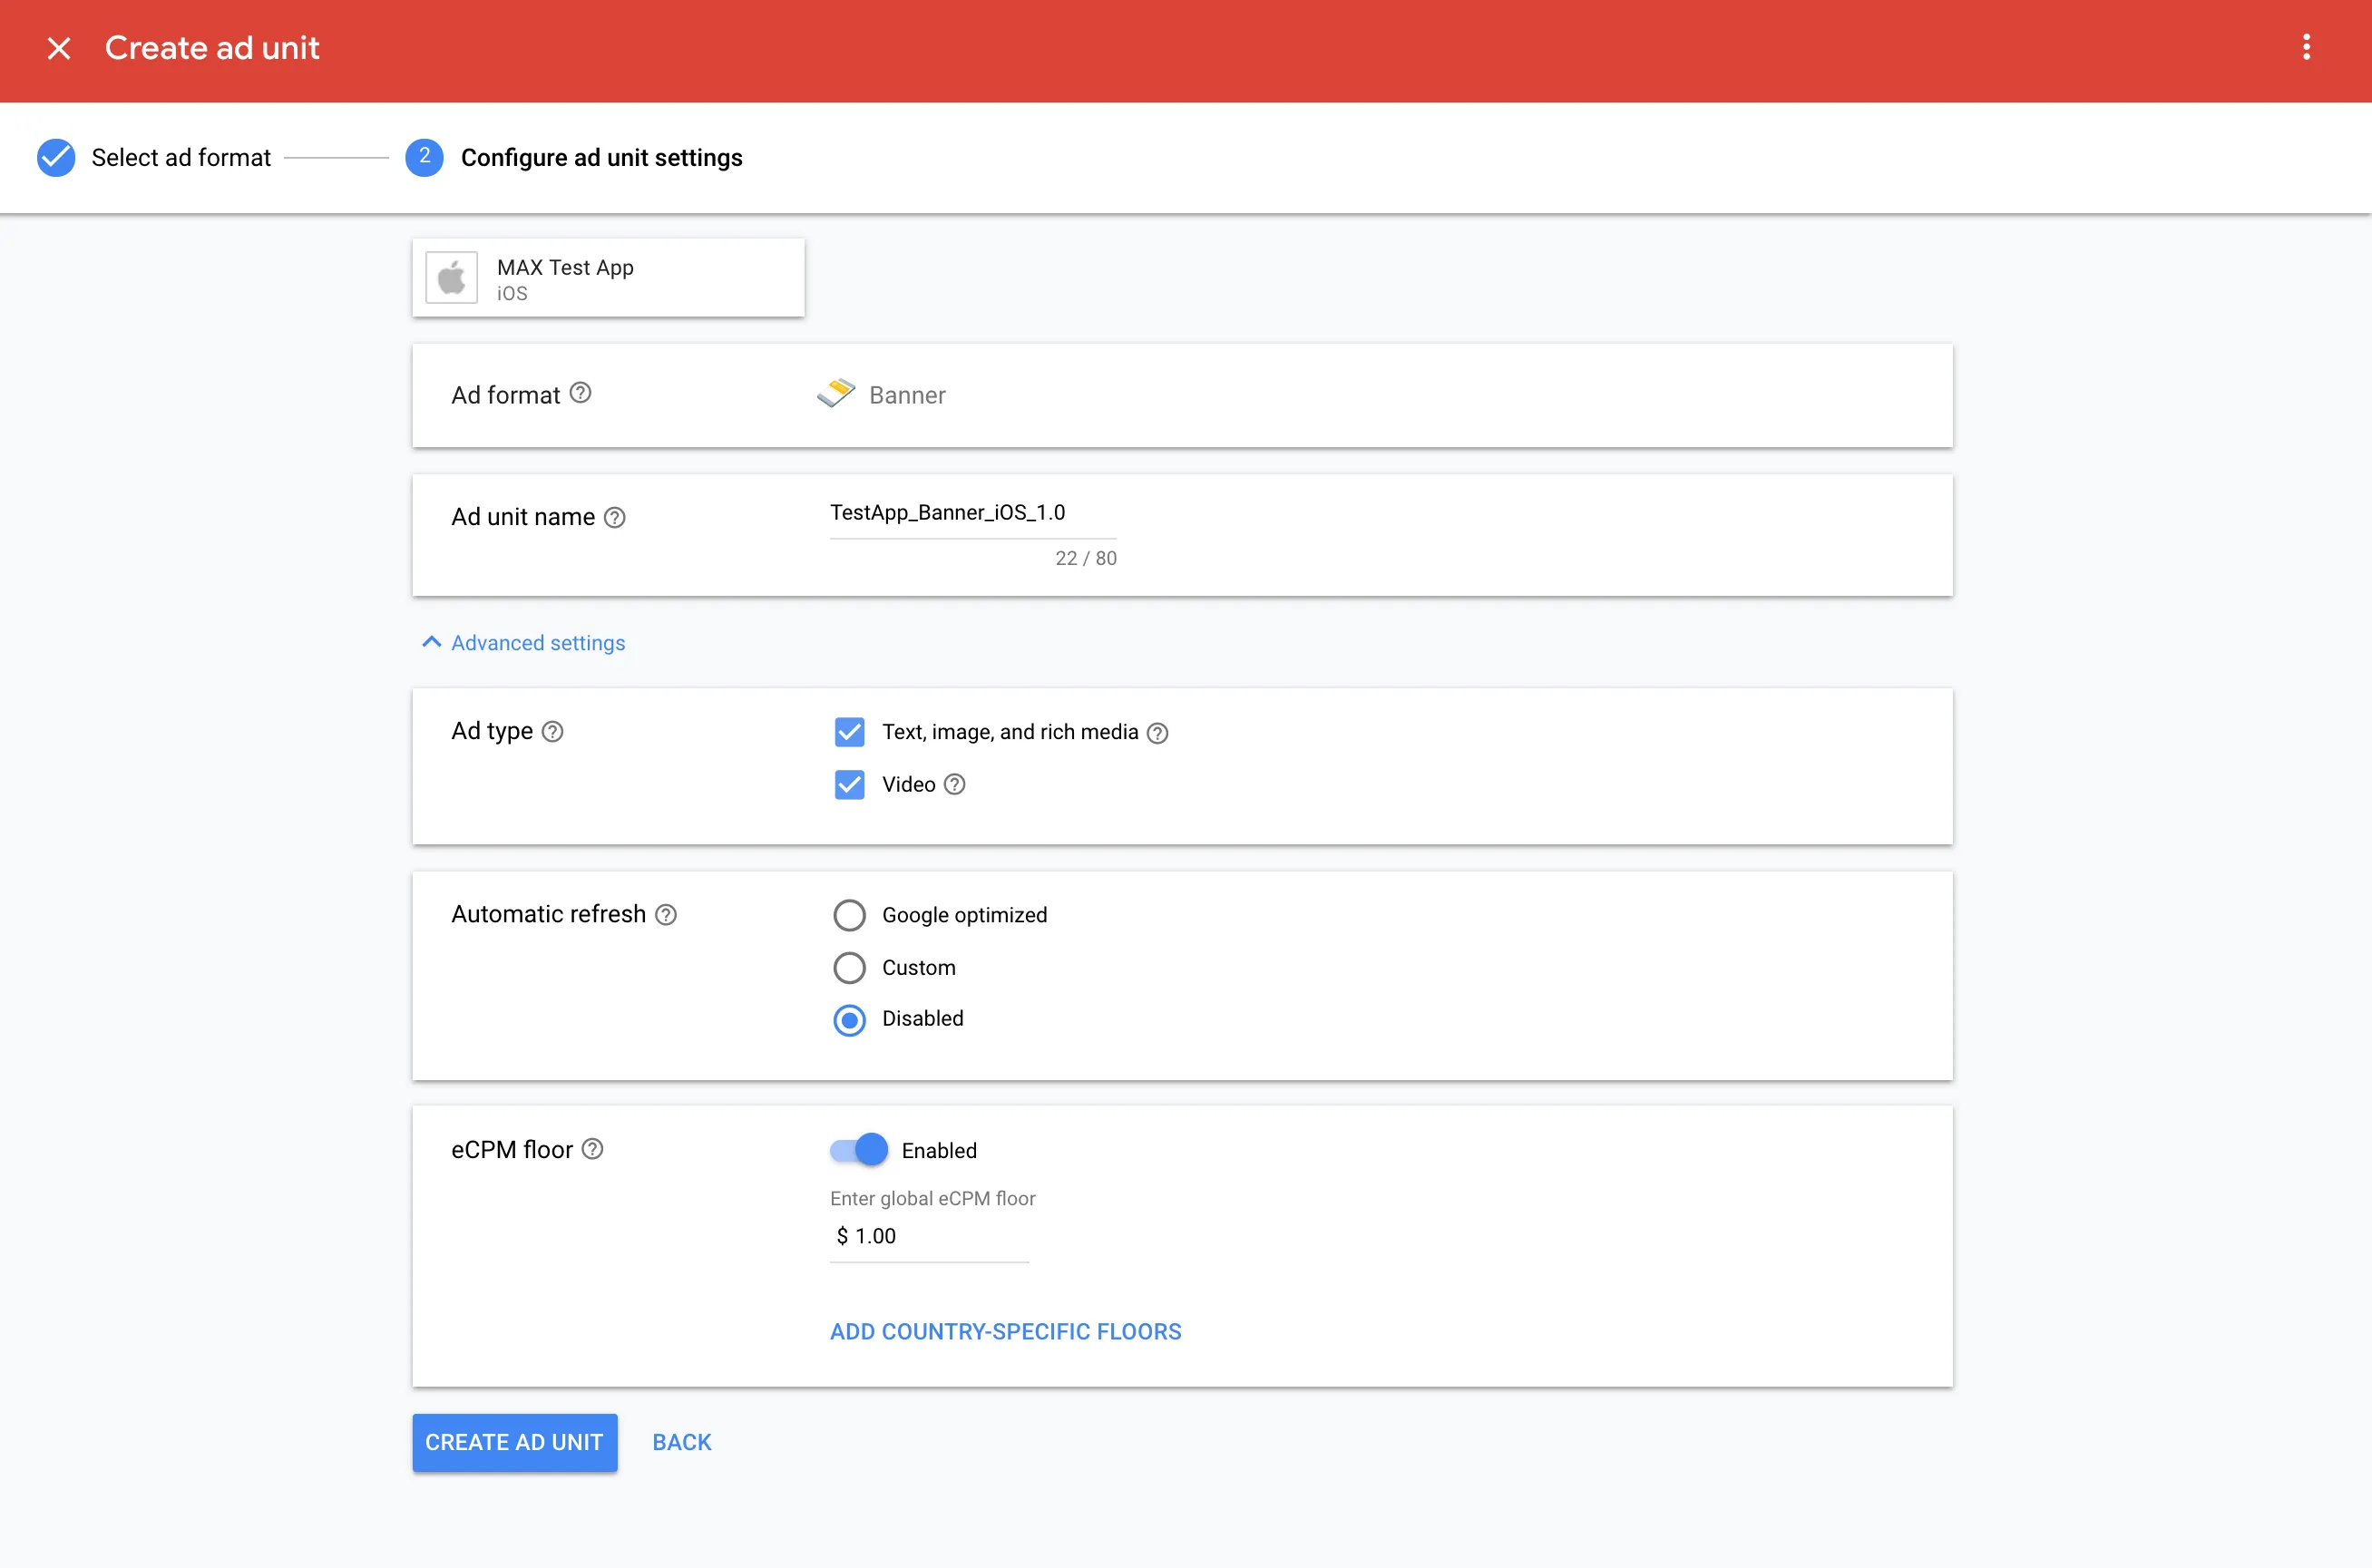
-
CREATE AD UNITをクリックして保存します。 Google Bidding、Google AdMobアプリID、広告ユニットIDを必ずメモしてください。
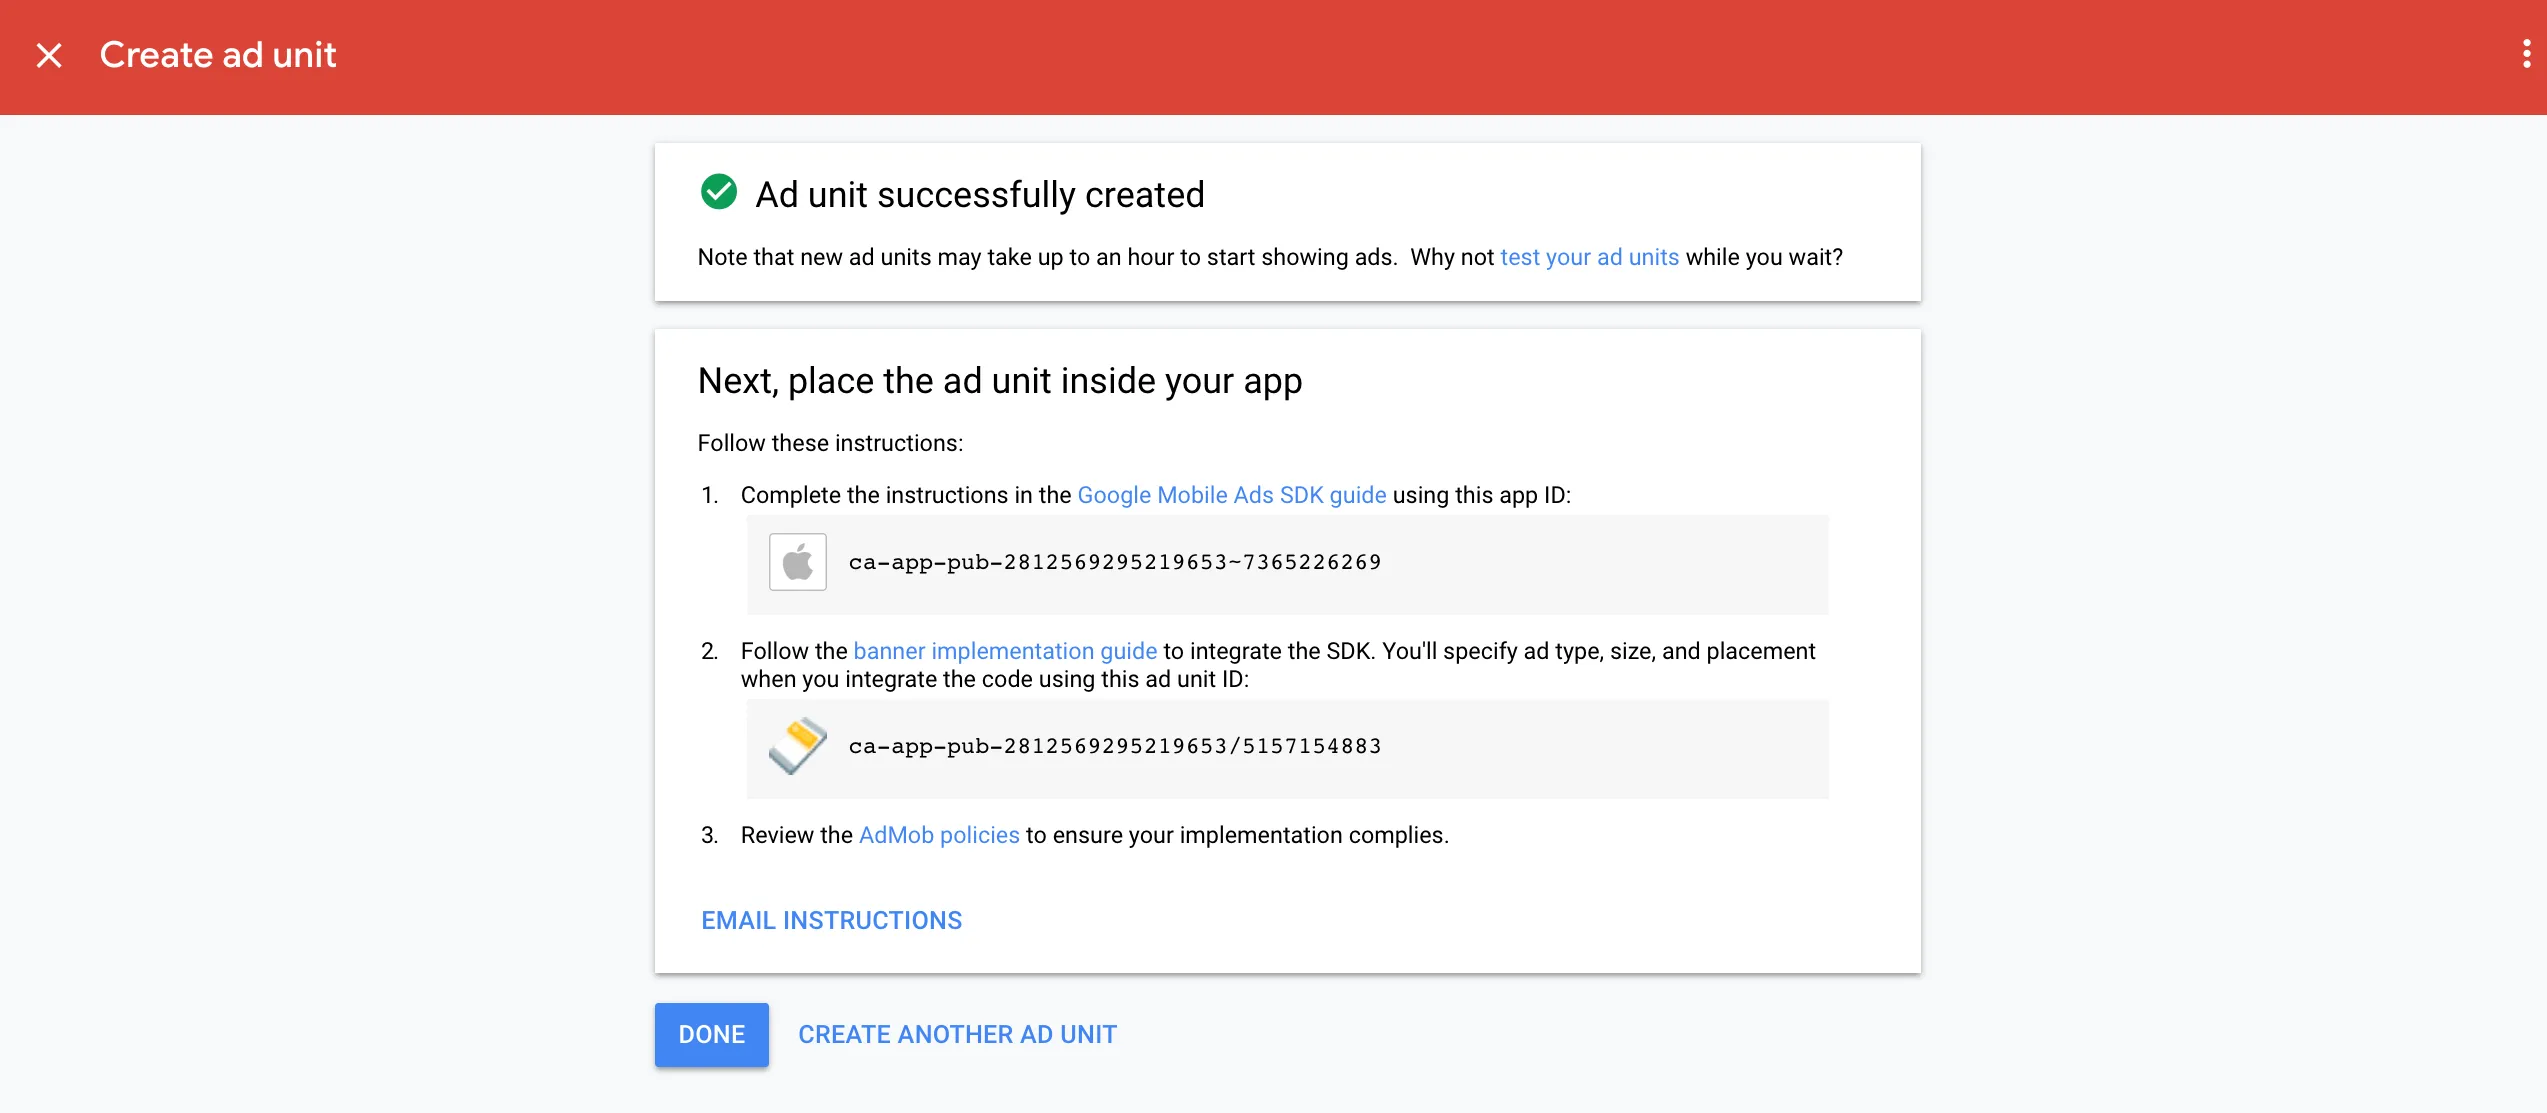
-
さらにバナー広告ユニットを作成する場合は、CREATE ANOTHER AD UNITをクリックします。
-
Create ad unitセクションで、Native Advancedフォーマットを選択します。
-
Ad Unit Nameフィールドにこの広告ユニットの名前を入力します。
-
Advanced Settingsセクションで以下を設定します。
- 広告タイプ:ImageとVideoの両方を確認します。
- eCPM Floor:MAXバナー広告ユニットページに記載された金額を入力します。

-
CREATE AD UNITをクリックして保存します。 Google AdMobアプリIDと広告ユニットIDを必ずメモしてください。
-
さらに広告ユニットを作成する場合は、CREATE ANOTHER AD UNITをクリックします。
-
Create ad unitセクションで、Interstitialフォーマットを選択します。
-
Ad Unit Nameフィールドにこの広告ユニットの名前を入力します。
-
Advanced Settingsセクションで以下を設定します。
- Ad Type:Text, image, and rich mediaとVideoの両方を確認します。
- Frequency Capping:これをDisabledに設定します。
- eCPM Floor:MAXのインタースティシャル広告ユニットページに記載された金額を入力します。
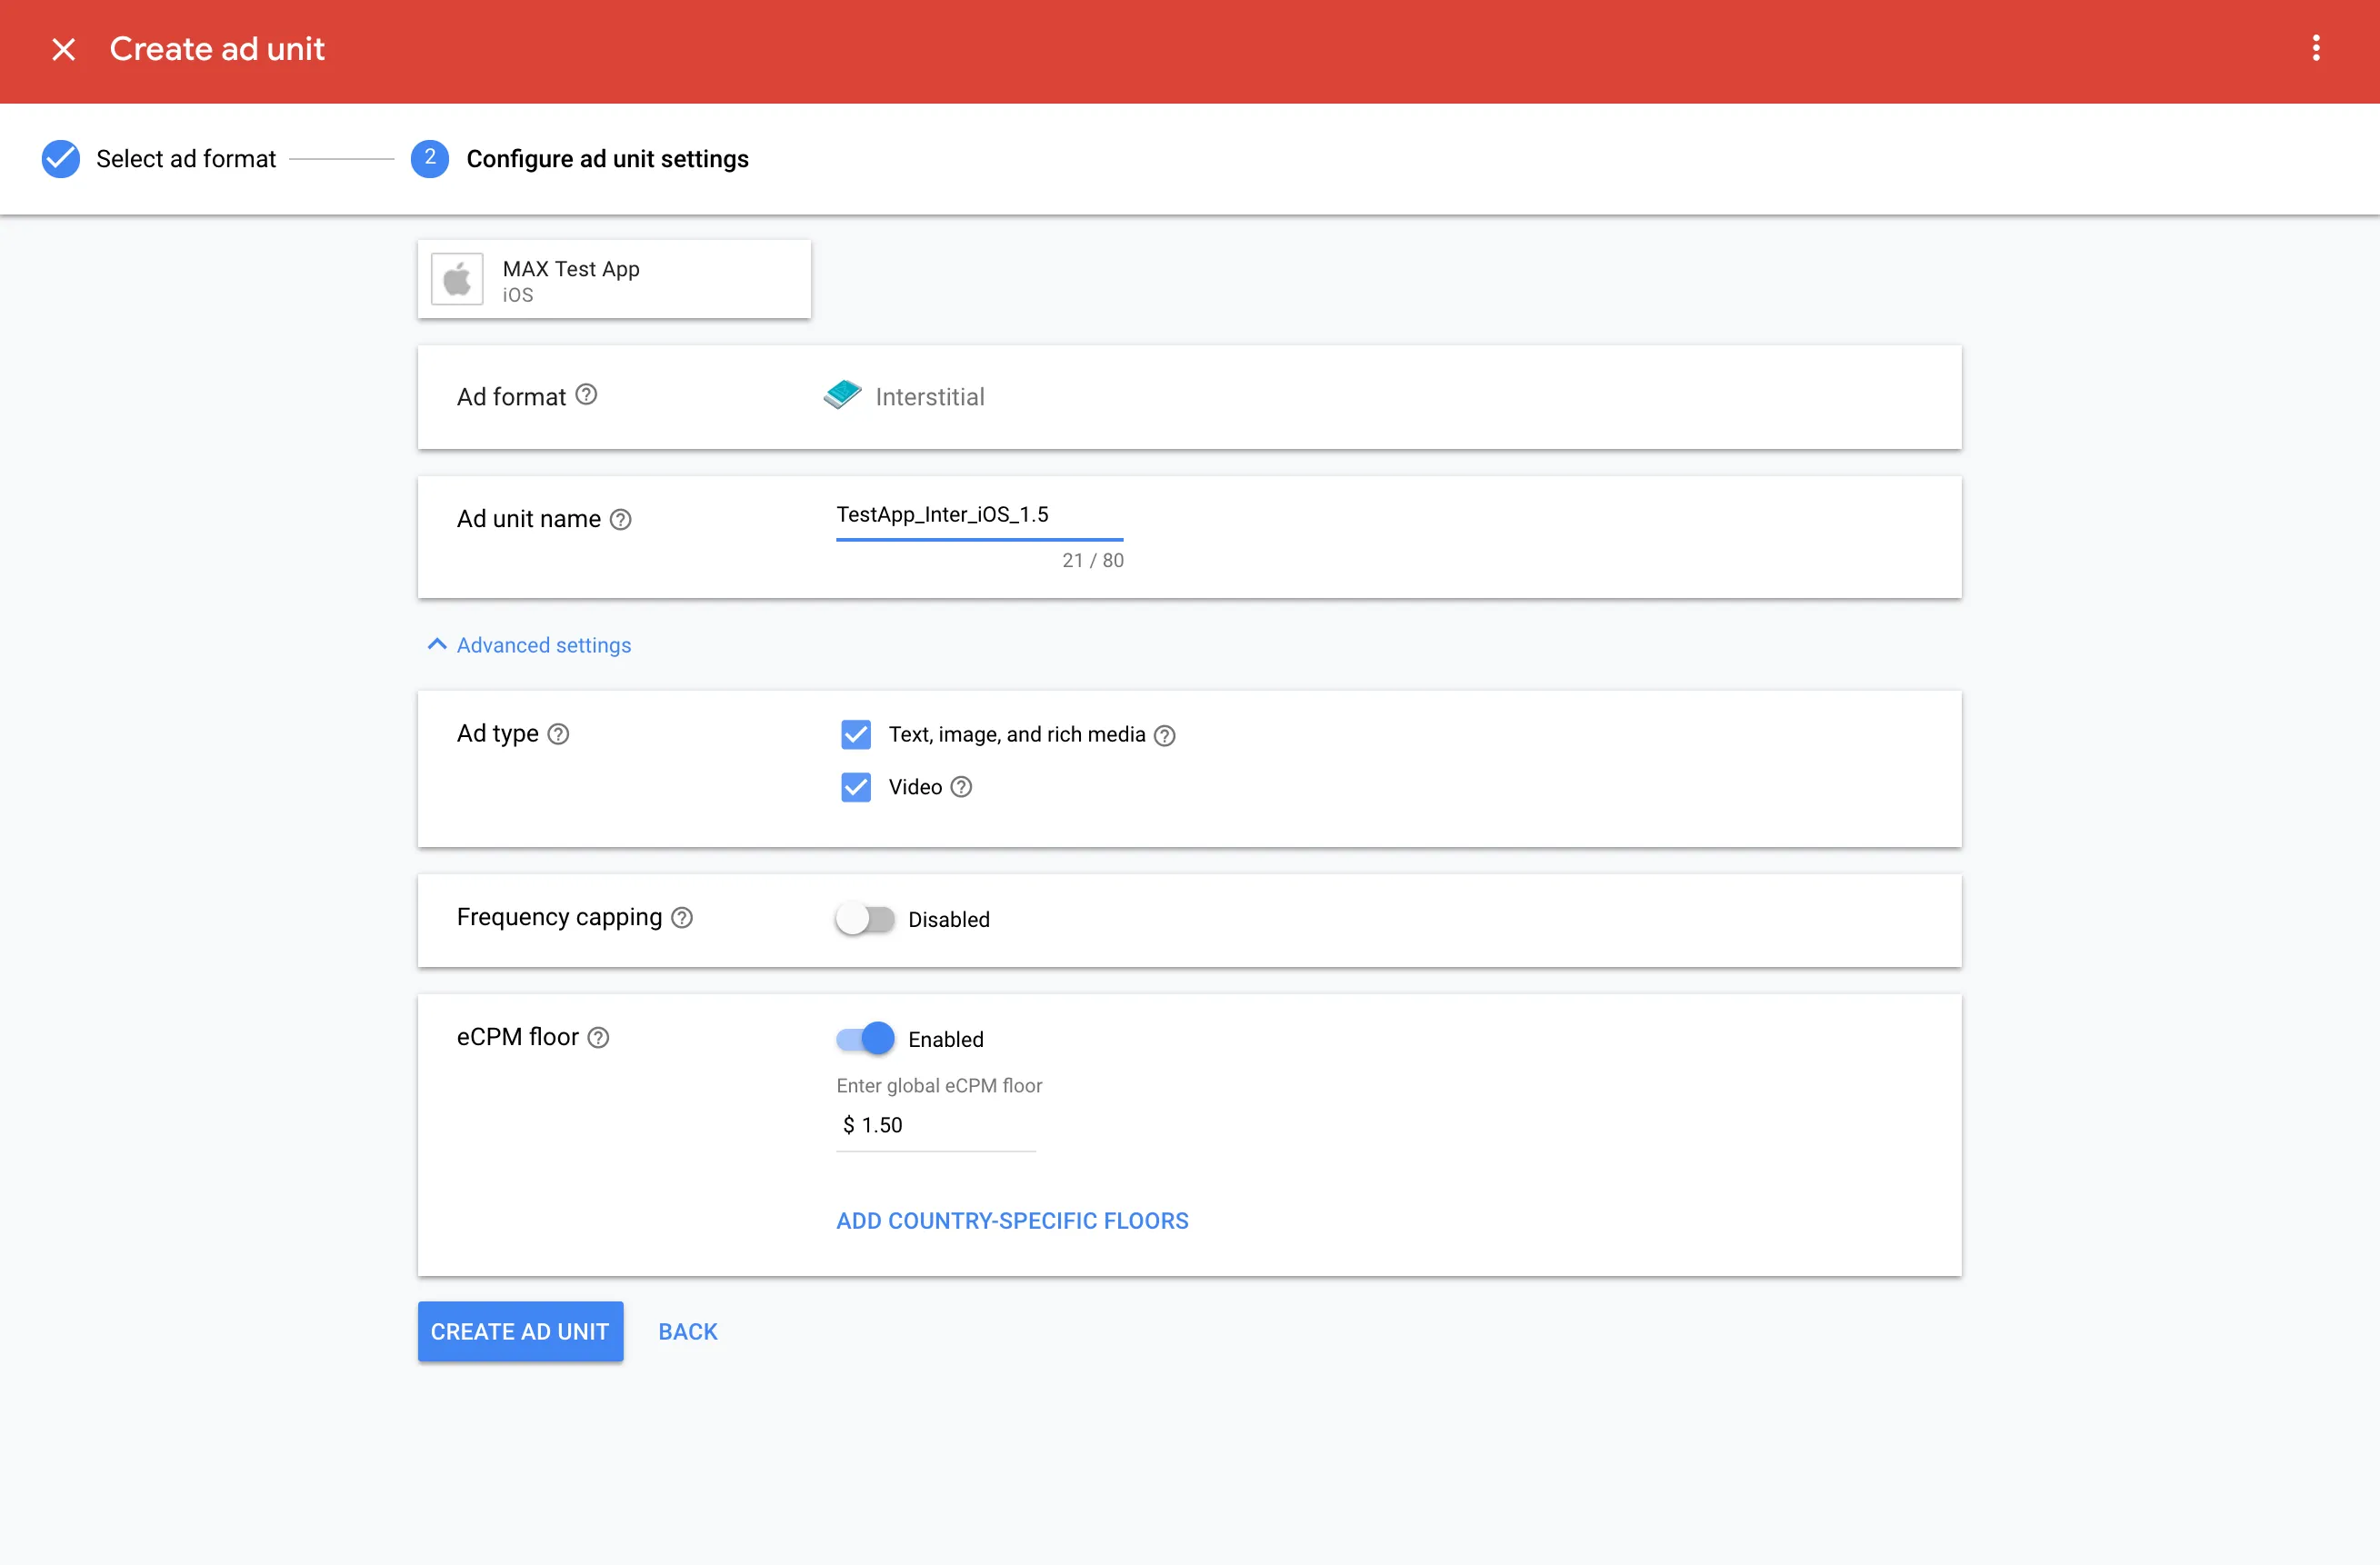
-
CREATE AD UNITをクリックして保存します。 Google AdMobアプリIDと広告ユニットIDを必ずメモしてください。
-
さらに広告ユニットを作成する場合は、CREATE ANOTHER AD UNITをクリックします。
-
Create ad unitセクションで、Rewardedフォーマットを選択します。
-
Ad Unit Nameフィールドにこの広告ユニットの名前を入力します。
-
Advanced Settingsセクションで以下を設定します。
- Ad Type:Include Interactiveを選択します。
- Frequency Capping:これをDisabledに設定します。
- eCPM Floor:MAXのリワード広告ユニットページに記載された金額を入力します。
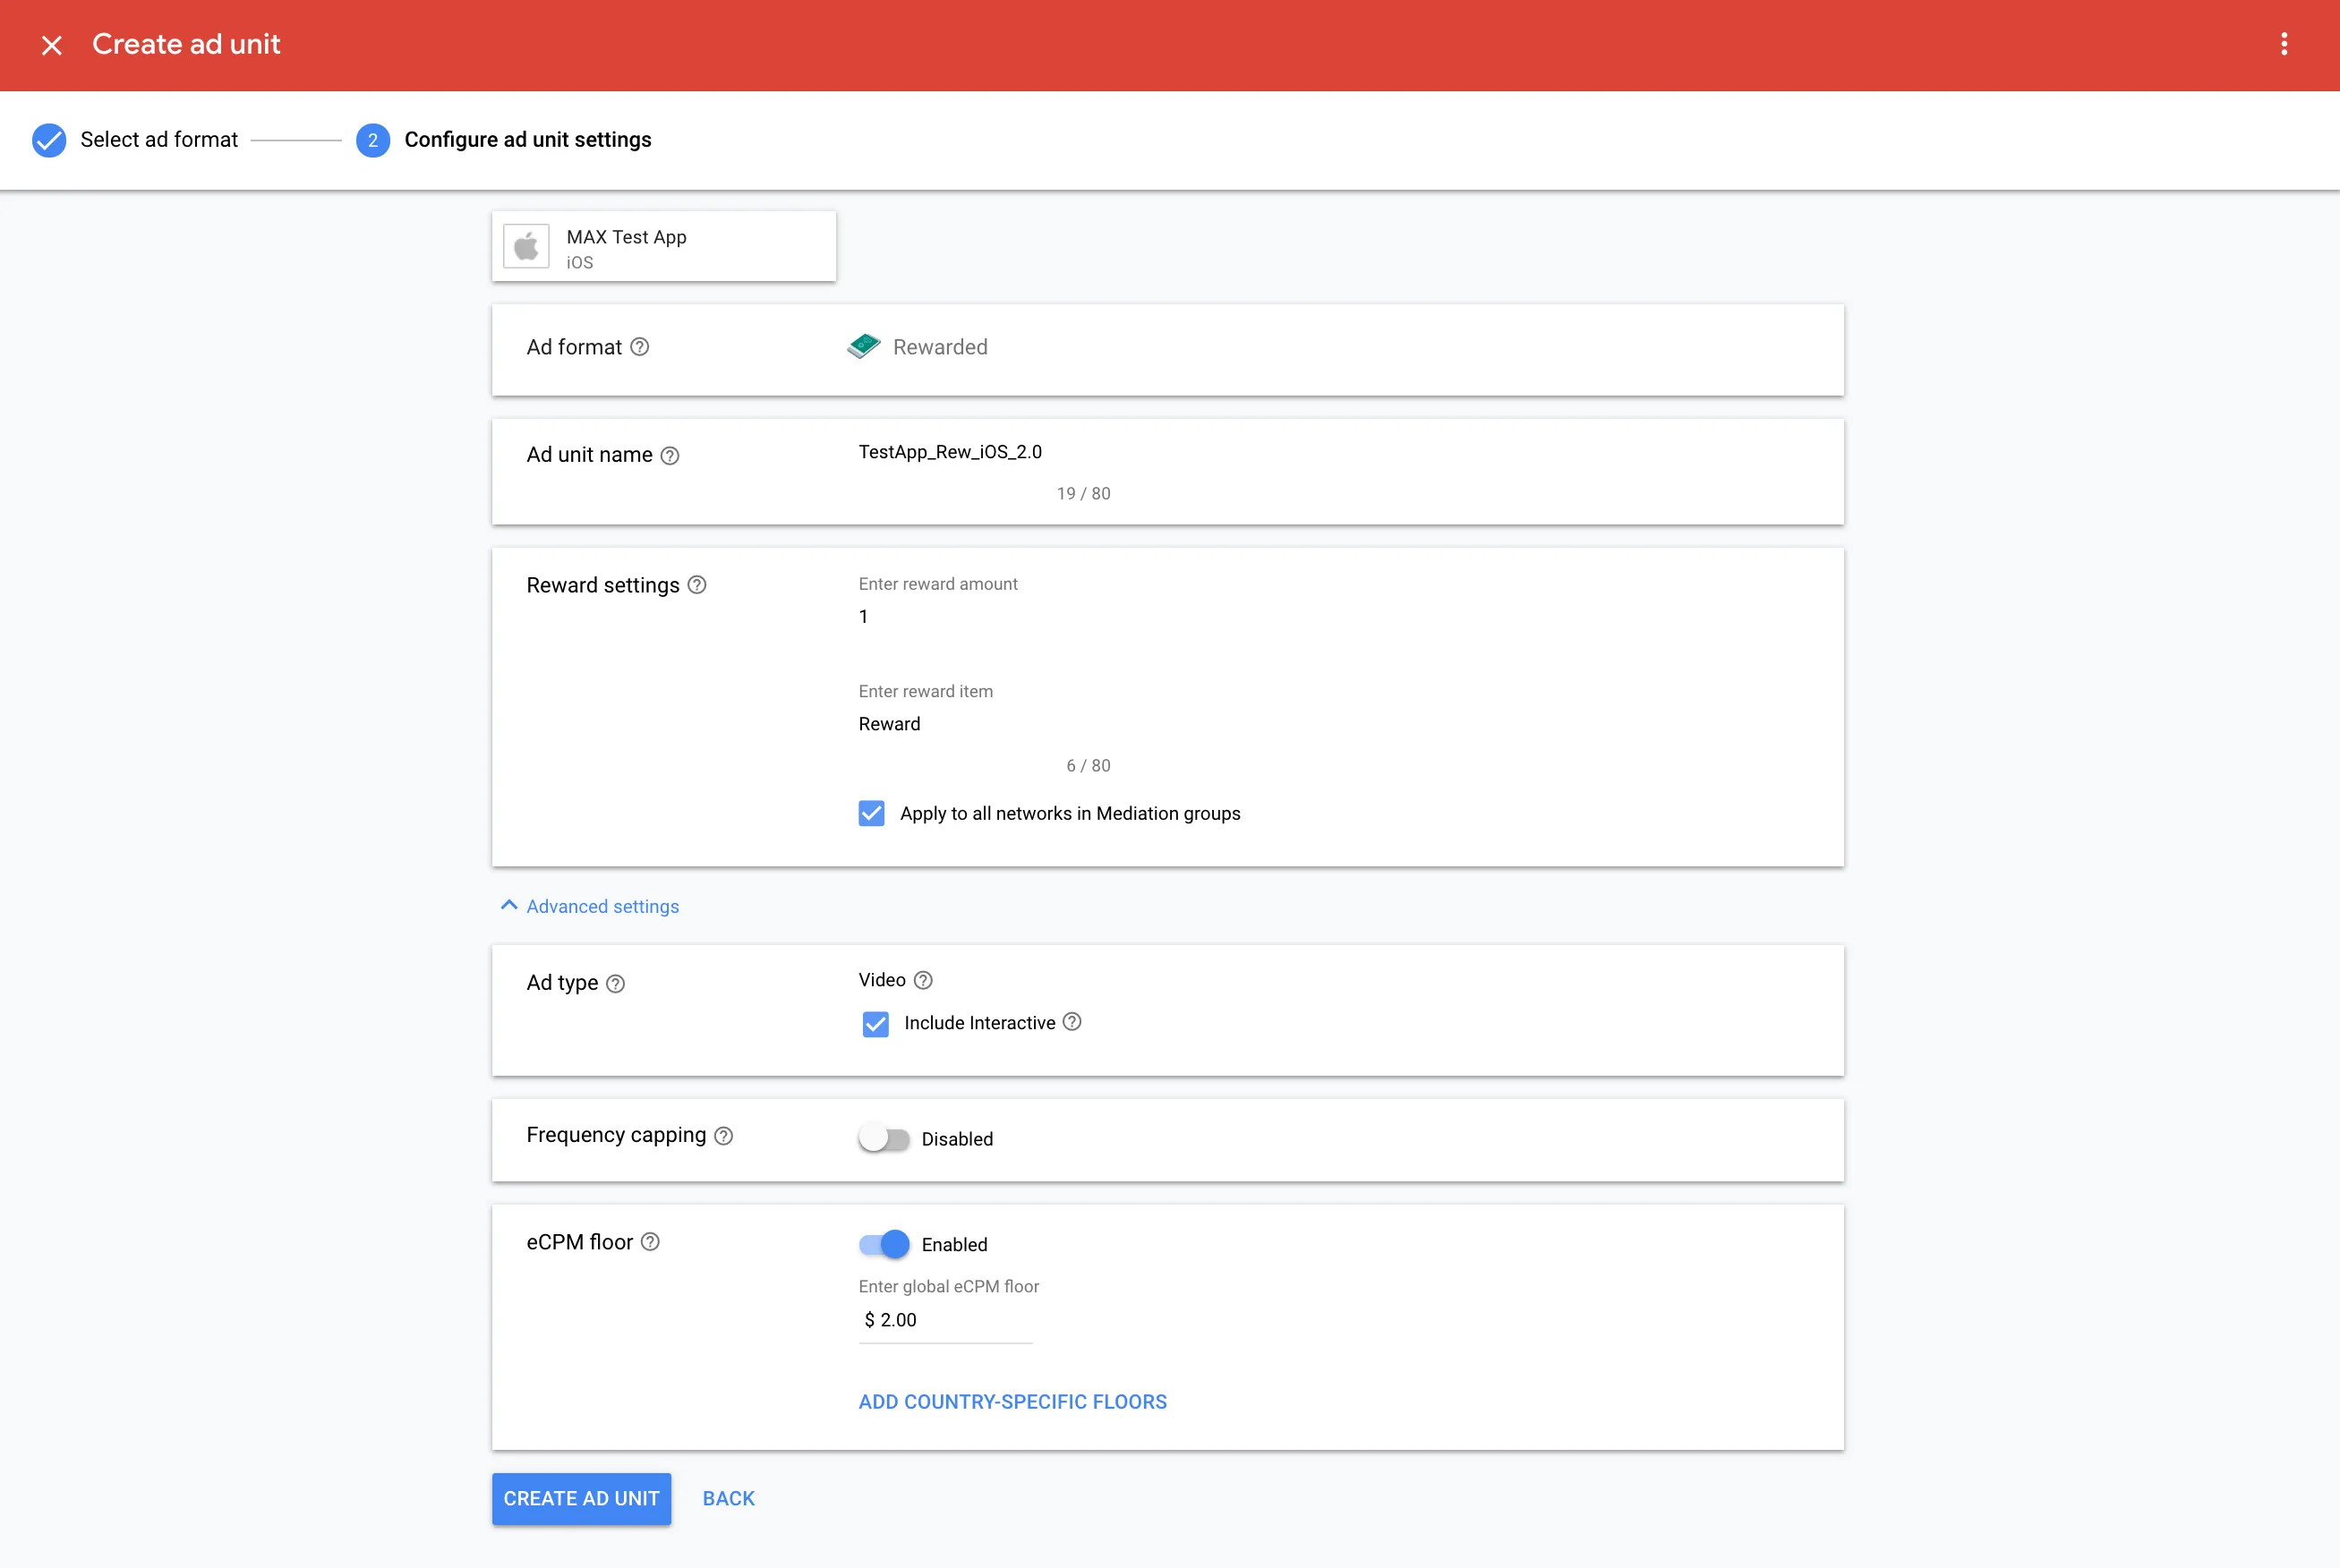
-
CREATE AD UNITをクリックして保存します。 Google AdMobアプリIDと広告ユニットIDを必ずメモしてください。
-
さらに広告ユニットを作成する場合は、CREATE ANOTHER AD UNITをクリックします。
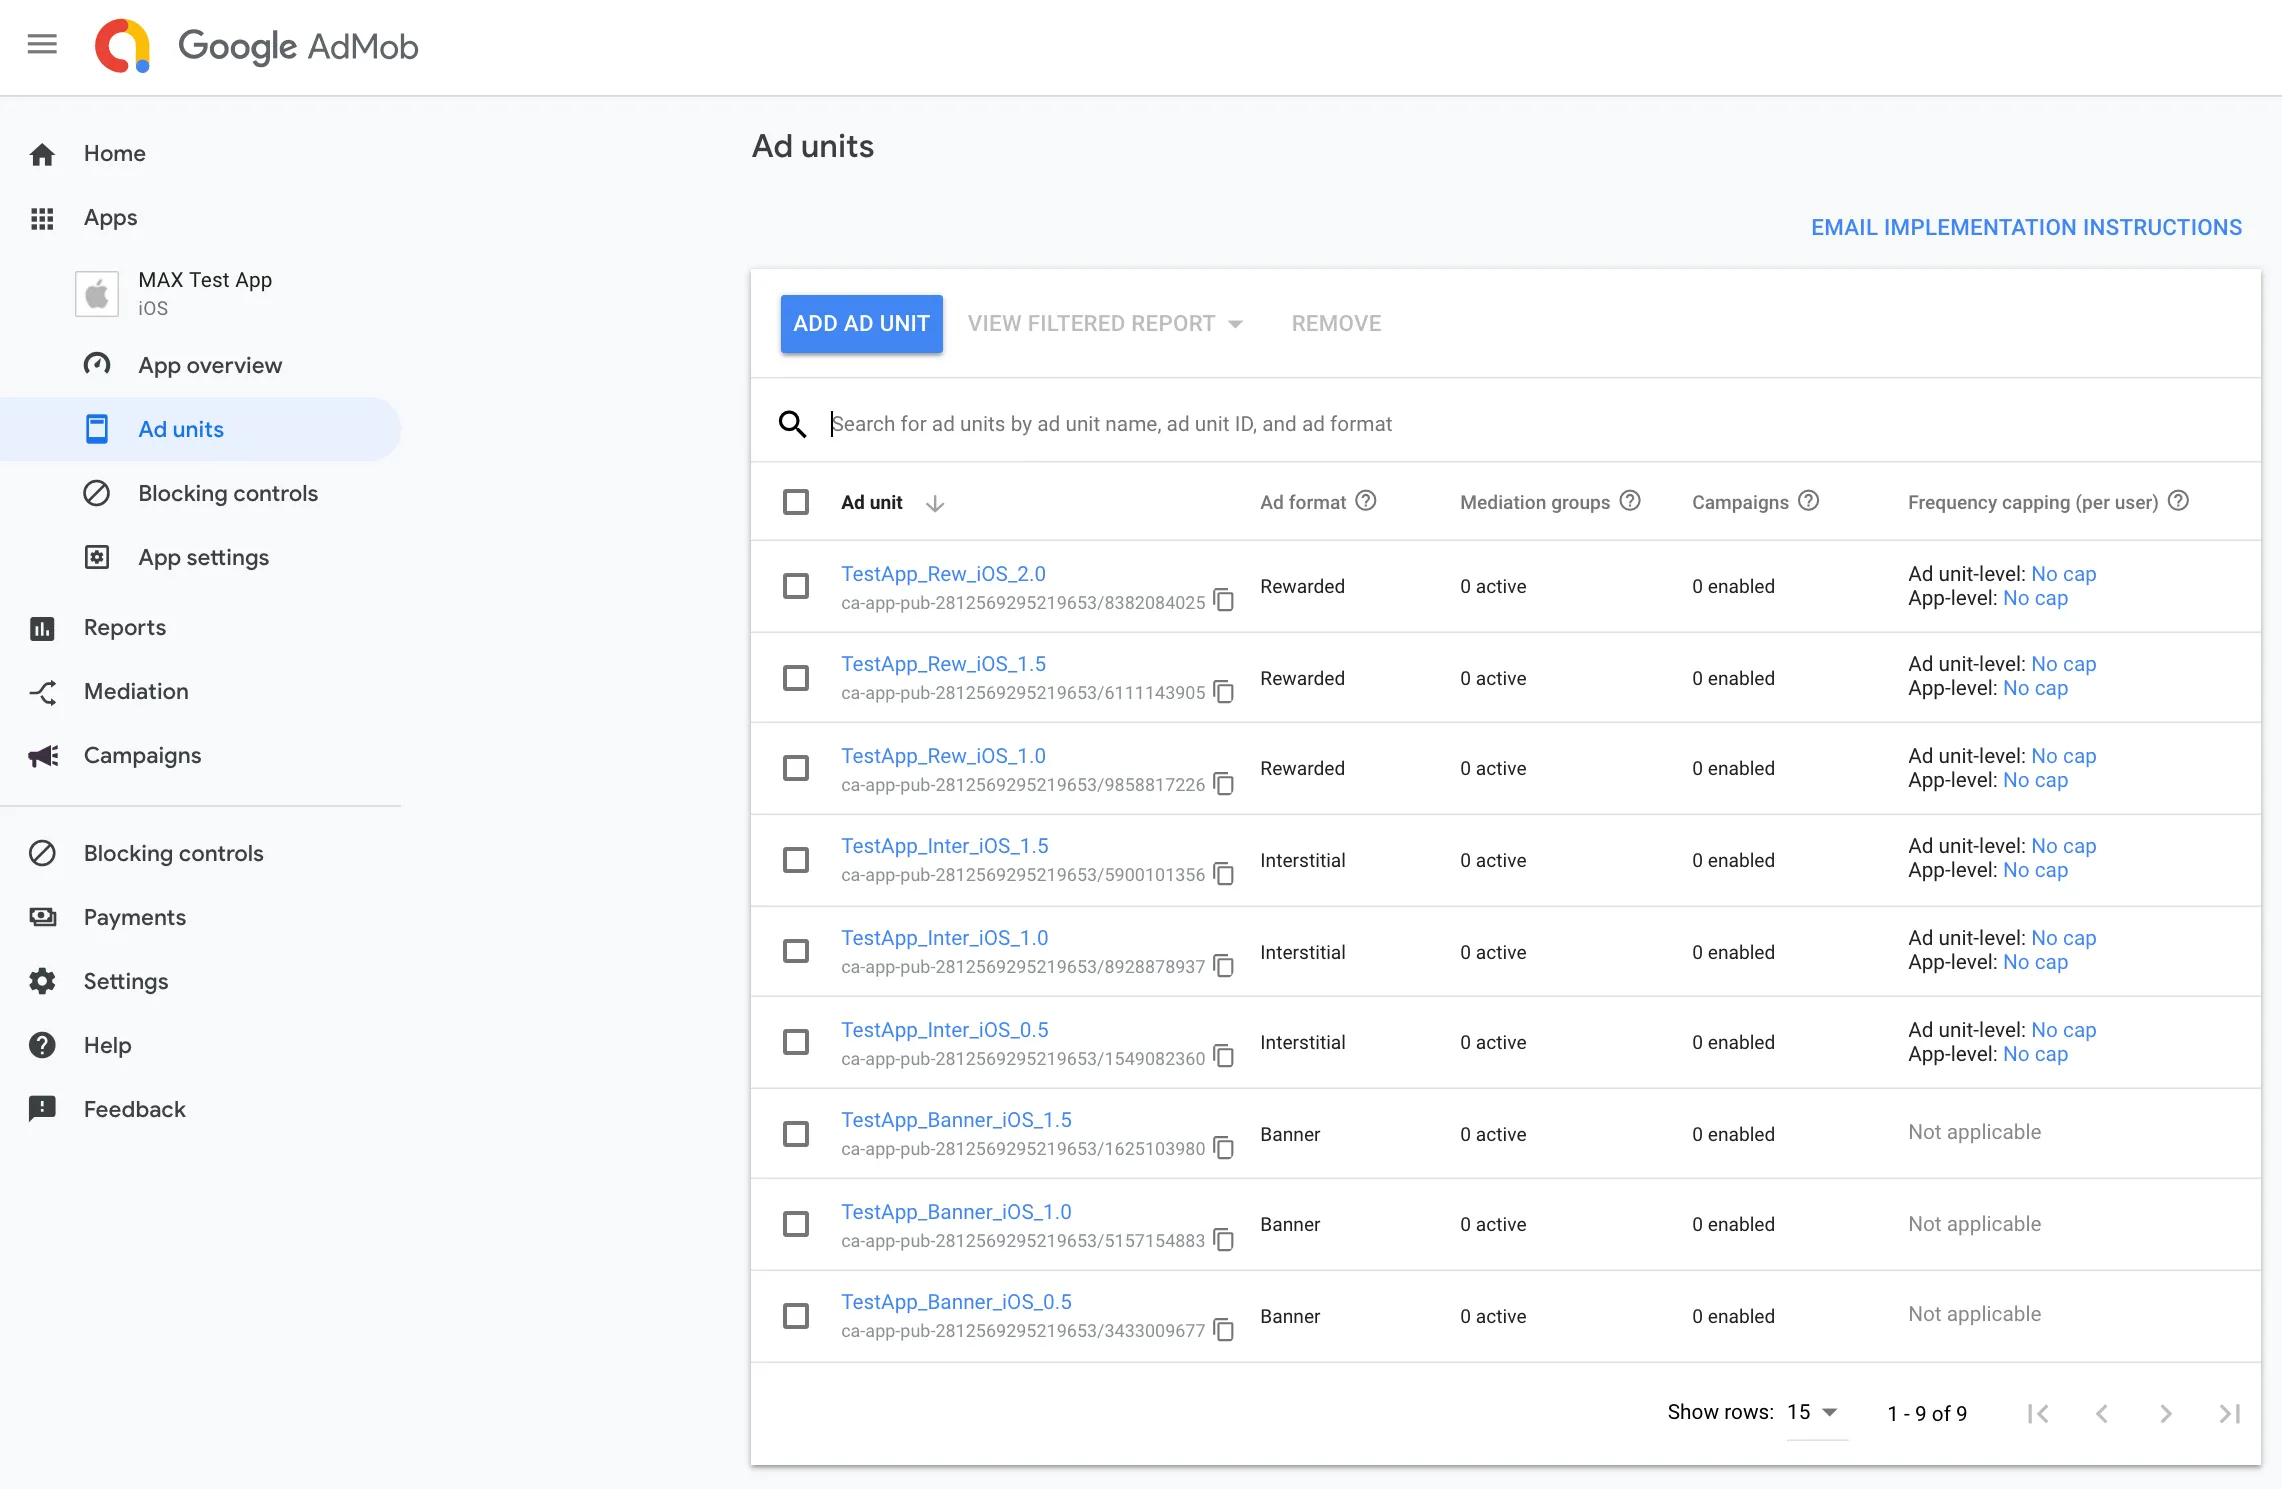
必要なGoogle AdMob広告ユニットを作成したら、左側のナビゲーションバーからAd Unitsを選択することでプレースメントIDを取得できます。
ステップ3. MAXアカウントでGoogle AdMobを有効化
- Google AdMobの設定が完了したら、MAXアカウントにログインします。
- MAX > Manage > Ad Unitsを選択します。
- Google AdMobを有効化したいMAX広告ユニットの配置をクリックします。
- 選択したMAX広告ユニットに関連付けられたGoogle AdMob App IDの値を入力します。
- ステータスバーをクリックして、ネットワークを有効化します。
- ✓ Saveをクリックします。 これにより、この広告ユニットの対応ネットワークリストでGoogle AdMobが有効になります。
コンテンツURLマッピングのサポート
MAXはGoogleのアプリのコンテンツマッピングをサポートします。これにより、Google AdMobからコンテキストに関連した広告を配信できるようになります。 この機能を使用するには、Googleアダプターバージョン9.3.0.2以降を実装してください。
単一コンテンツURLマッピング
単一コンテンツのURLを渡すには、広告オブジェクトでsetLocalExtraParameterForKeyを呼び出します。
この関数にURL文字列を渡します。
-[setLocalExtraParameterForKey: "google_content_url" value: NSString]マルチコンテンツURLマッピング
複数のコンテンツURLを渡すには、広告オブジェクトでsetLocalExtraParameterForKeyを呼び出します。
この関数にURL文字列のリストを渡します。
-[setLocalExtraParameterForKey: "google_neighbouring_content_url_strings" value: NSArray<NSString *>]HyprMX
ステップ1. HyprMXアカウントを作成
アカウントの作成方法については、HyprMXの担当者にお問い合わせください。
ステップ2. HyprMXでアプリケーションとプレースメントを作成
アプリケーションの作成とプレースメントについては、HyprMXの担当者に問い合わせてください。 担当者より、MAXでHyprMXを有効化するために必要な Distributor IDとPlacement Nameが提供されます。
ステップ3. MAXアカウントでHyprMXを有効化
- 必要なHyprMXインスタンスIDを取得したら、MAXアカウントにログインします。
- MAX > Manage > Ad Unitsを選択します。
- HyprMXを有効化したいMAX広告ユニットの配置をクリックします。
- Placement Nameセクションに、選択したMAX広告ユニットに関連付けられたHyperMX instance IDsを入力します。
- ステータスバーをクリックして、ネットワークを有効化します。
- ✓ Saveをクリックします。
Maio
ステップ1. Maioアカウントを作成
MAXメディエーションプラットフォームを通じてMaioの広告インベントリを有効化するには、Maioの承認済みアカウントが必要です。 アカウントを持っていない場合は、このフォームから登録してください。
Maioのアカウントをすでにお持ちの場合は、ステップ3に進み、MAX広告ユニットでMaioを有効化してください。 AppLovinは、新しいプレースメントIDを作成することを推奨します。これにより、MAXがレポートする内容の正確性が向上するためです。
ステップ2. Maioでアプリケーションとプレースメントを作成
アプリを追加する
すでにアプリを作成済みの場合は、以下の「新規プレースメントを追加する」に進み、MAX連携のゾーンIDを作成してください。
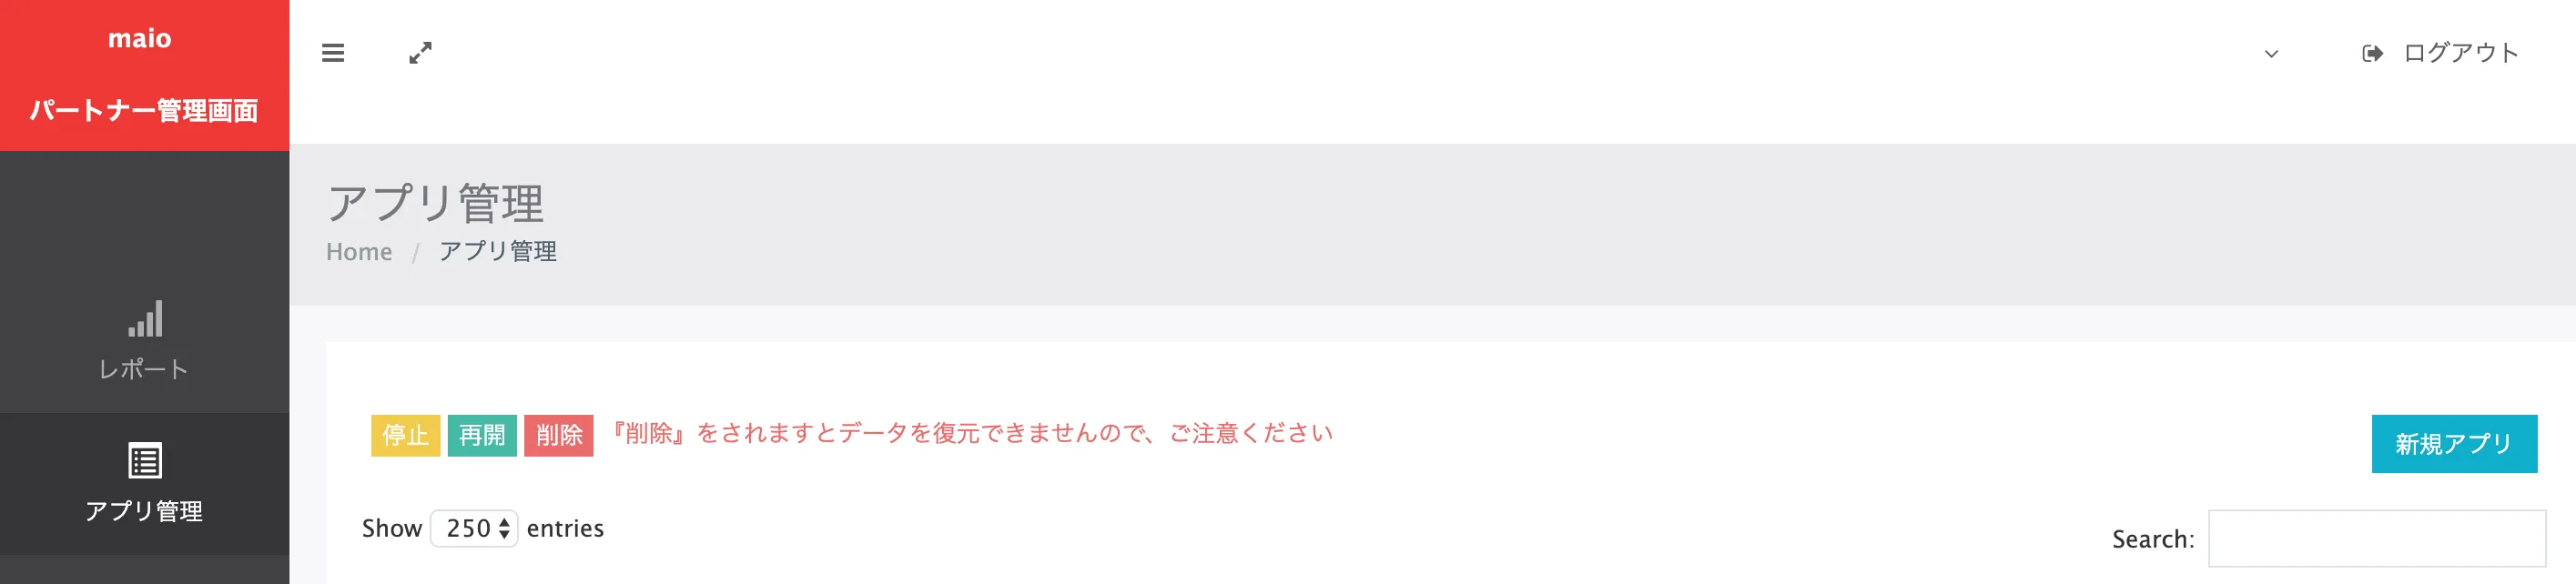
- Maioアカウントにログインします。
- 左側のメニューから、Apps (アプリ管理) を選択します。
- New App (新規アプリ) を選択して、新しいアプリを作成します。
- アプリの設定を行います。
- Name (名称):アプリの名前を入力します。
- Platform (プラットフォーム):iOSまたはAndroidを選択します。
- URL (アプリURL):アプリのストアURLを入力します。
- URL Scheme (URLスキーム):空欄のままにします。
- Default Zone (広告タイプ(既定ゾーン)):Rewarded (動画リワード) またはInterstitial (動画インタースティシャル) を選択します。 後で別の広告タイプを追加できます。
- Submit (更新) をクリックしてアプリを追加します。

アプリのMedia ID (メディアID) をメモします。

新規プレースメントを追加する
アプリの作成が完了したら、新しいプレースメントを作成するか、Maioが作成したデフォルトのプレースメントを使用することができます。 プレースメントを新規作成するには、以下の手順に従ってください。
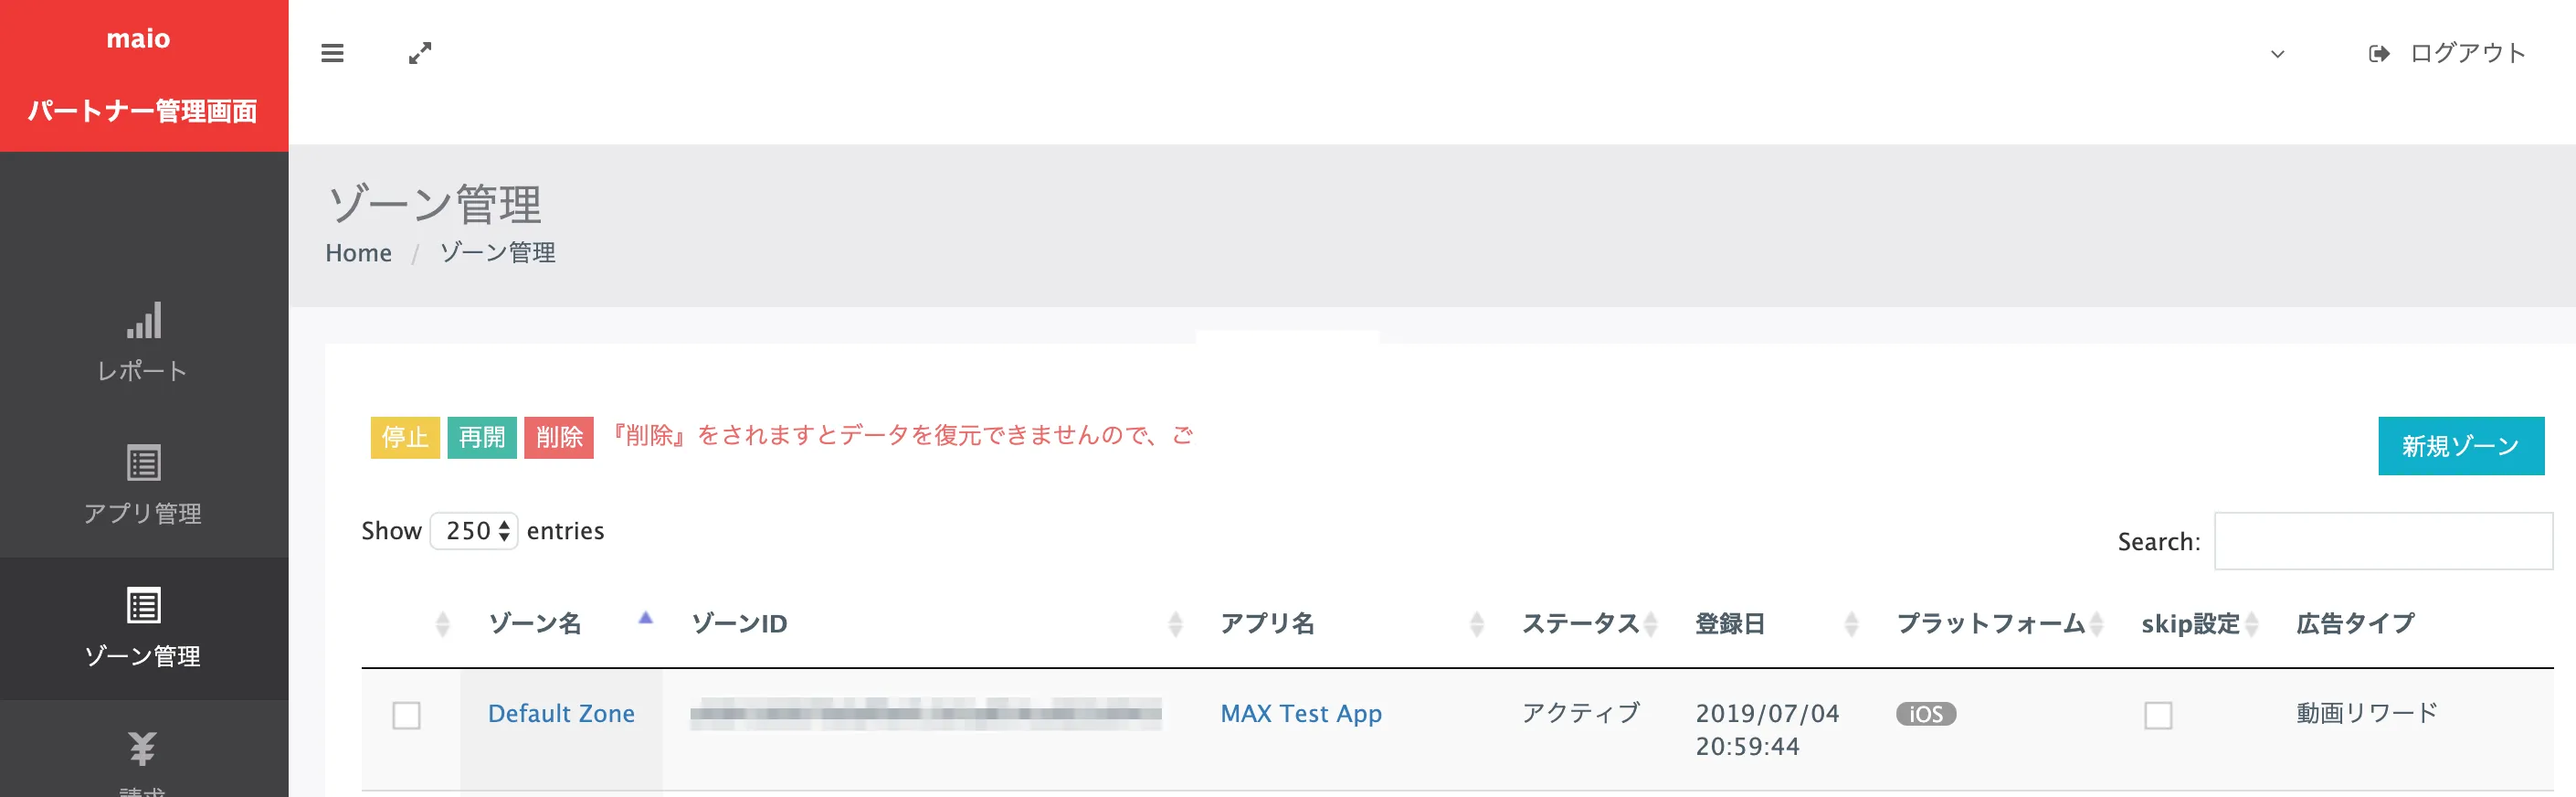
- Placements (ゾーン管理) を選択します。
- New Placement (新規ゾーン) をクリックします。
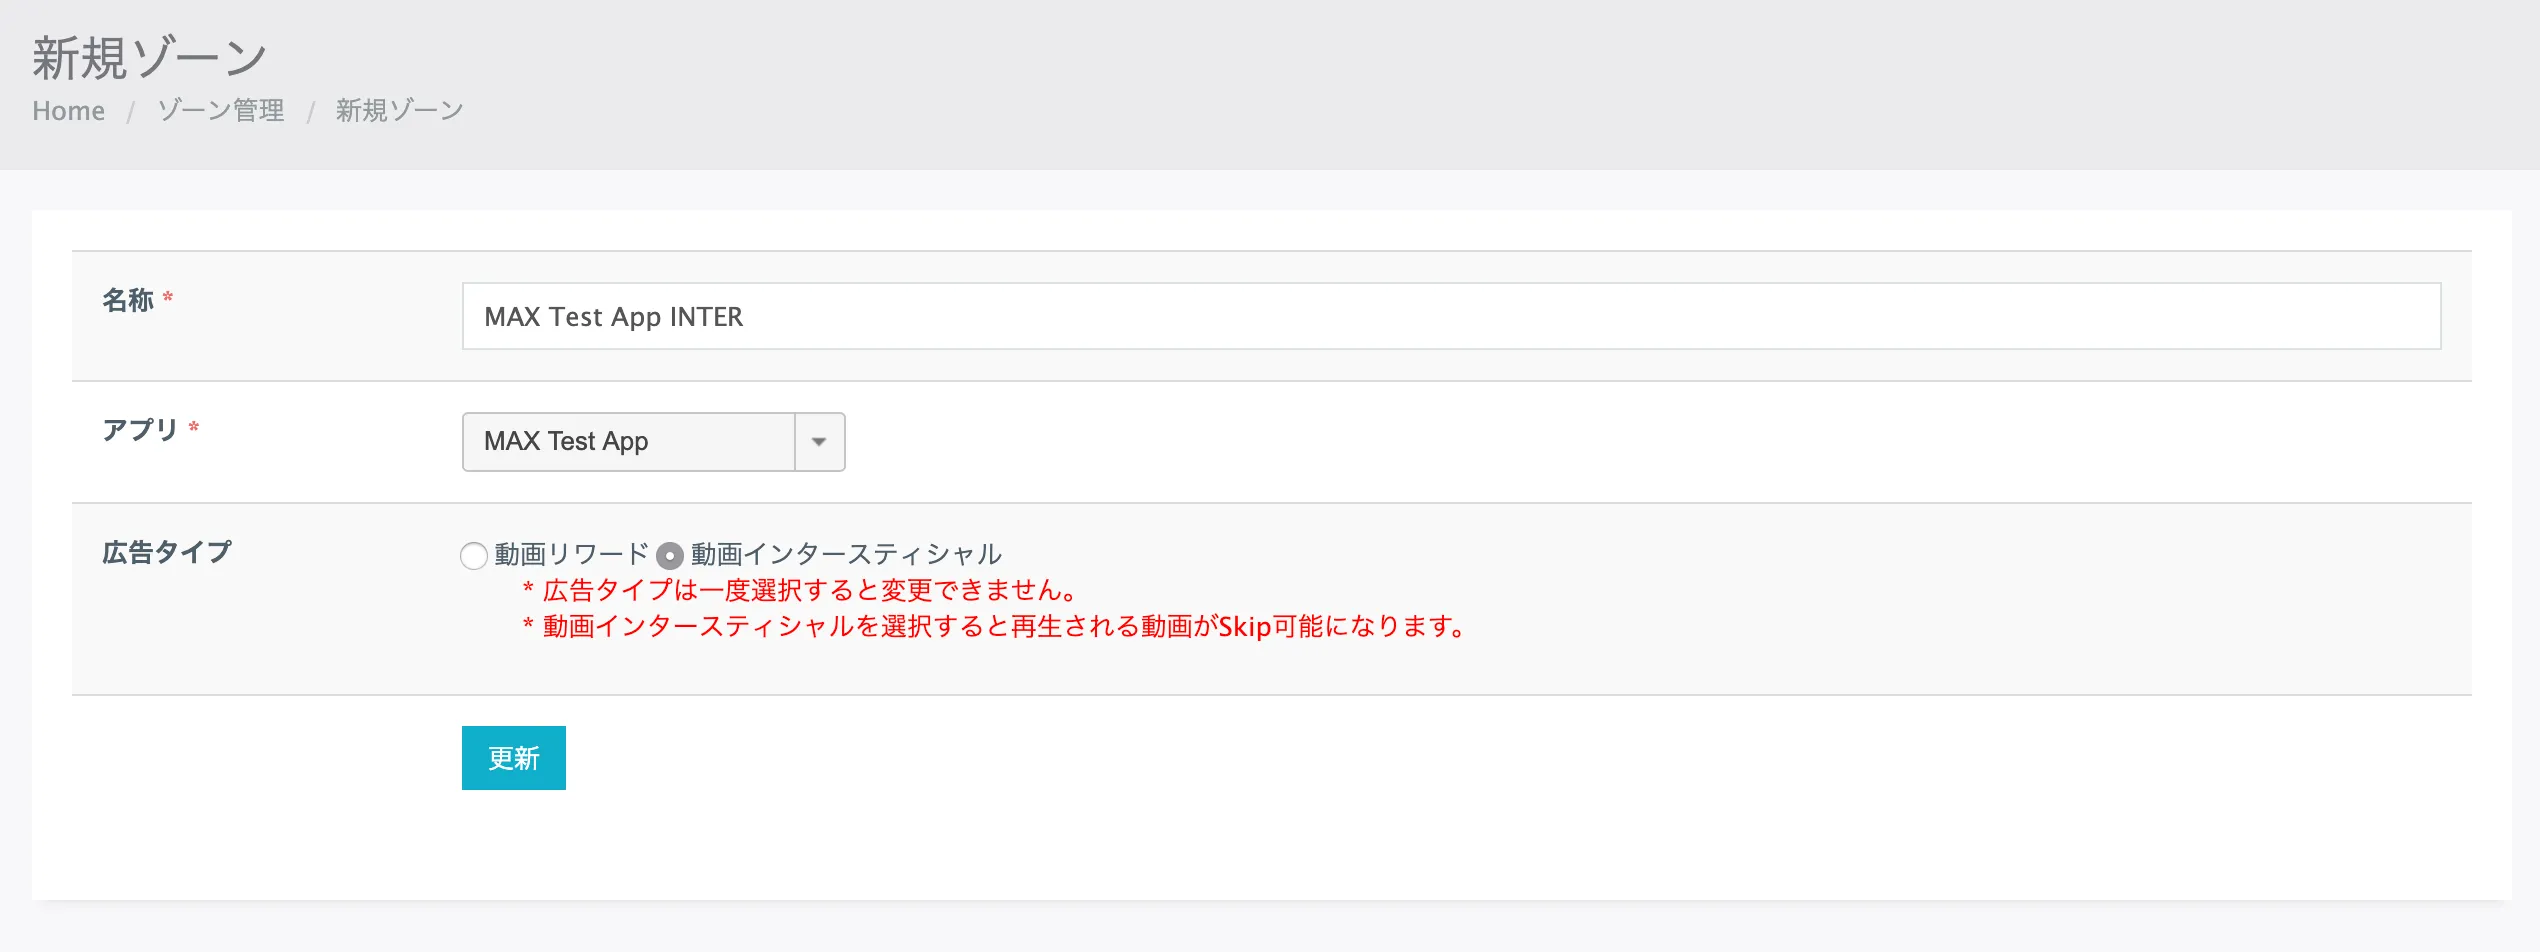
- 必要な情報を入力して、Maioのプレースメントを作成します。
- Name (名称):プレースメントの名前を入力します。
- App (アプリ):新規プレースメントを作成したいアプリを選択します。
- Ad Type (タイプ):Rewarded (動画リワード) またはInterstitial (動画インタースティシャル) を選択します。
- Submit (更新) をクリックして新しいプレースメントを追加します。
追加したプレースメントのZone ID (ゾーンID) をメモします。これは、ステップ3で新しいプレースメントをMAXで有効化する際に必要になります。

価格の下限を設定したプレースメントを作成したい場合は、Maioのアカウントチームに手順を確認してください。
ステップ3. MAXアカウントでMaioを有効化
- メディアIDとゾーンIDを取得したら、MAXアカウントにログインします。
- MAX > Manage > Ad Unitsを選択します。
- Maioを有効化したいMAX広告ユニットの配置をクリックします。
- 選択したMAX広告ユニットに関連付けられたMedia ID とZone IDを入力します。
- ステータスバーをクリックして、ネットワークを有効化します。
- ✓ Saveをクリックします。 これにより、この広告ユニットの対応ネットワークリストにMaioが追加されるようになります。
Tencent
ステップ1. Tencentのアドネットワークアカウントを作成
MAXメディエーションプラットフォームを通じてTencentの広告インベントリを有効化するには、Tencentの承認済みマネタイズアカウントが必要です。 アカウントを持っていない場合は、Tencentのサイトから登録してください。
Tencentダッシュボードですでに広告ユニットを作成済みの場合は、ステップ3に進み、MAX広告ユニットでTencentを有効化してください。
ステップ2. Tencentでアプリケーションとプレースメントを作成
アプリを追加する
Tencentでアプリの収益化を開始するには、Tencentダッシュボードでアプリを作成します。
-
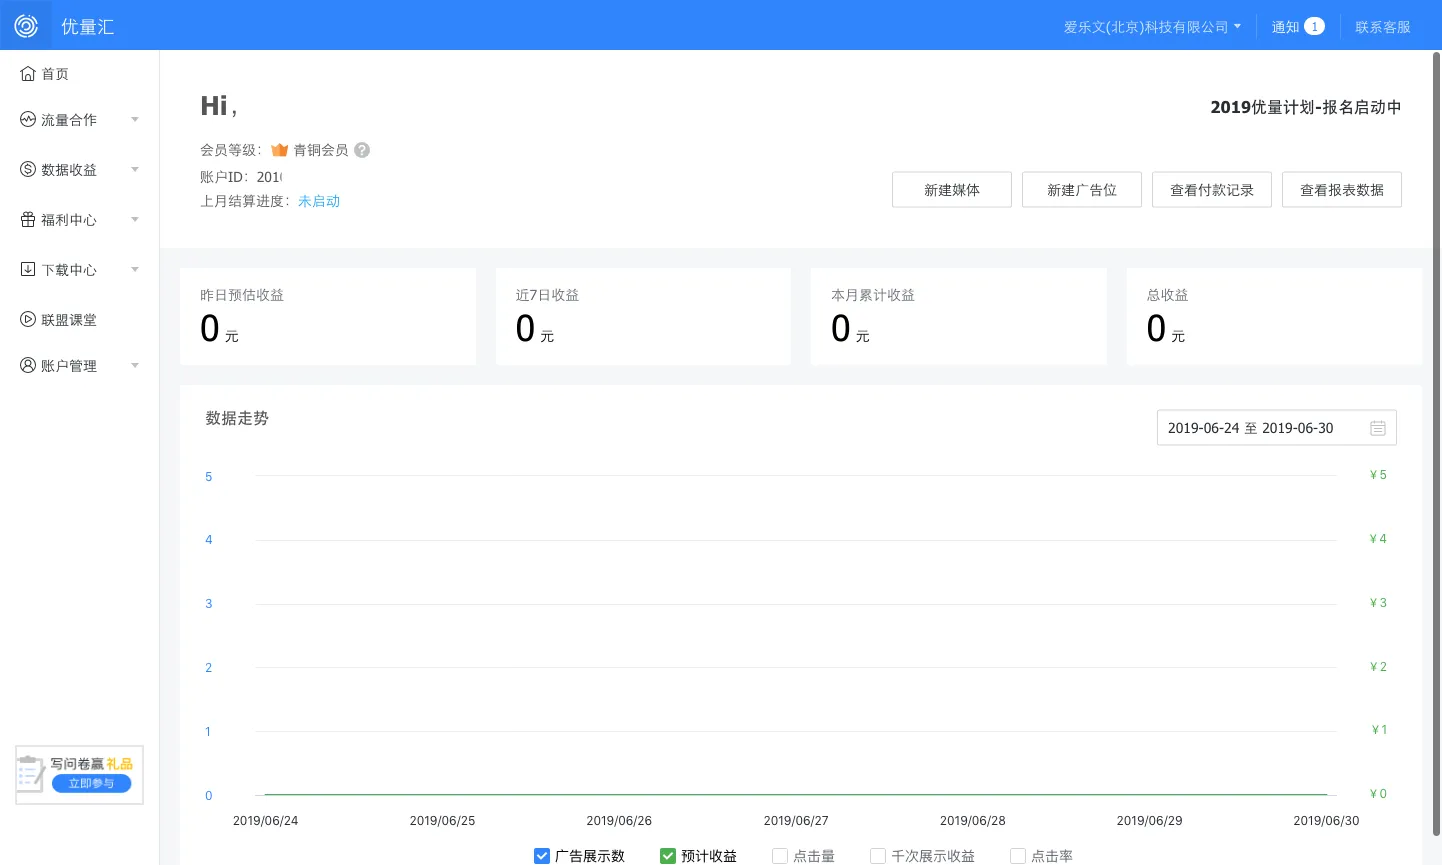
Tencentダッシュボードにログインします。
-
Application (流量合作)を選択し、アプリを作成して、アプリに関する必要な情報を入力します。
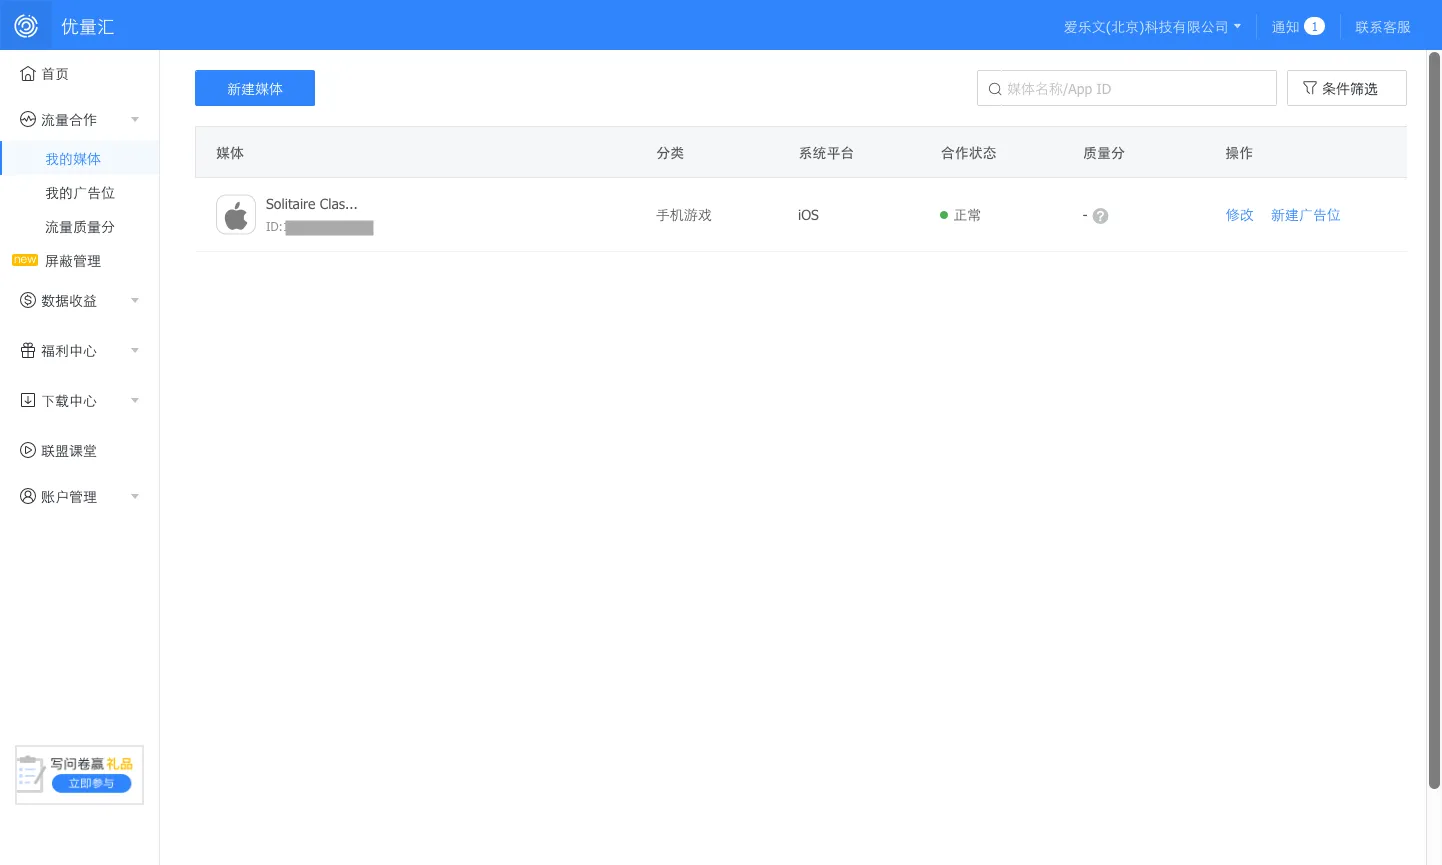
-
アプリを保存したら、My Placement (我的广告位)でAdd Placement (新建广告位)をクリックします。 各広告フォーマットのTencentプレースメントIDを作成します。
- バナーとインタースティシャルには、2.0クリエイティブタイプを選択します:バナーの場合はBanner 2.0、インタースティシャルの場合はInterstitial 2.0 (插屏2.0) です。
- リワード動画には、通常のRewarded Video (激励视频) を選択します。
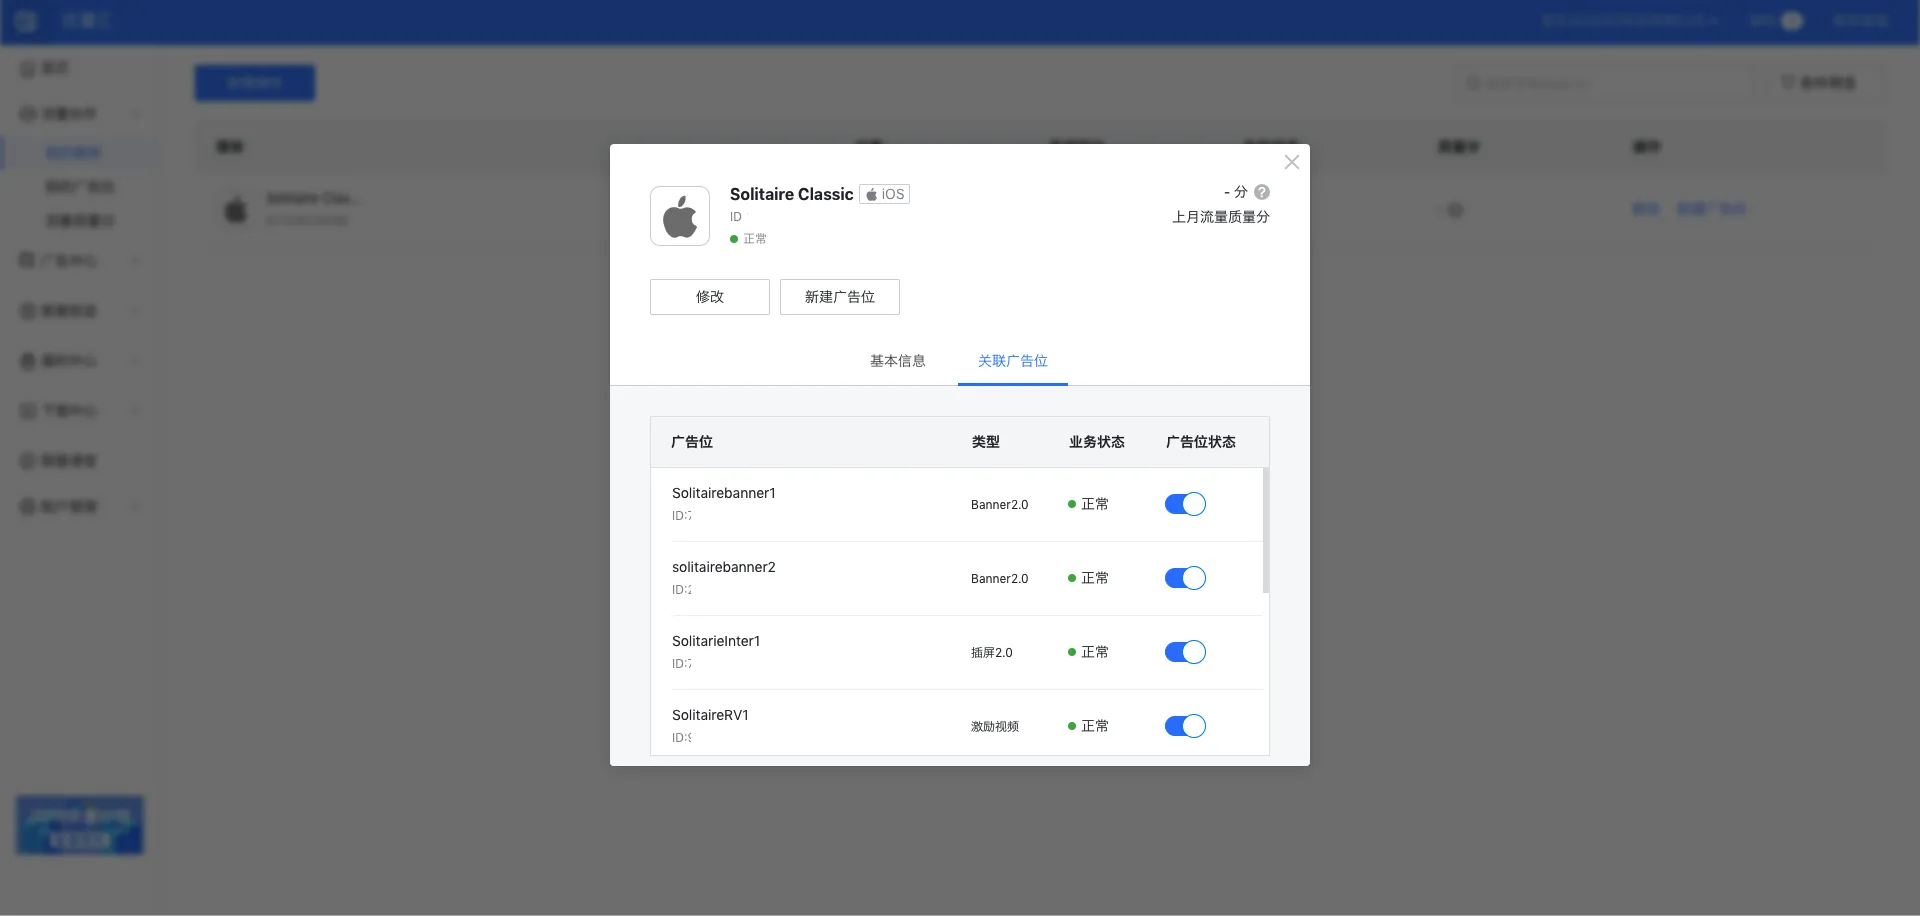
MAXメディエーションでTencentを有効化するには、App IDと、作成した広告ユニットにTencentが関連付けるAd Slot IDsが必要です。 Ad Slot IDは、 Add Placement (我的广告位)セクションで確認できます。 App IDは、左側のナビゲーションバーに表示されているApplication (流量合作)セクションで確認できます。
Payment Informationセクションで支払い情報を設定します。 Tencentから充填率を受信するには、支払い情報を設定する必要があります。
ステップ3. MAXアカウントでTencentを有効化
- Tencentの設定が完了したら、MAXアカウントにログインします。
- MAX > Manage > Ad Unitsを選択します。
- Tencentを有効化したいMAX広告ユニットの配置をクリックします。
- 選択したMAX広告ユニットに関連付けられたTencent App ID とAd Slot IDを入力します。
- ステータスバーをクリックして、ネットワークを有効化します。
- ✓ Saveをクリックします。 これにより、この広告ユニットの対応ネットワークリストでTencentが有効になります。