Tenjin Tracking
You must completely set up your MMP to ensure accurate data tracking and optimal campaign performance. Complete all the steps listed below before you launch any campaign. Unless otherwise indicated, carry out each step within the Tenjin dashboard.
-
Configure Axon by AppLovin as a Partner. To configure Axon by AppLovin as a partner, do the following:
-
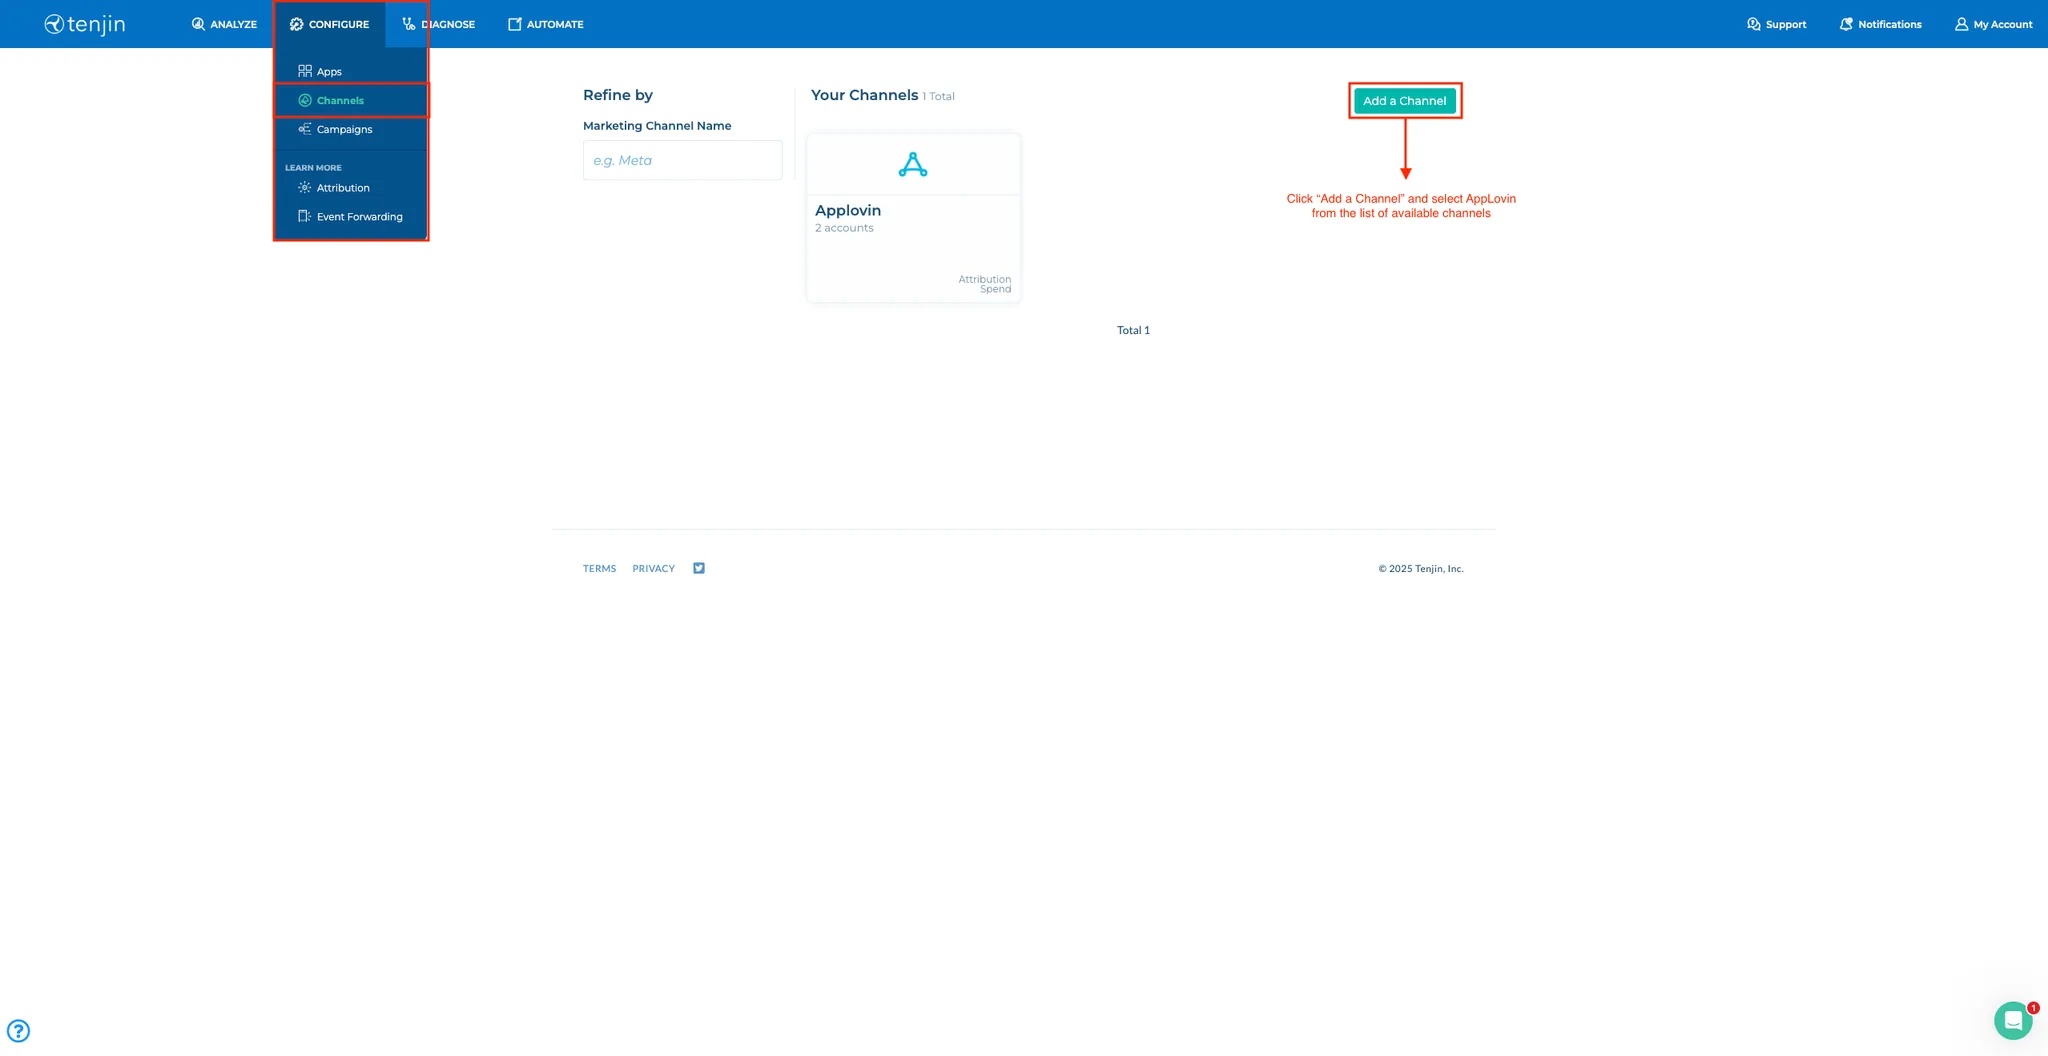
Open tenjin.com in your browser.
-
Select CONFIGURE > Channels.
-
Click Add a Channel.
-
Select “Axon by AppLovin” from the list of channels.
-
-
Set Your Report Key. After you add Axon by AppLovin as a marketing channel, select it from the list and proceed with the following steps:
-
Enter a name for the account in the Account Name field.
-
Enter your Axon by AppLovin Report Key in the Api Key field. You can find this key in the Axon by AppLovin dashboard under Account > Keys.
-
Click Add Ad Account.

-
-
Configure Attribution Windows. To customize the attribution window settings, do the following:
-
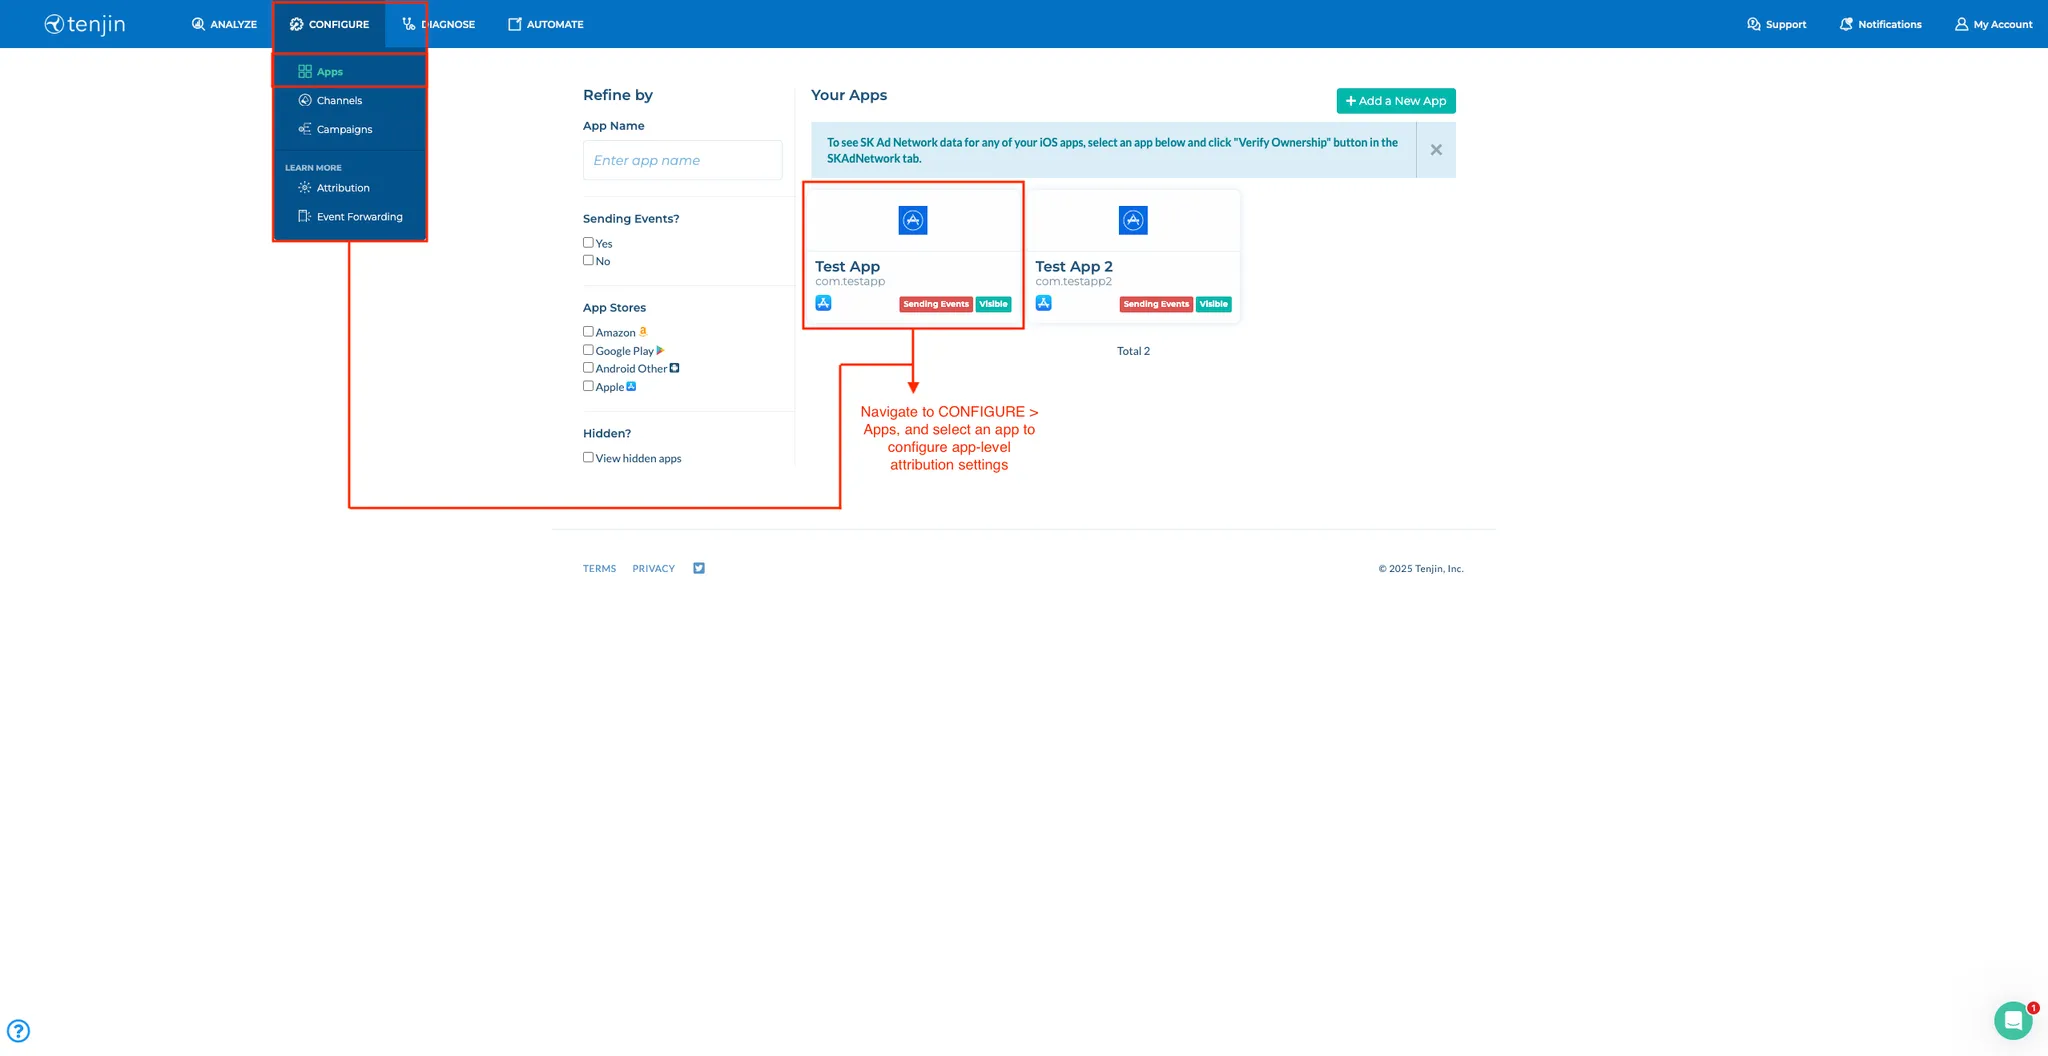
Go to CONFIGURE > Apps.
-
Select the app for which you want to set up the customized attribution window.
-
Select the Attribution tab.
-
Find the APP ATTRIBUTION WINDOWS section.
-
Set the click-through attribution app window to seven days (minimum) next to Device Matching and toggle on Probabilistic Matching.
-
Set the view-through attribution app window to 24 hours (minimum) next to Device Matching and toggle on Probabilistic Matching.

-
-
Set Up Install and Event Callbacks. Tenjin notifies integrated marketing channels of installs and other events when they occur. To set up install and event callbacks, do the following:
-
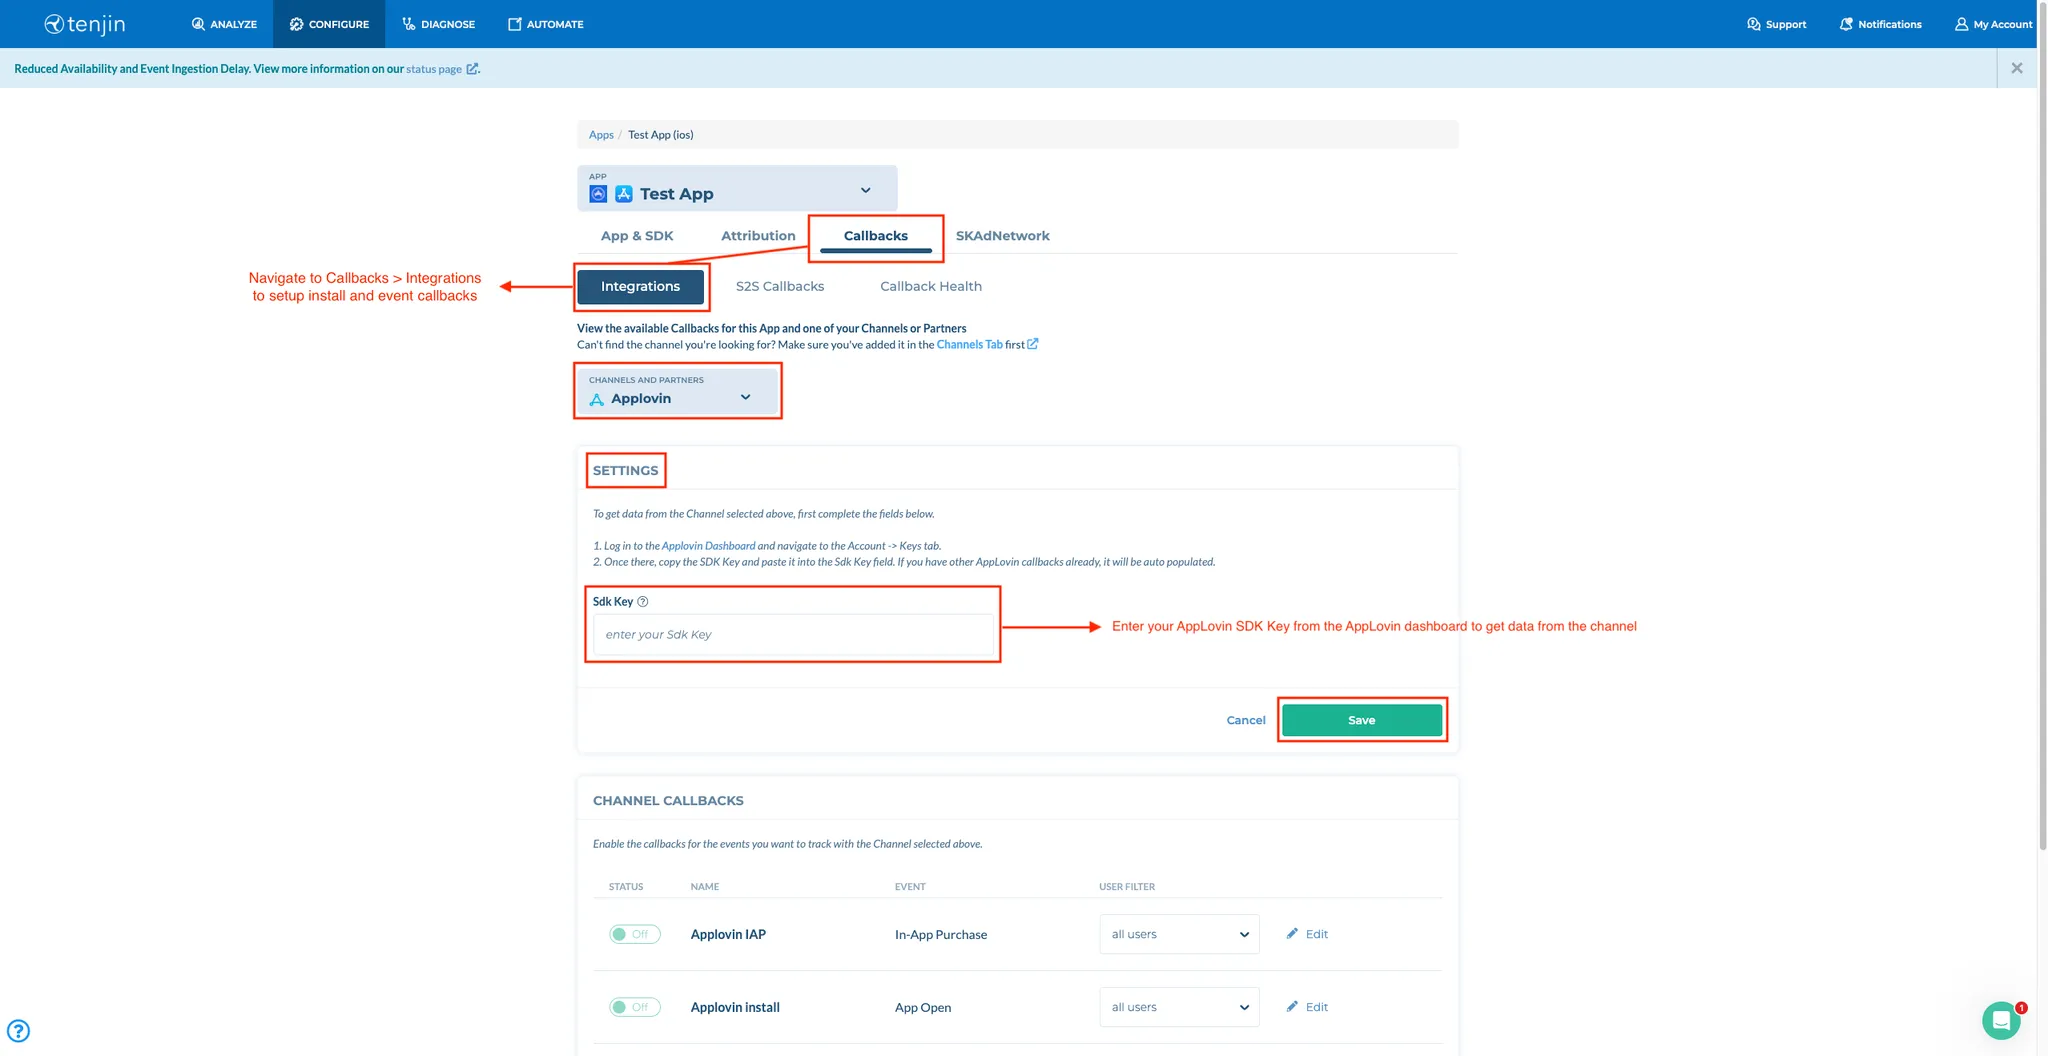
Select the Callbacks and select Integrations.
-
Select “Axon by AppLovin” from the CHANNELS AND PARTNERS dropdown menu.
-
Enter your Axon by AppLovin SDK Key in the Sdk Key field of the SETTINGS subsection. You can find this key in the Axon by AppLovin dashboard under Account > Keys.
-
Click Save.
-
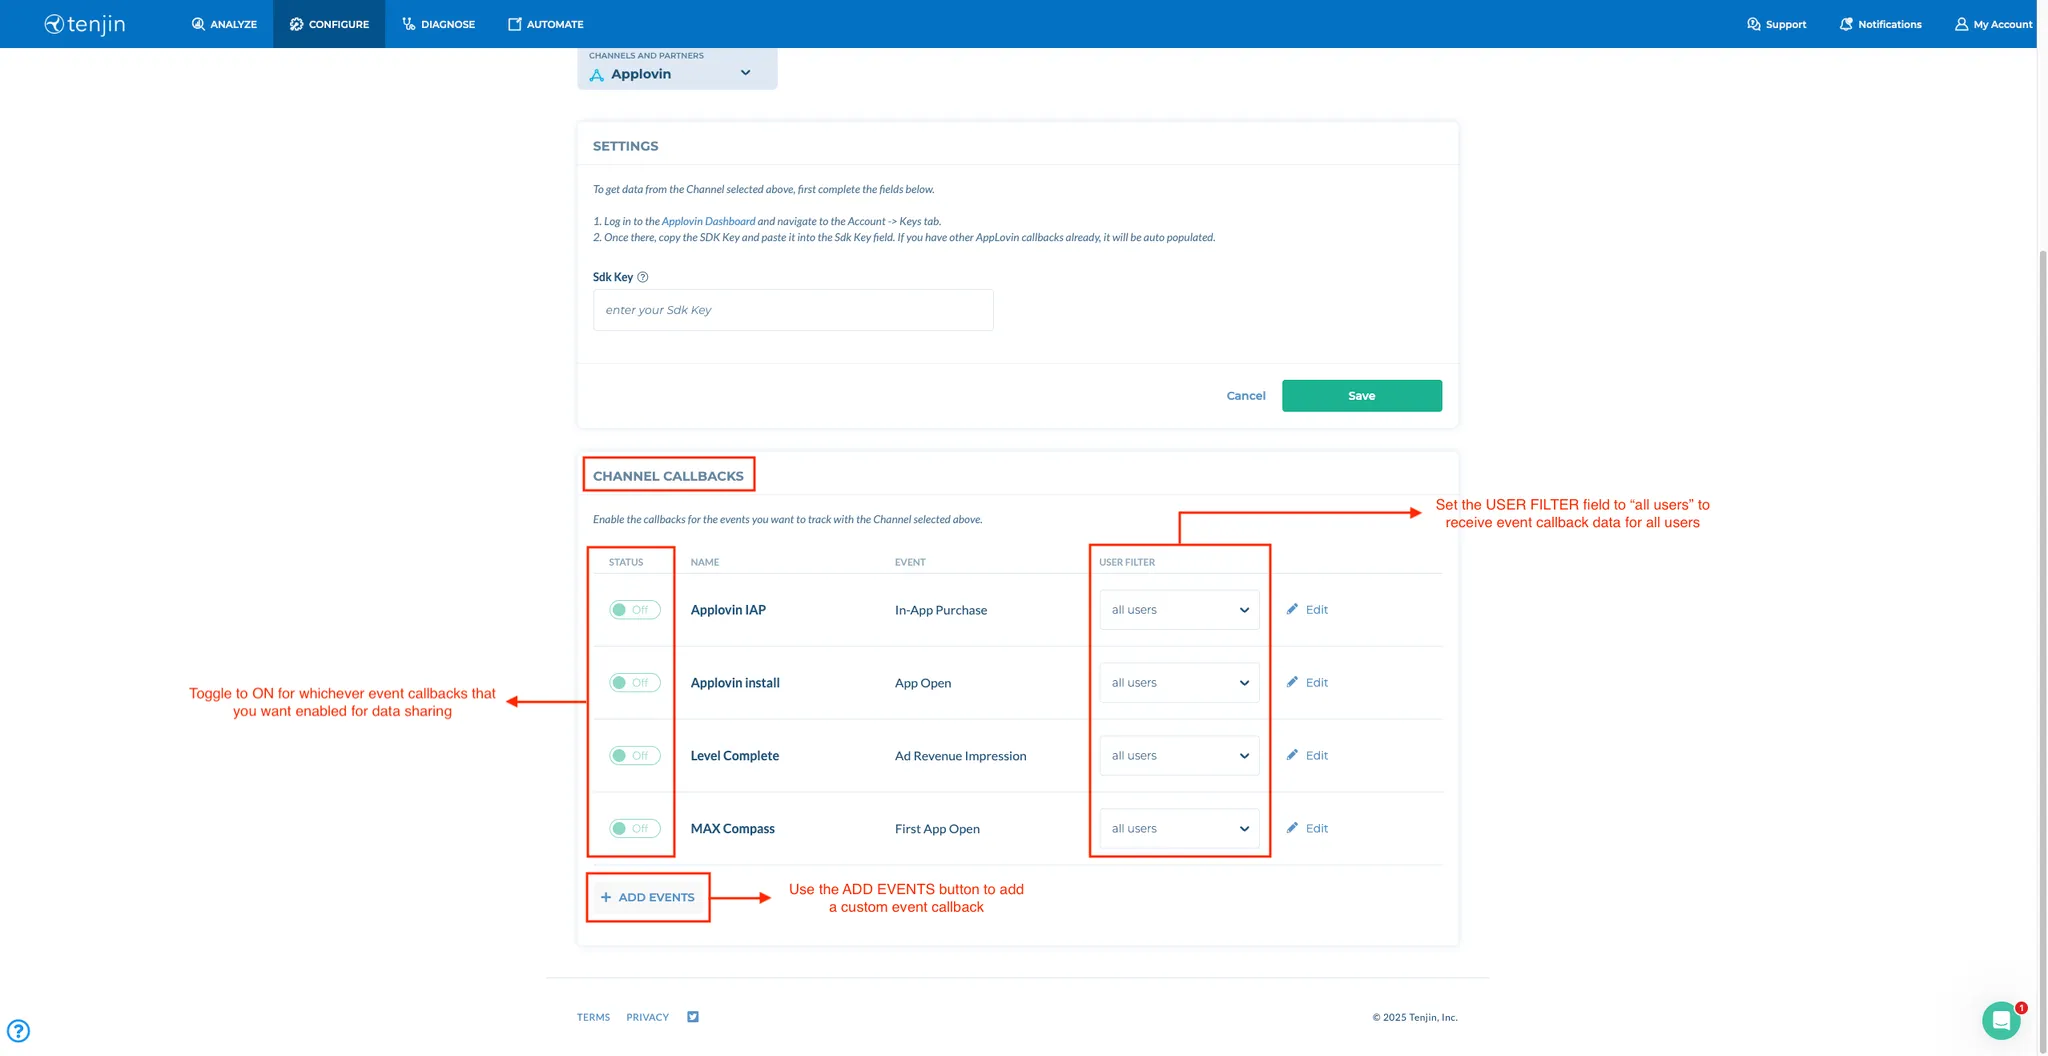
Find the CHANNEL CALLBACKS subsection.
-
Use the toggles to enable those callbacks that you want for Axon by AppLovin.
-
To set up a custom event callback for Axon by AppLovin, click ADD EVENTS and fill in the required details. Remember to set the USER FILTER field to all users.
-
-
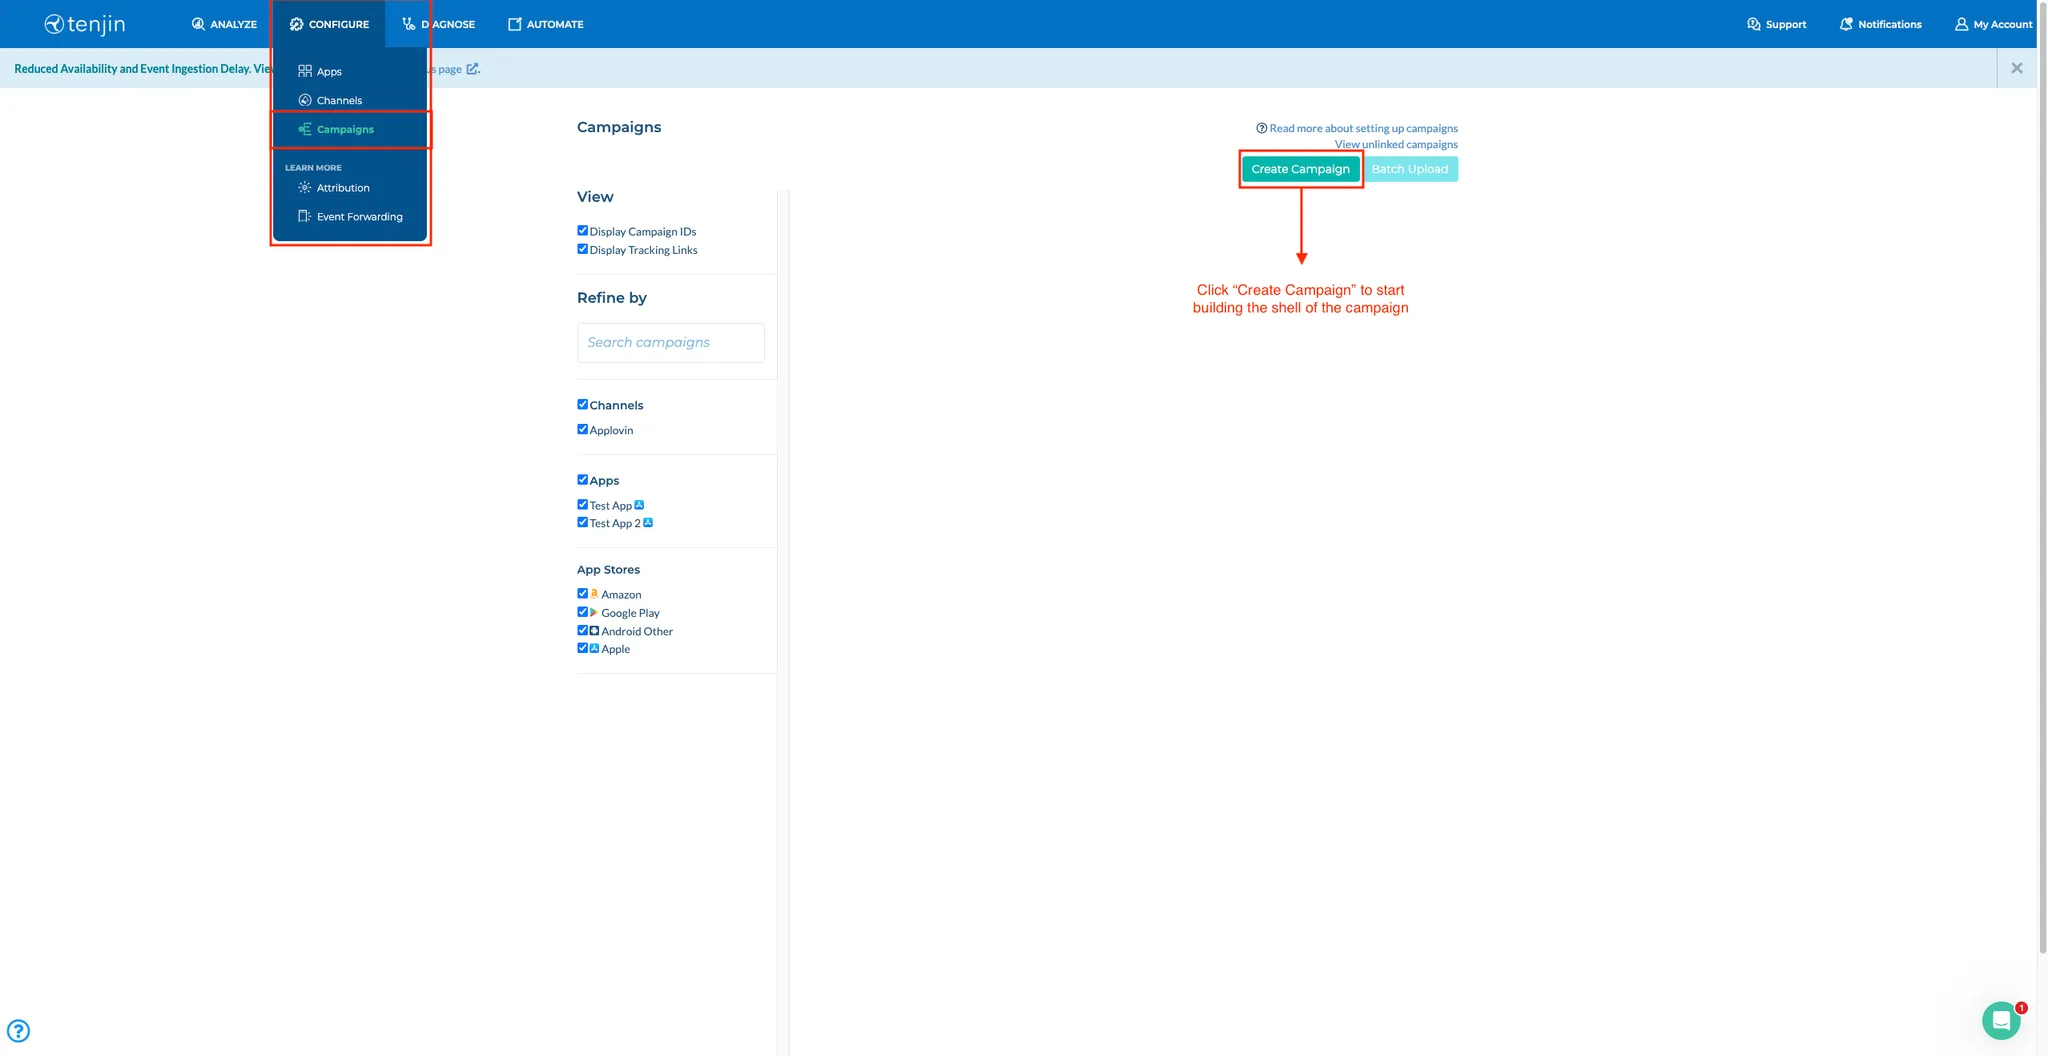
Create a New Campaign. To create a new campaign and complete the integration process, do the following:
-
Select CONFIGURE > Campaigns.
-
Click NEW CAMPAIGN to start building the shell of the campaign.
-
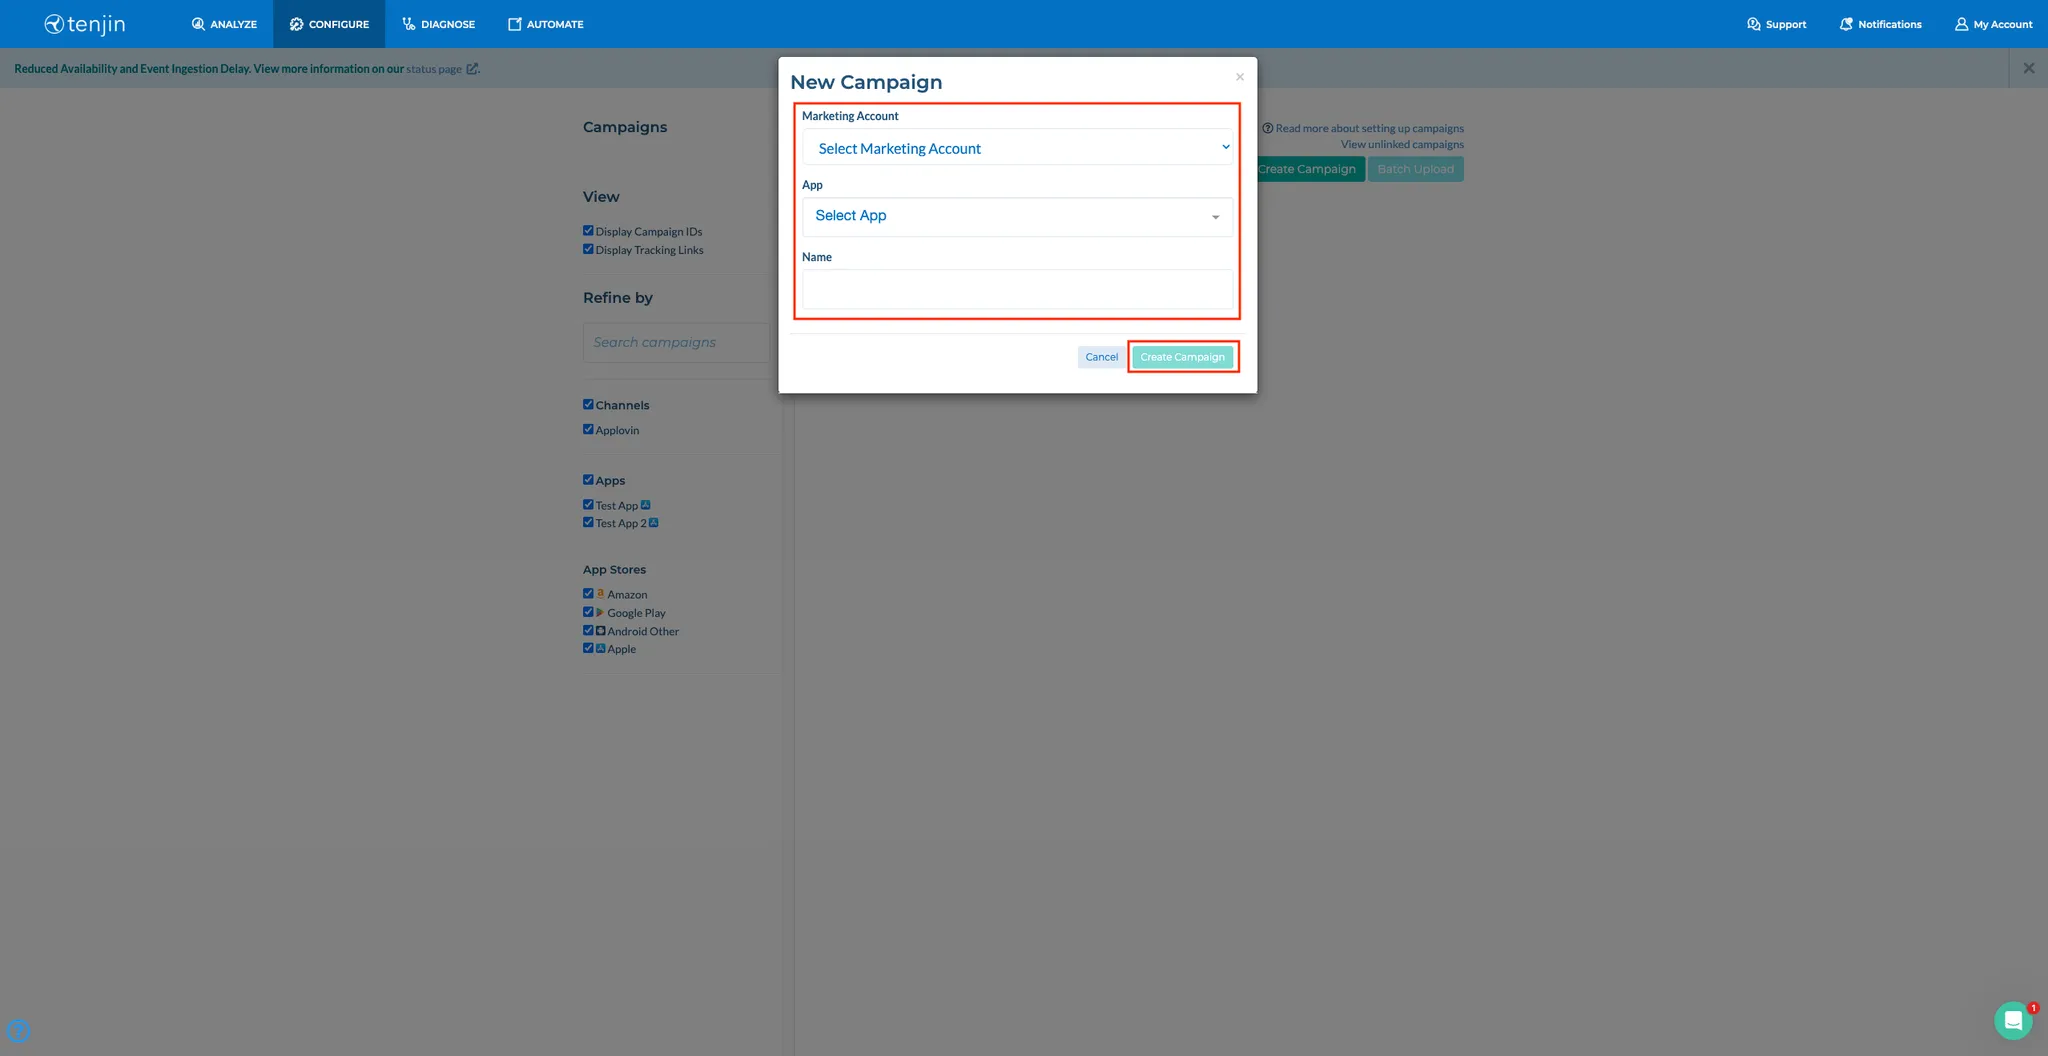
Click Create Campaign.
-
From the Marketing Account drop-down, select the Axon by AppLovin account you configured earlier
-
From the App drop-down, select the app for which you are setting up the campaign.
-
In the Name field, enter the campaign name.
-
Click Create Campaign.
-
-
Gather Tracking URLs After you create a campaign, you can access both the click and impression tracking URLs on the CONFIGURE > Campaigns tab. The tracking URL macros are pre-populated using the appropriate network macros and syntax.