Kochava Tracking
You must completely set up your MMP to ensure accurate data tracking and optimal campaign performance. Complete all the steps listed below before you launch any campaign. Unless otherwise indicated, carry out each step within the Kochava dashboard.
-
Configure Axon by AppLovin as a Partner. To configure Axon by AppLovin as a partner, do the following:
-
Open kochava.com in your browser.
-
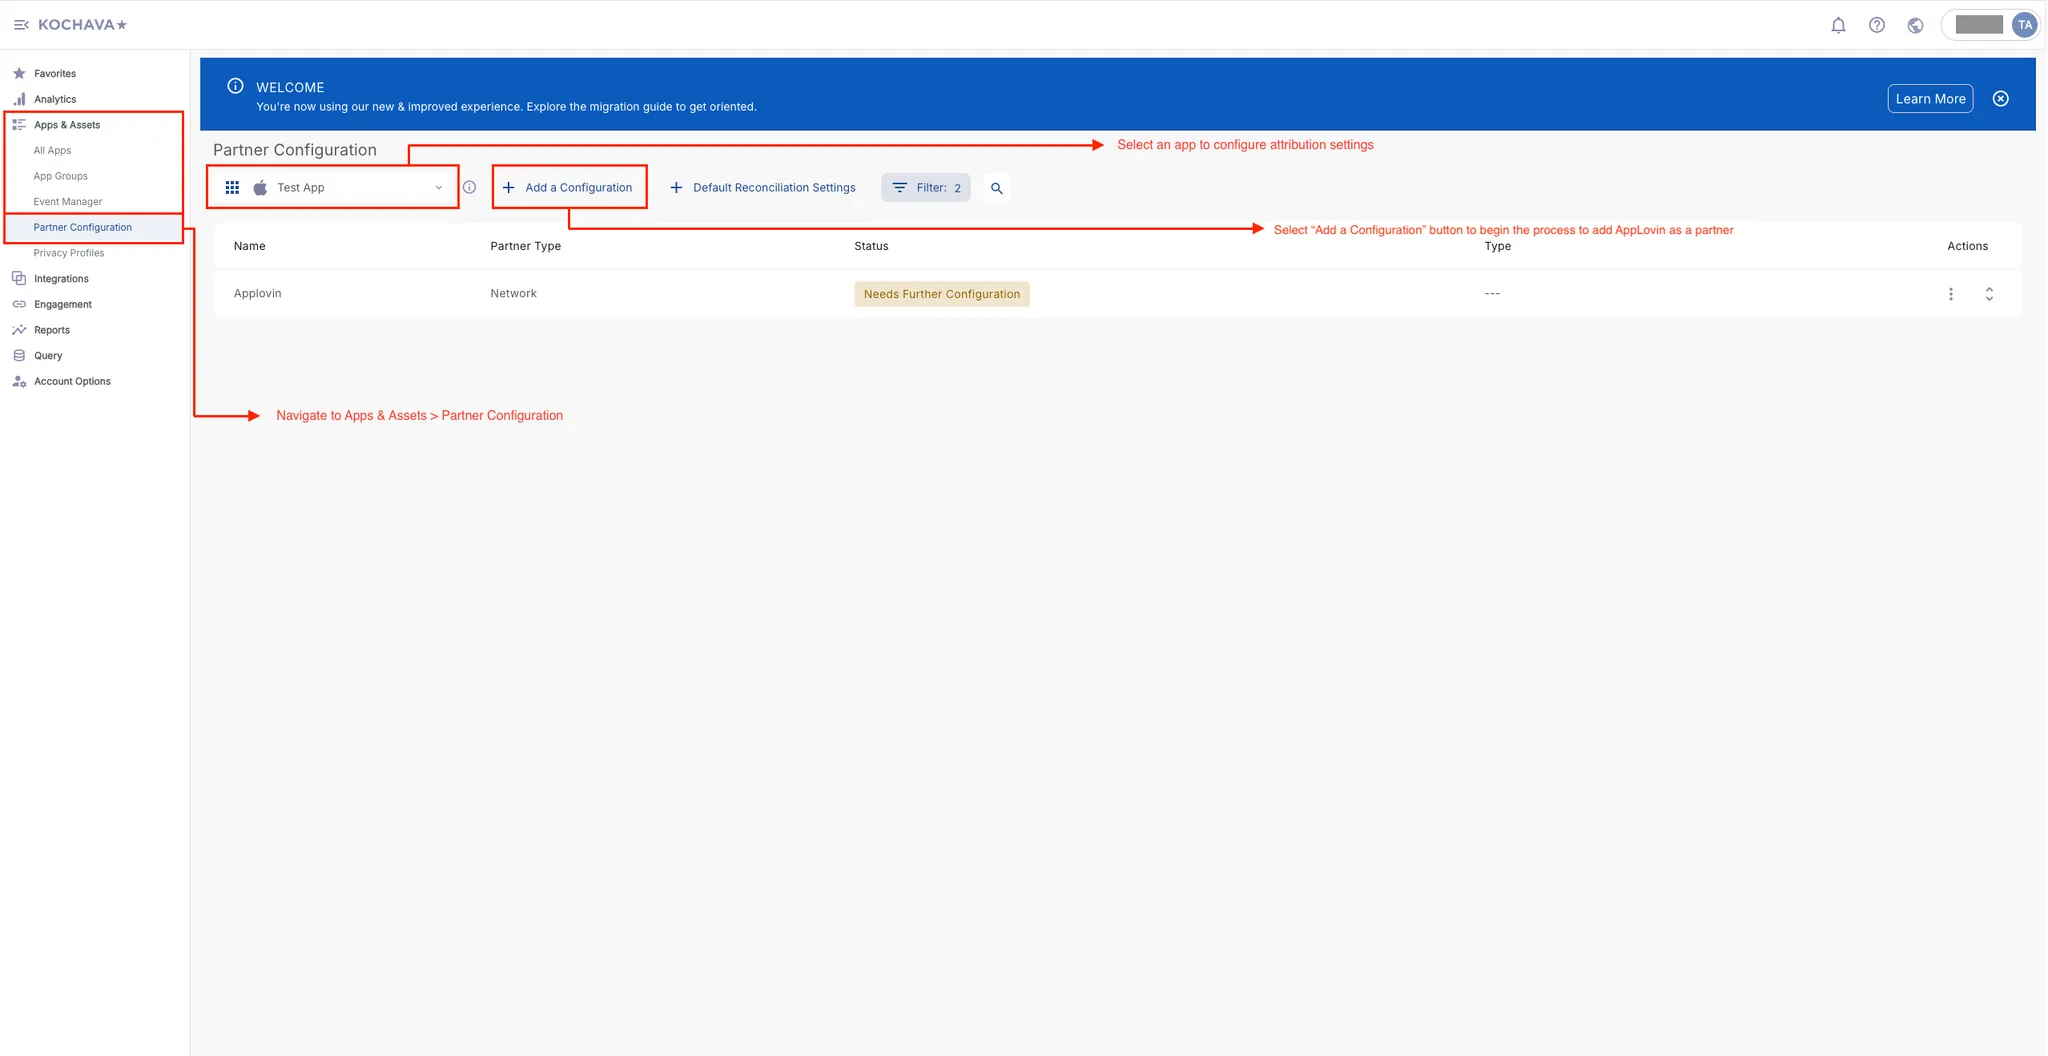
Select Apps & Assets > Partner Configuration.
-
Select the app for which you want to enable data sharing with Axon by AppLovin.
-
Click Add a Configuration.
-
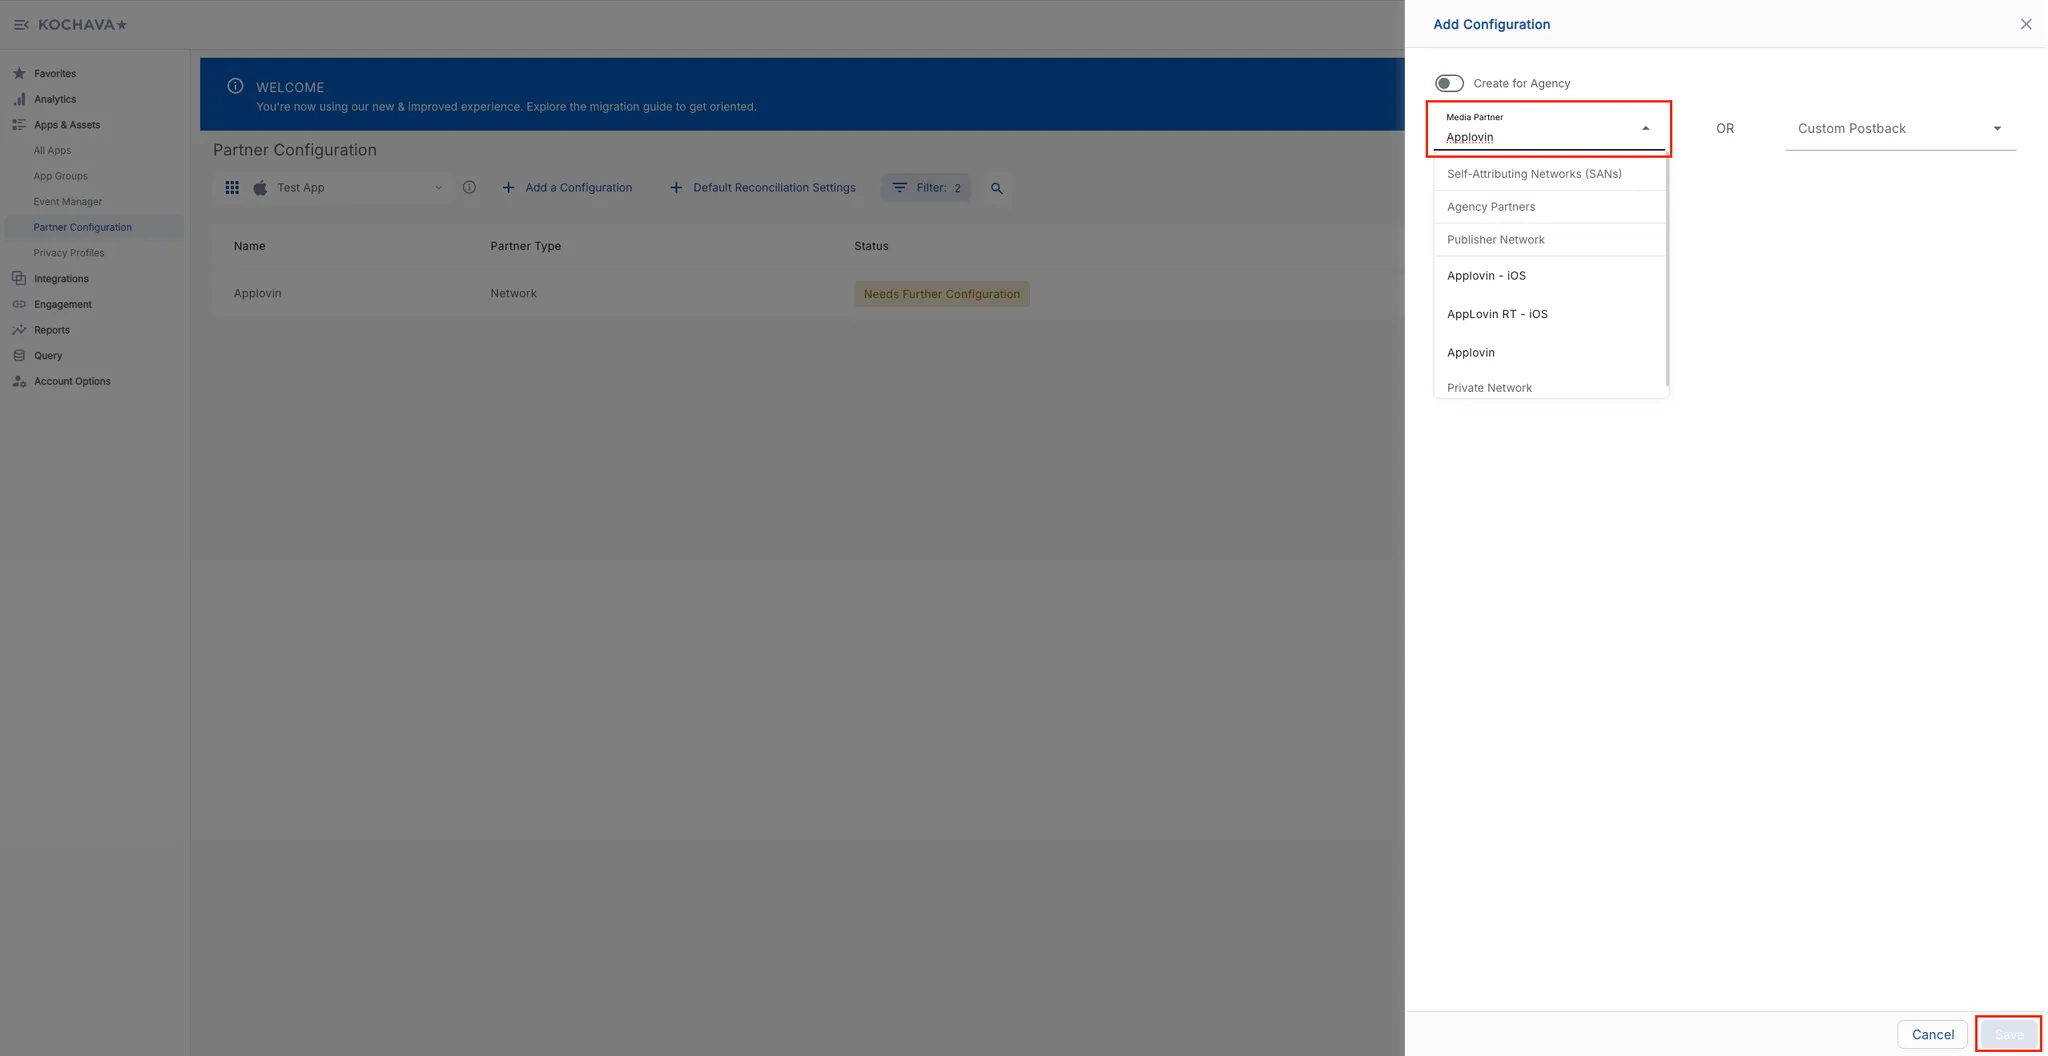
Under Media Partner, search for and select Axon by AppLovin.
-
Click Save when you are ready to proceed with the partner selection.
-
-
Configure Install Postback. To configure an install postback, do the following:
-
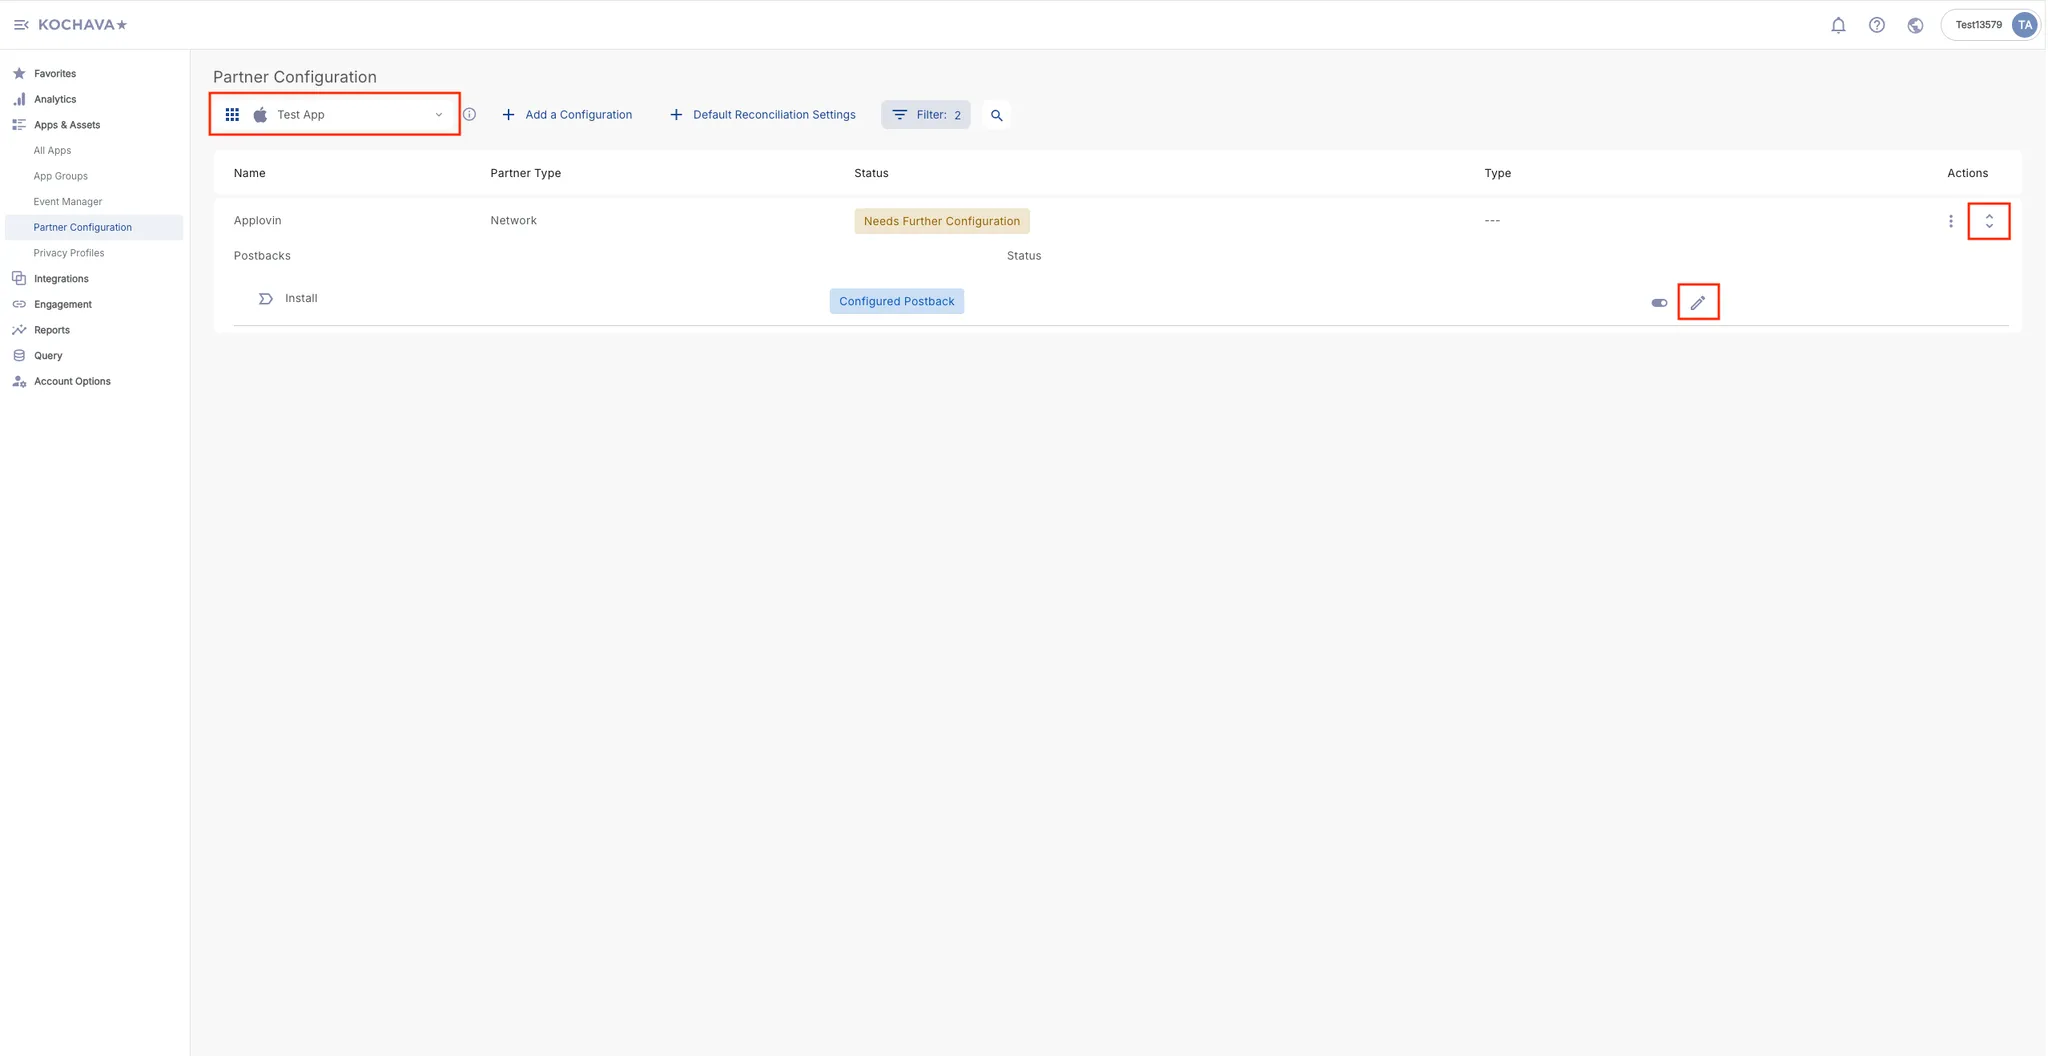
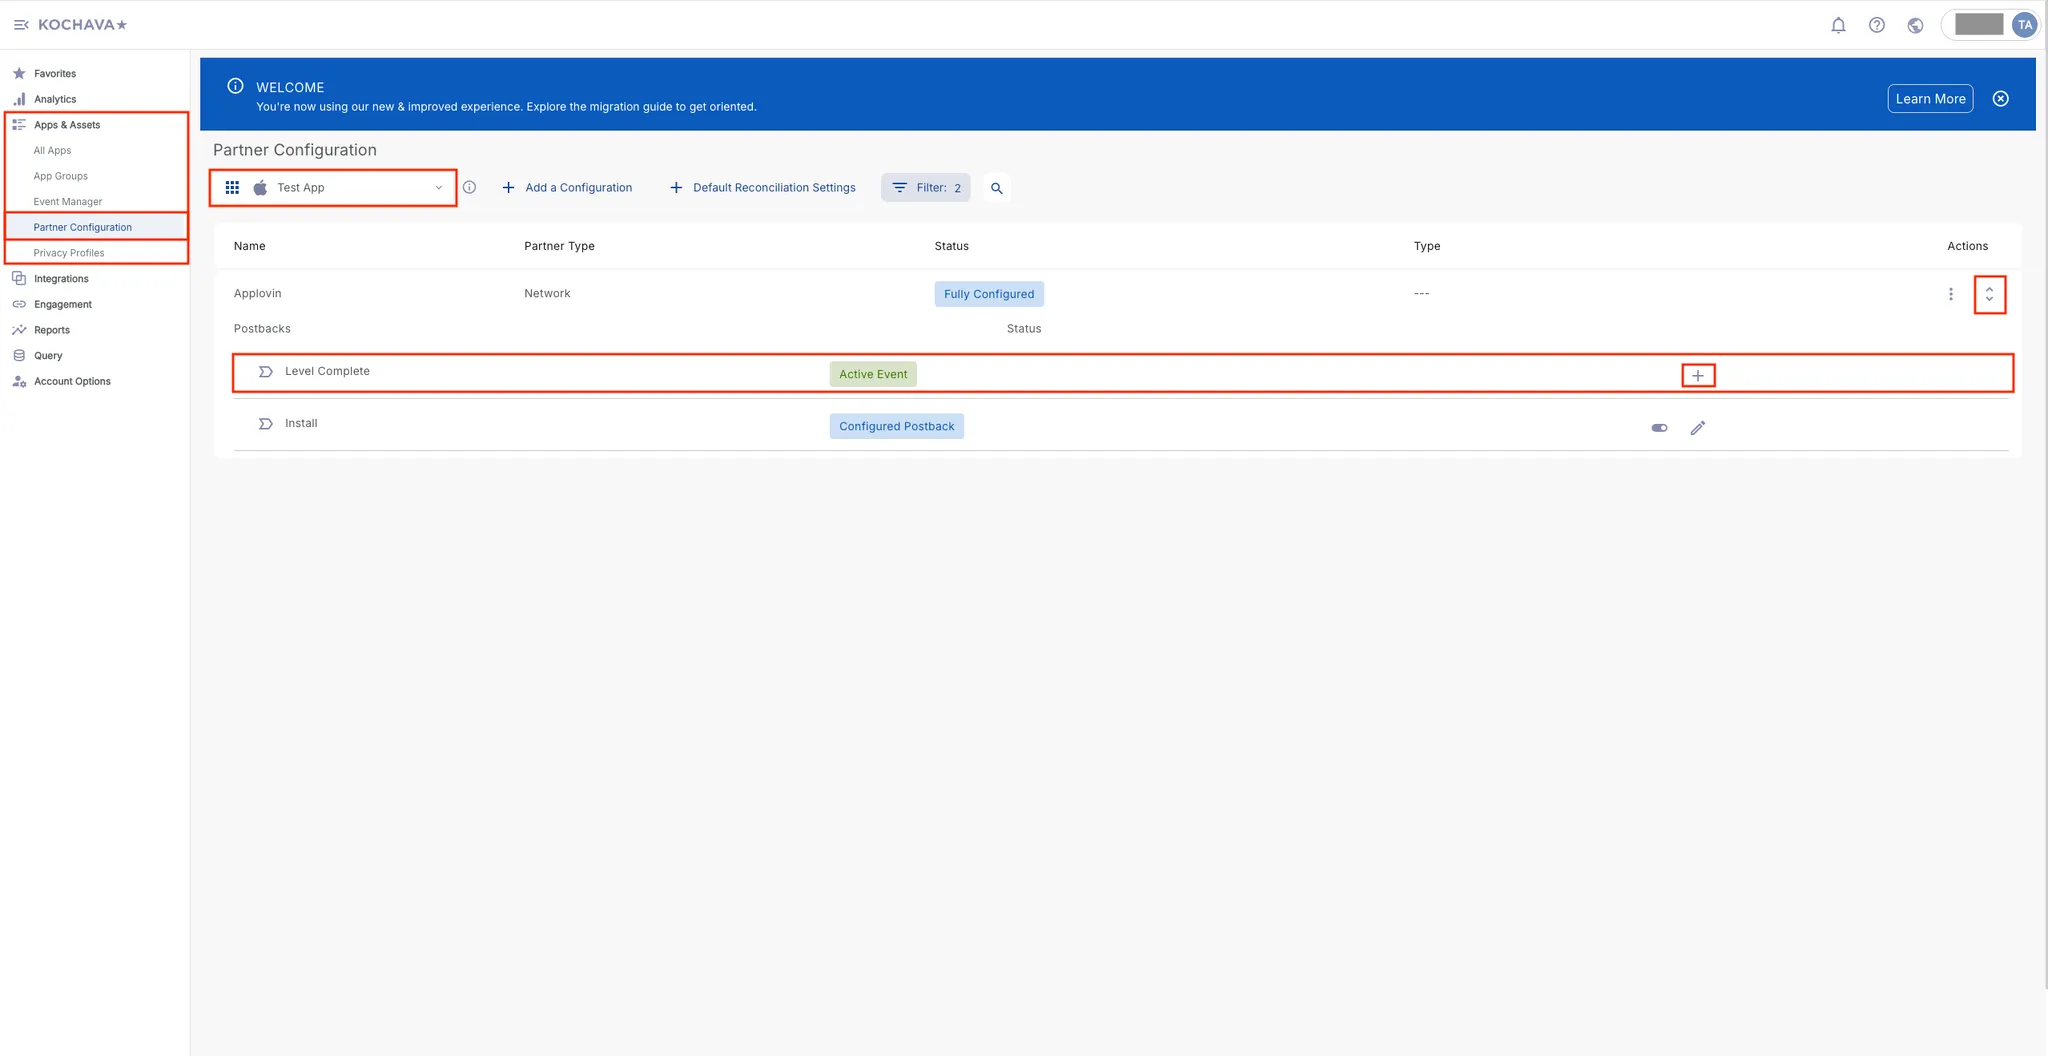
Go to Apps & Assets > Partner Configuration.
-
Select the app for which you want to configure an install postback.
-
Locate Axon by AppLovin, and click the ↕ option under the Actions header.
-
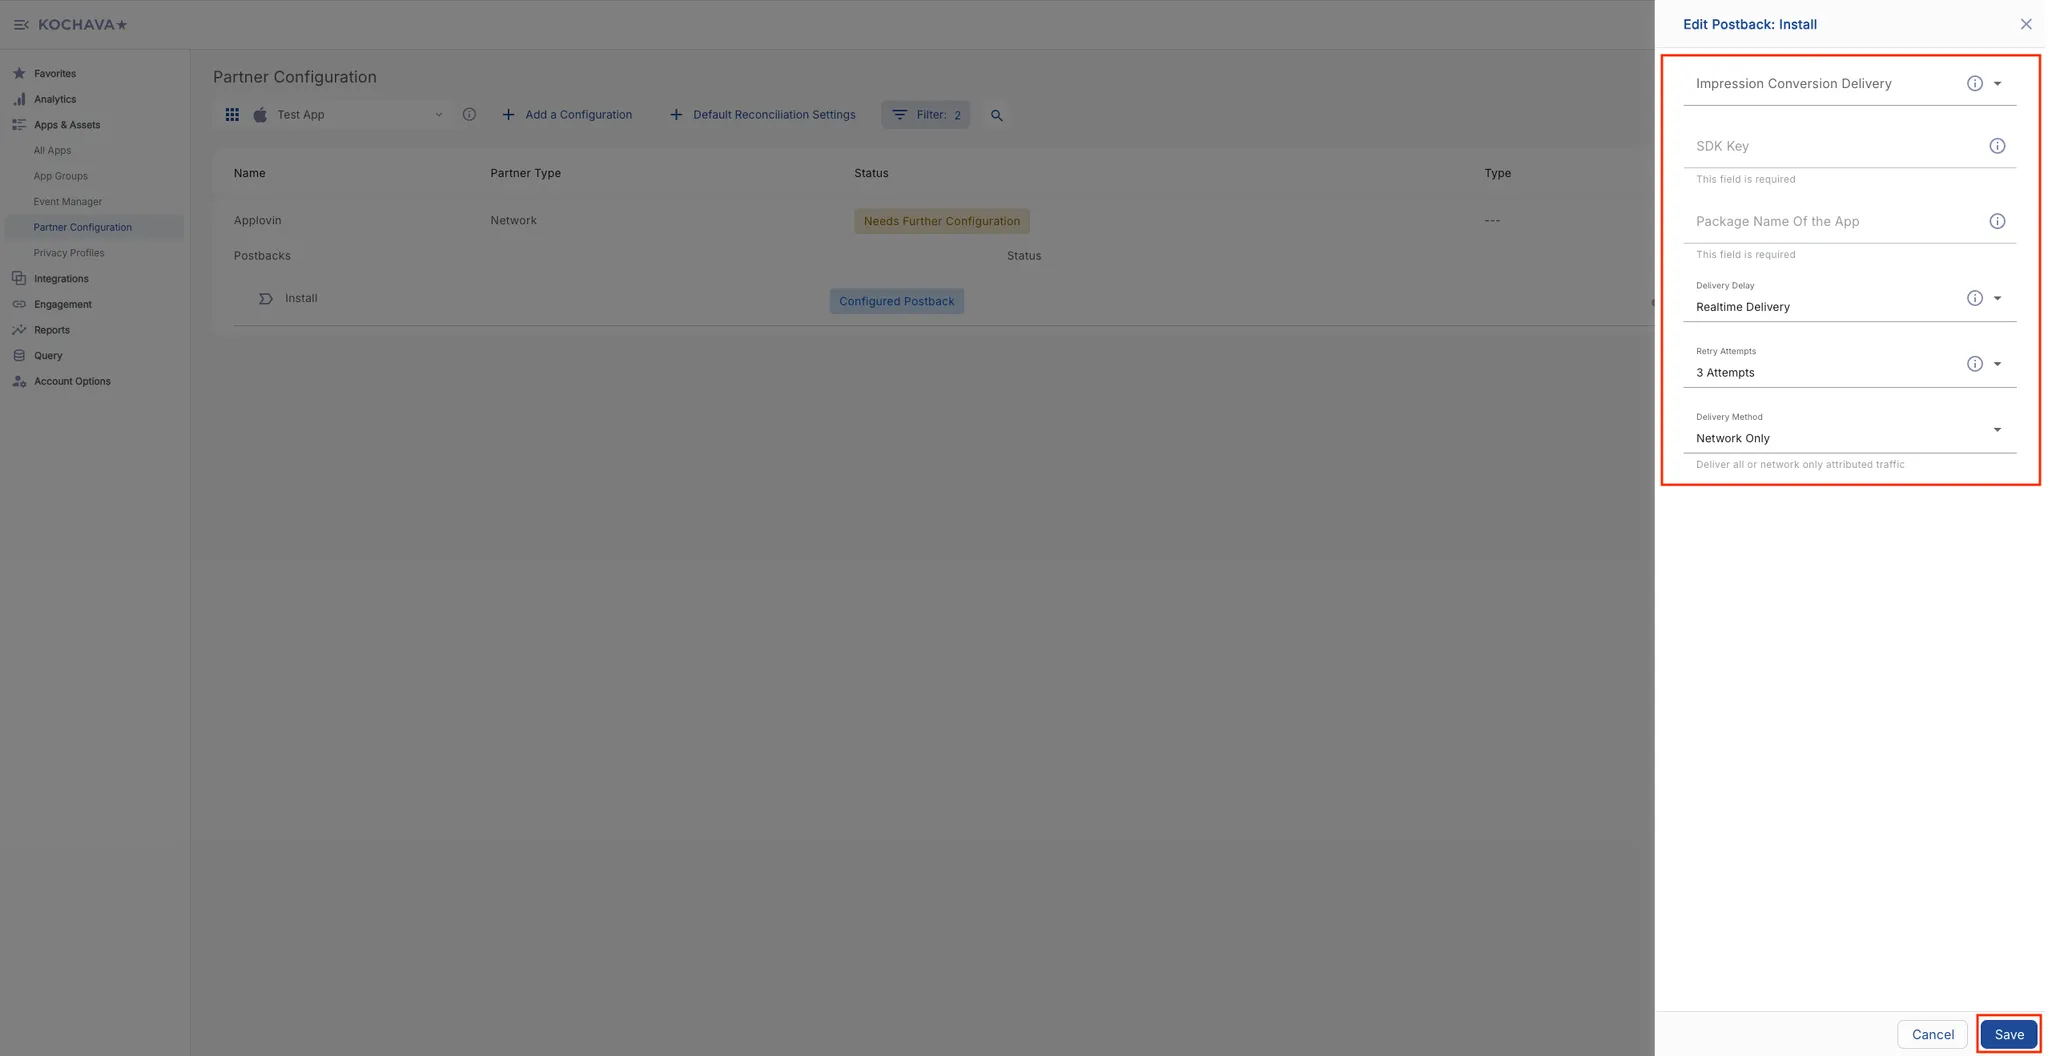
Locate Install under the Name header, and click the 🖊 option to its right.
-
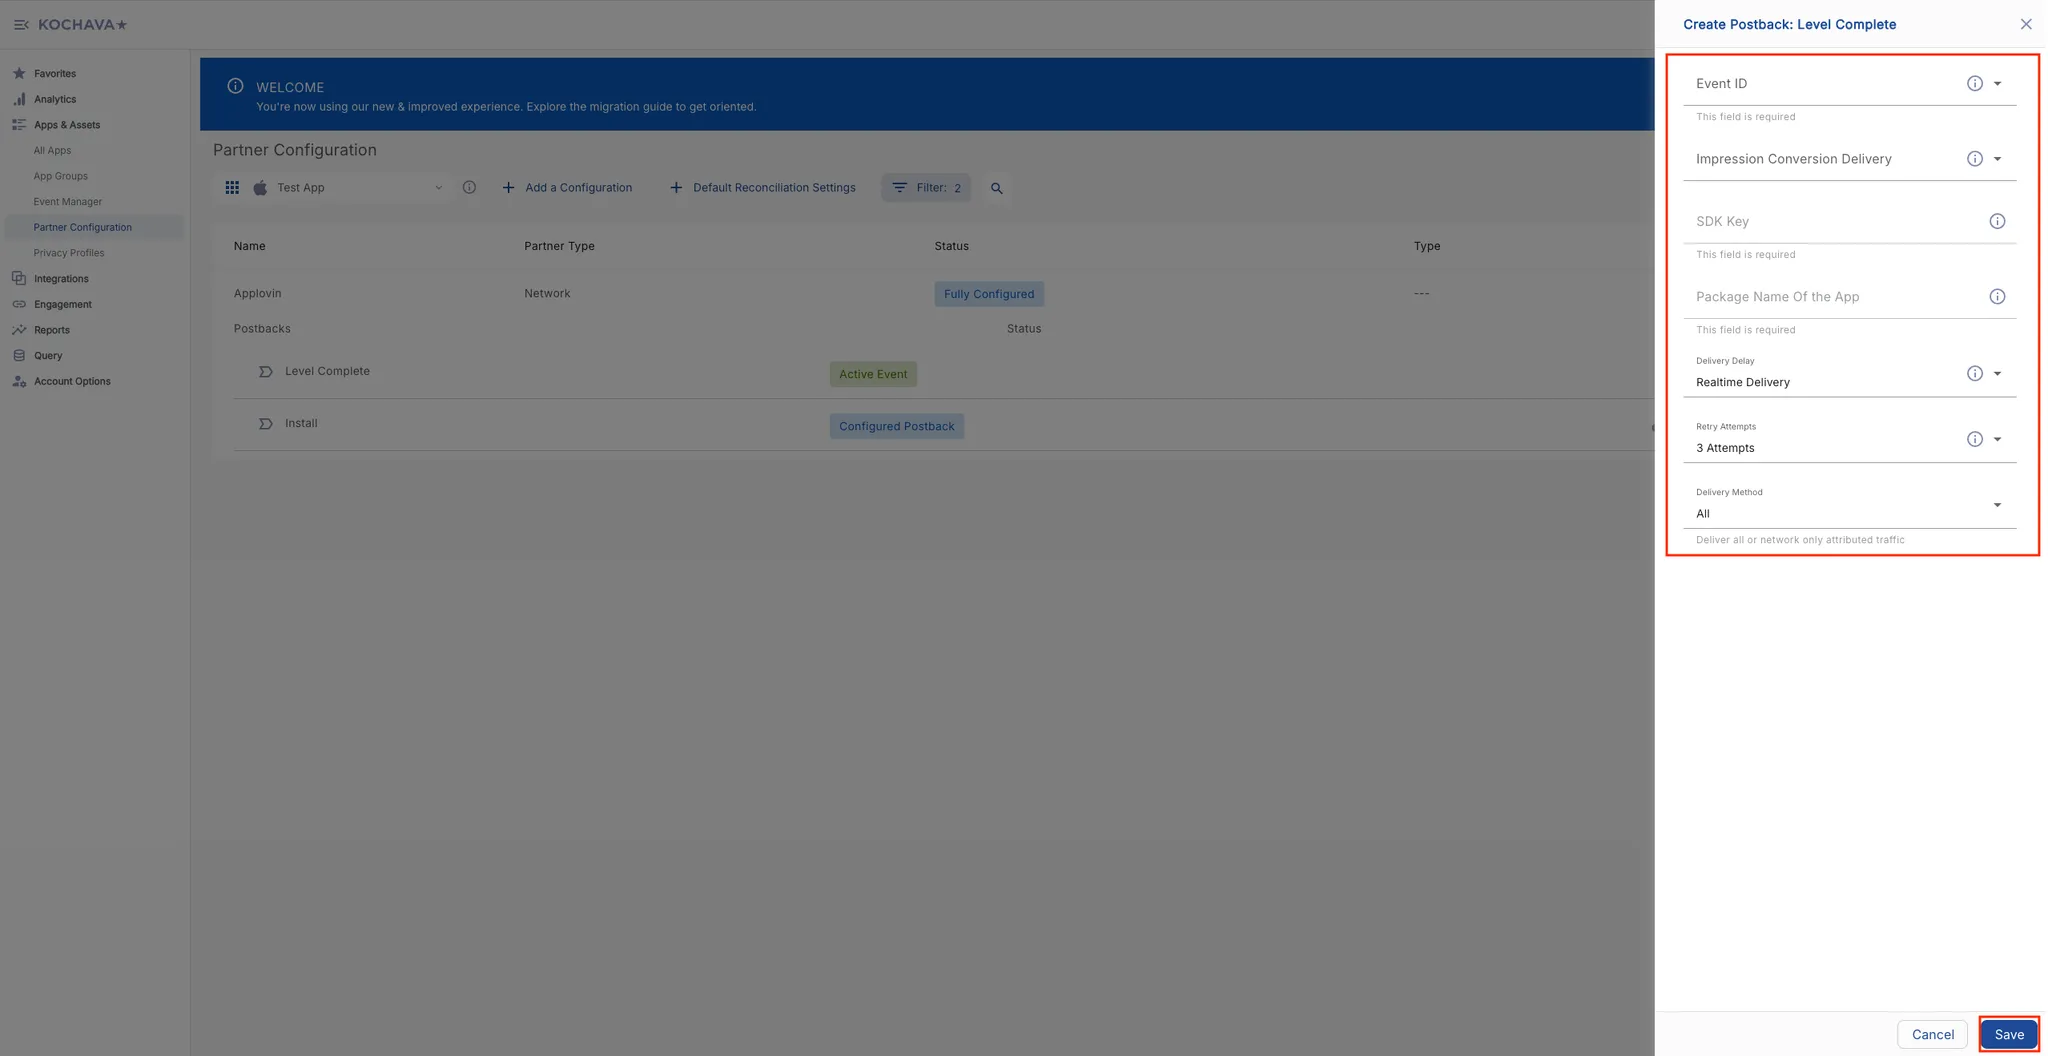
Select Deliver All in the Impression Conversion Delivery field.
-
Enter your Axon by AppLovin SDK key in the SDK Key field. You can find this key in the Axon by AppLovin dashboard under Account > Keys.
-
Enter the app’s package name / bundle ID in the Package Name Of the App field.
-
Select Realtime Delivery in the Delivery Delay field.
-
Select 3 Attempts in the Retry Attempts field.
-
Select All in the Delivery Method field.
-
Click Save.
-
-
Set Up Post-Install Event. To set up a post-install event, do the following:
-
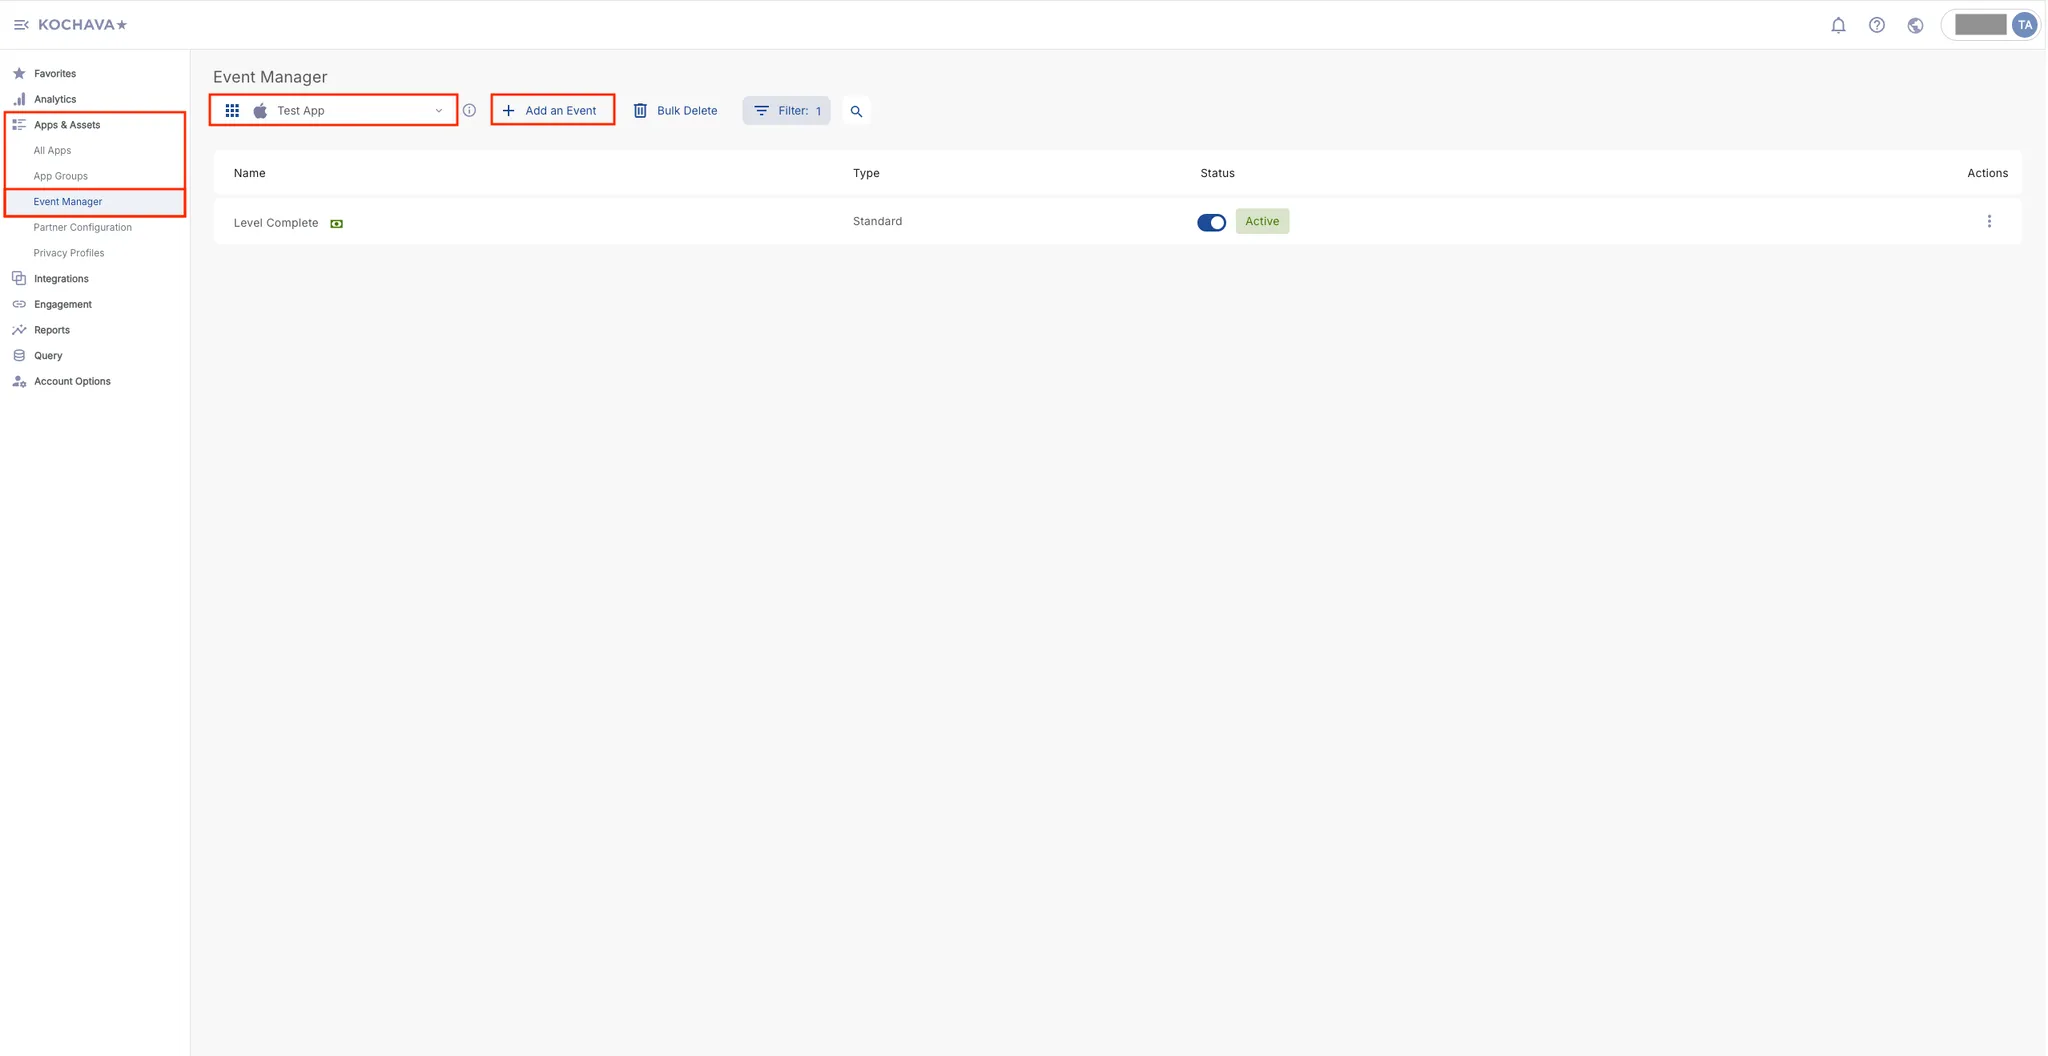
Select Apps & Assets > Event Manager.
-
Select an app for which you want to set up a post-install event.
-
Click Add an Event.
-
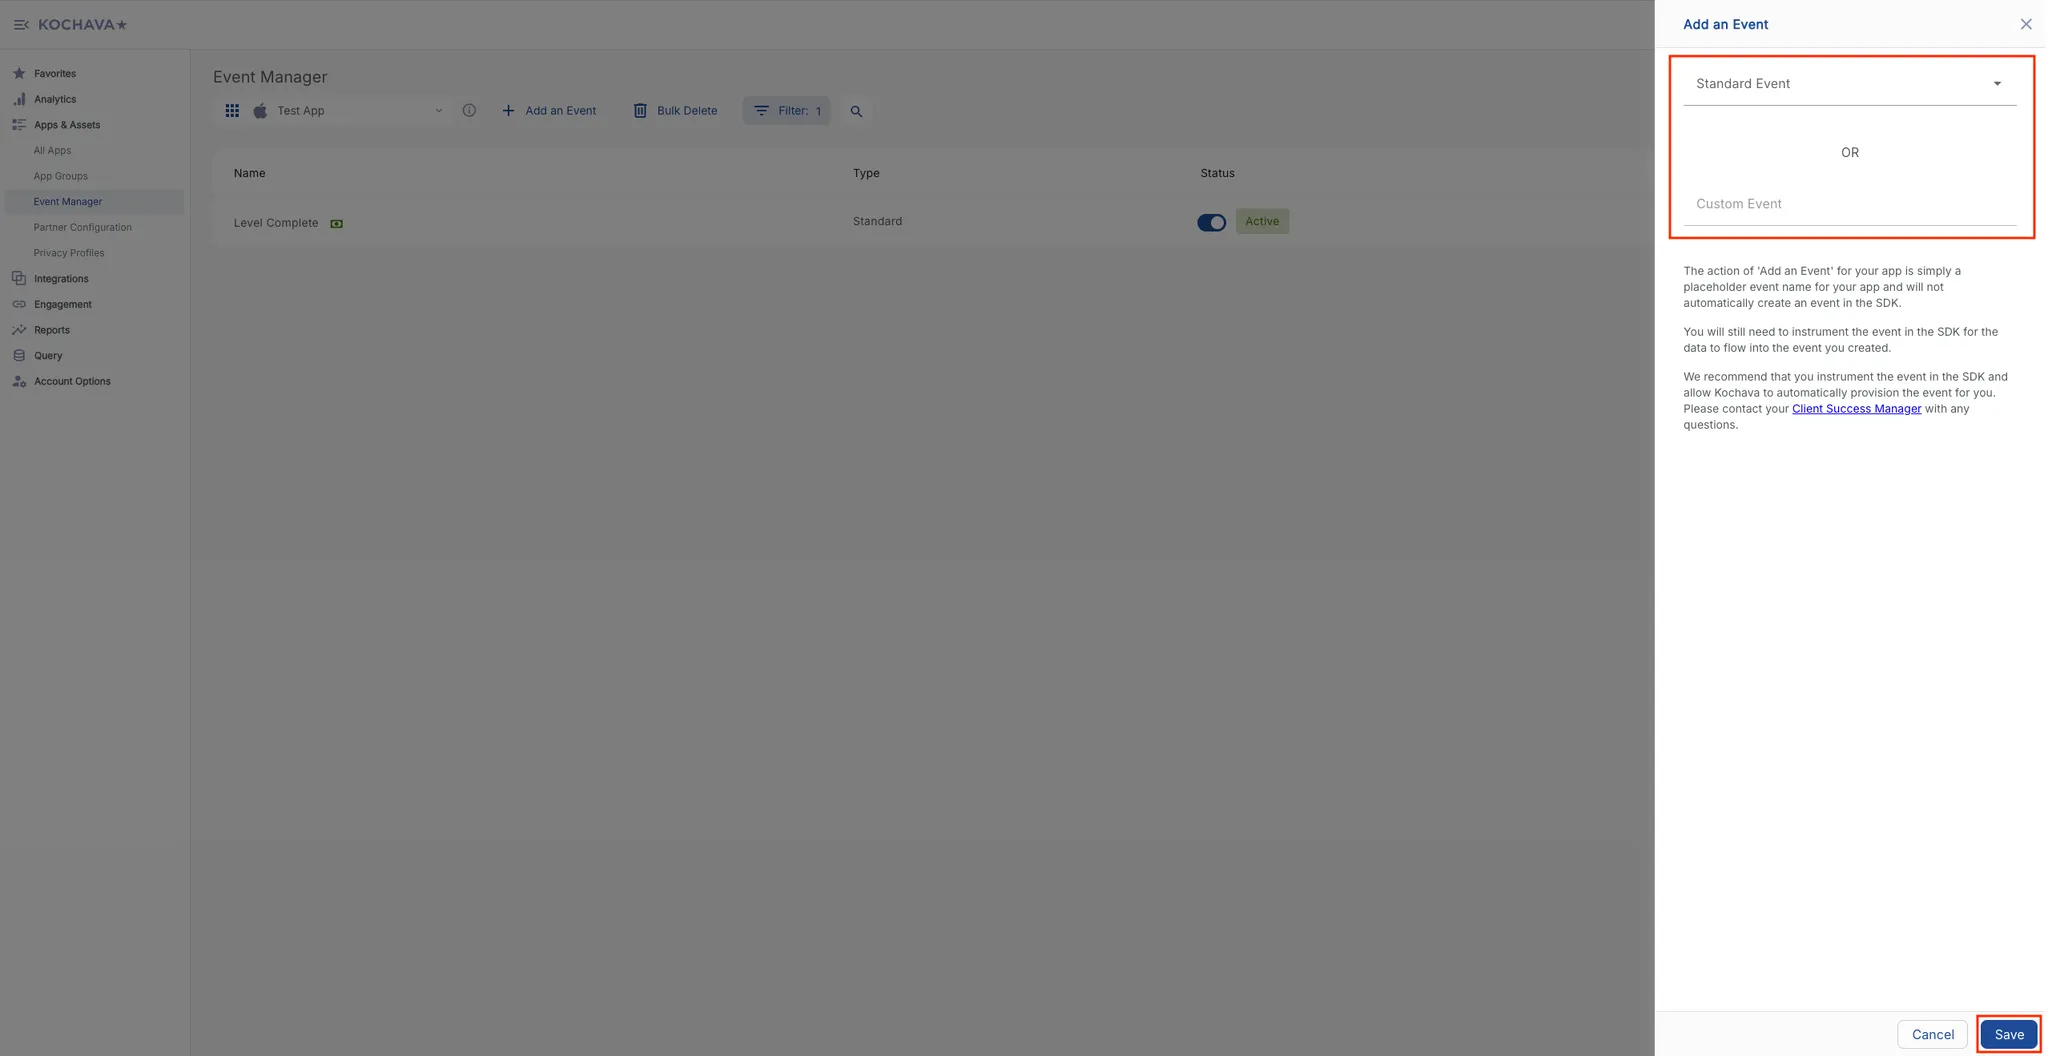
Select from the dropdown options in the Standard Event field or enter a custom event in the Custom Event field.
-
Click Save.
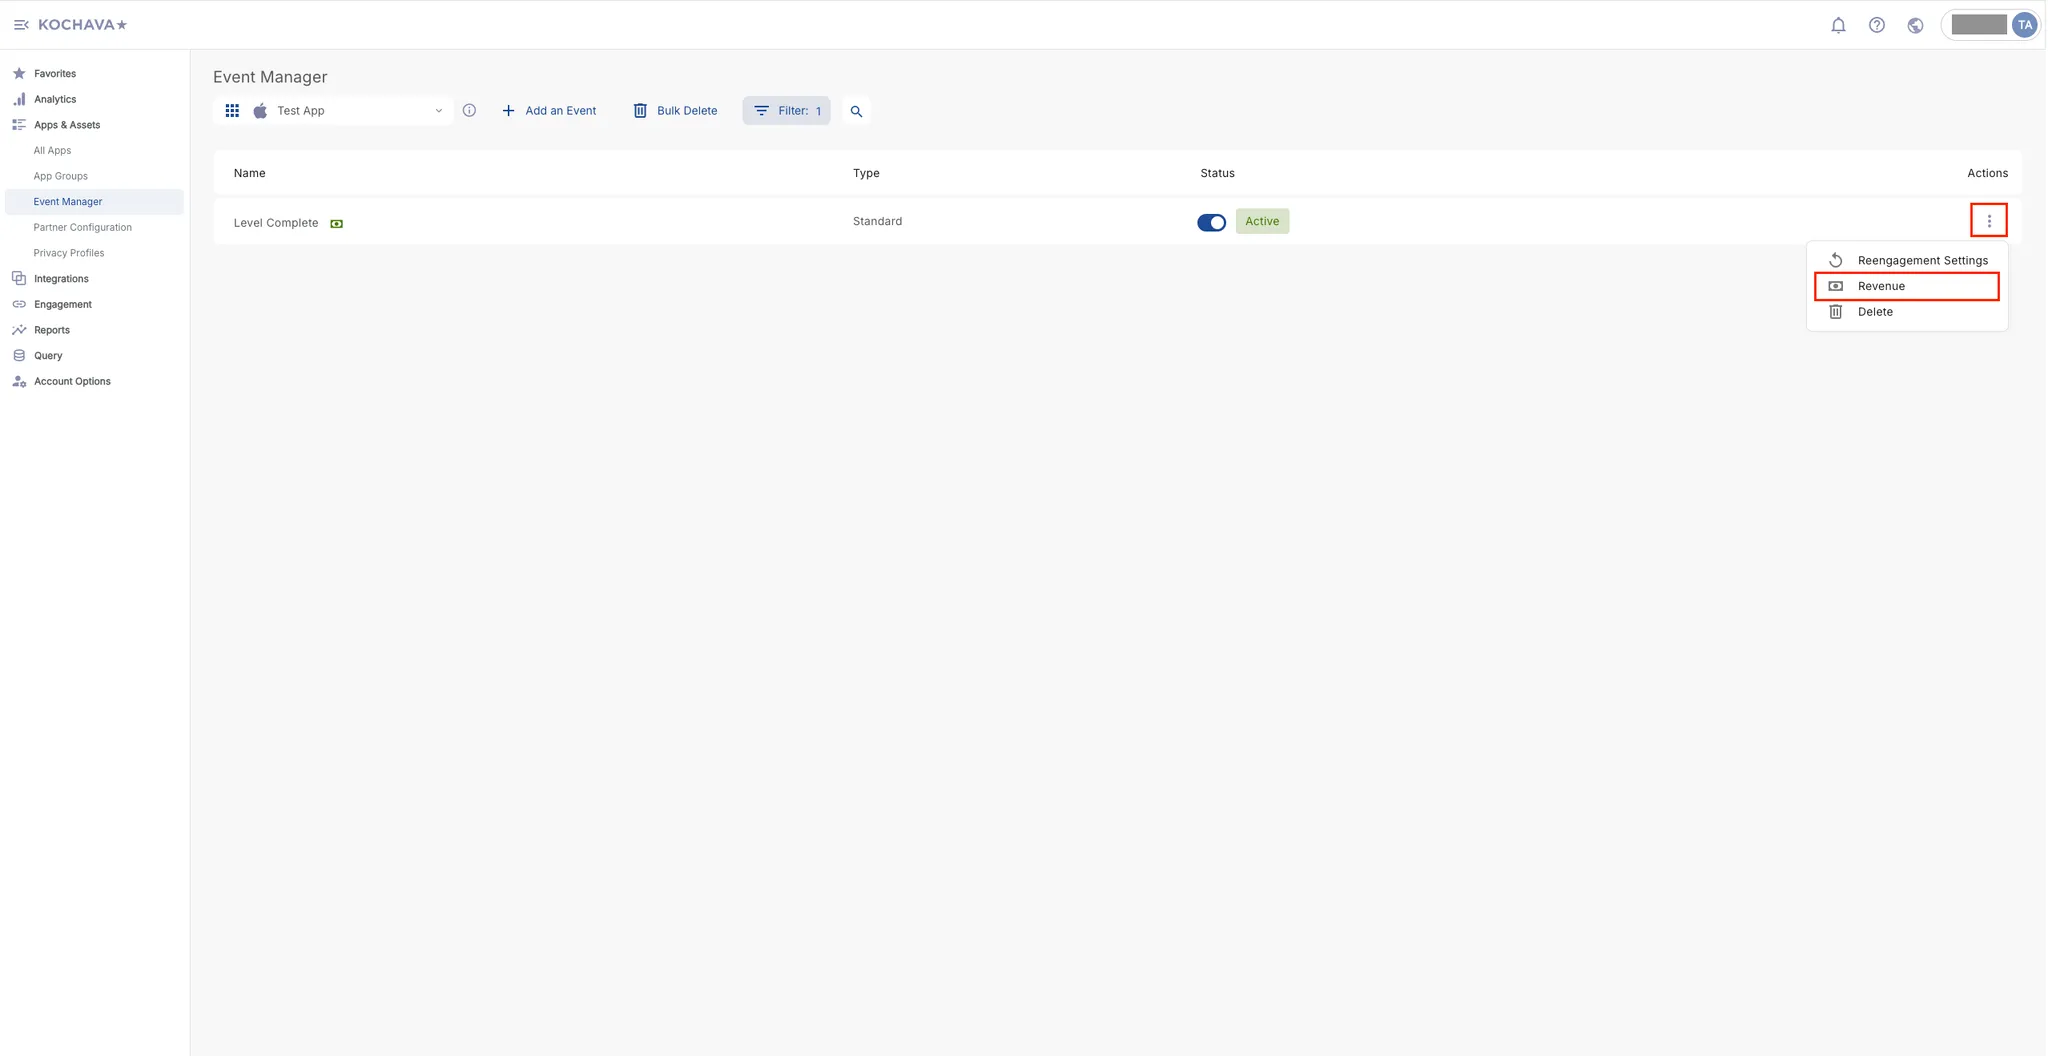
For revenue-based events, do the following steps:
-
Locate the recently configured event in the Event Manager table, and click ⋮ in its row under the Actions header.
-
Select Revenue.
-
Click Confirm.
-
-
Configure Post-Install Event Postback. To configure a post-install event postback, do the following:
-
Go to Apps & Assets > Partner Configuration.
-
Select an app for which you want to configure a post-install event postback.
-
Locate Axon by AppLovin, and click the ↕ option under the Actions header.
-
Locate the post-install event that you created in the previous step, and click the + option in that event’s row.
-
Select General Post Install for non-revenue post-install events and Checkout for revenue-based events in the Event ID field.
-
Select Deliver All in the Impression Conversion Delivery field.
-
Enter your Axon by AppLovin SDK key in the SDK Key field. You can find this key in the Axon by AppLovin dashboard under Account > Keys.
-
Enter the app’s package name / bundle ID in the Package Name Of the App field.
-
Select Realtime Delivery in the Delivery Delay field.
-
Select 3 Attempts in the Retry Attempts field.
-
Select All in the Delivery Method field.
-
Click Save.
-
-
Set Up View-based Attribution (Impression Reconciliation) and Click-based Attribution (Click Reconciliation). To set-up both view-based and click-based attribution, do the following:
-
Go to Apps & Assets > Partner Configuration.
-
Select an app for which you want to configure attribution windows.
-
Locate Axon by AppLovin, and click the ⋮ option under the Actions header.
-
Select Reconciliation.

-
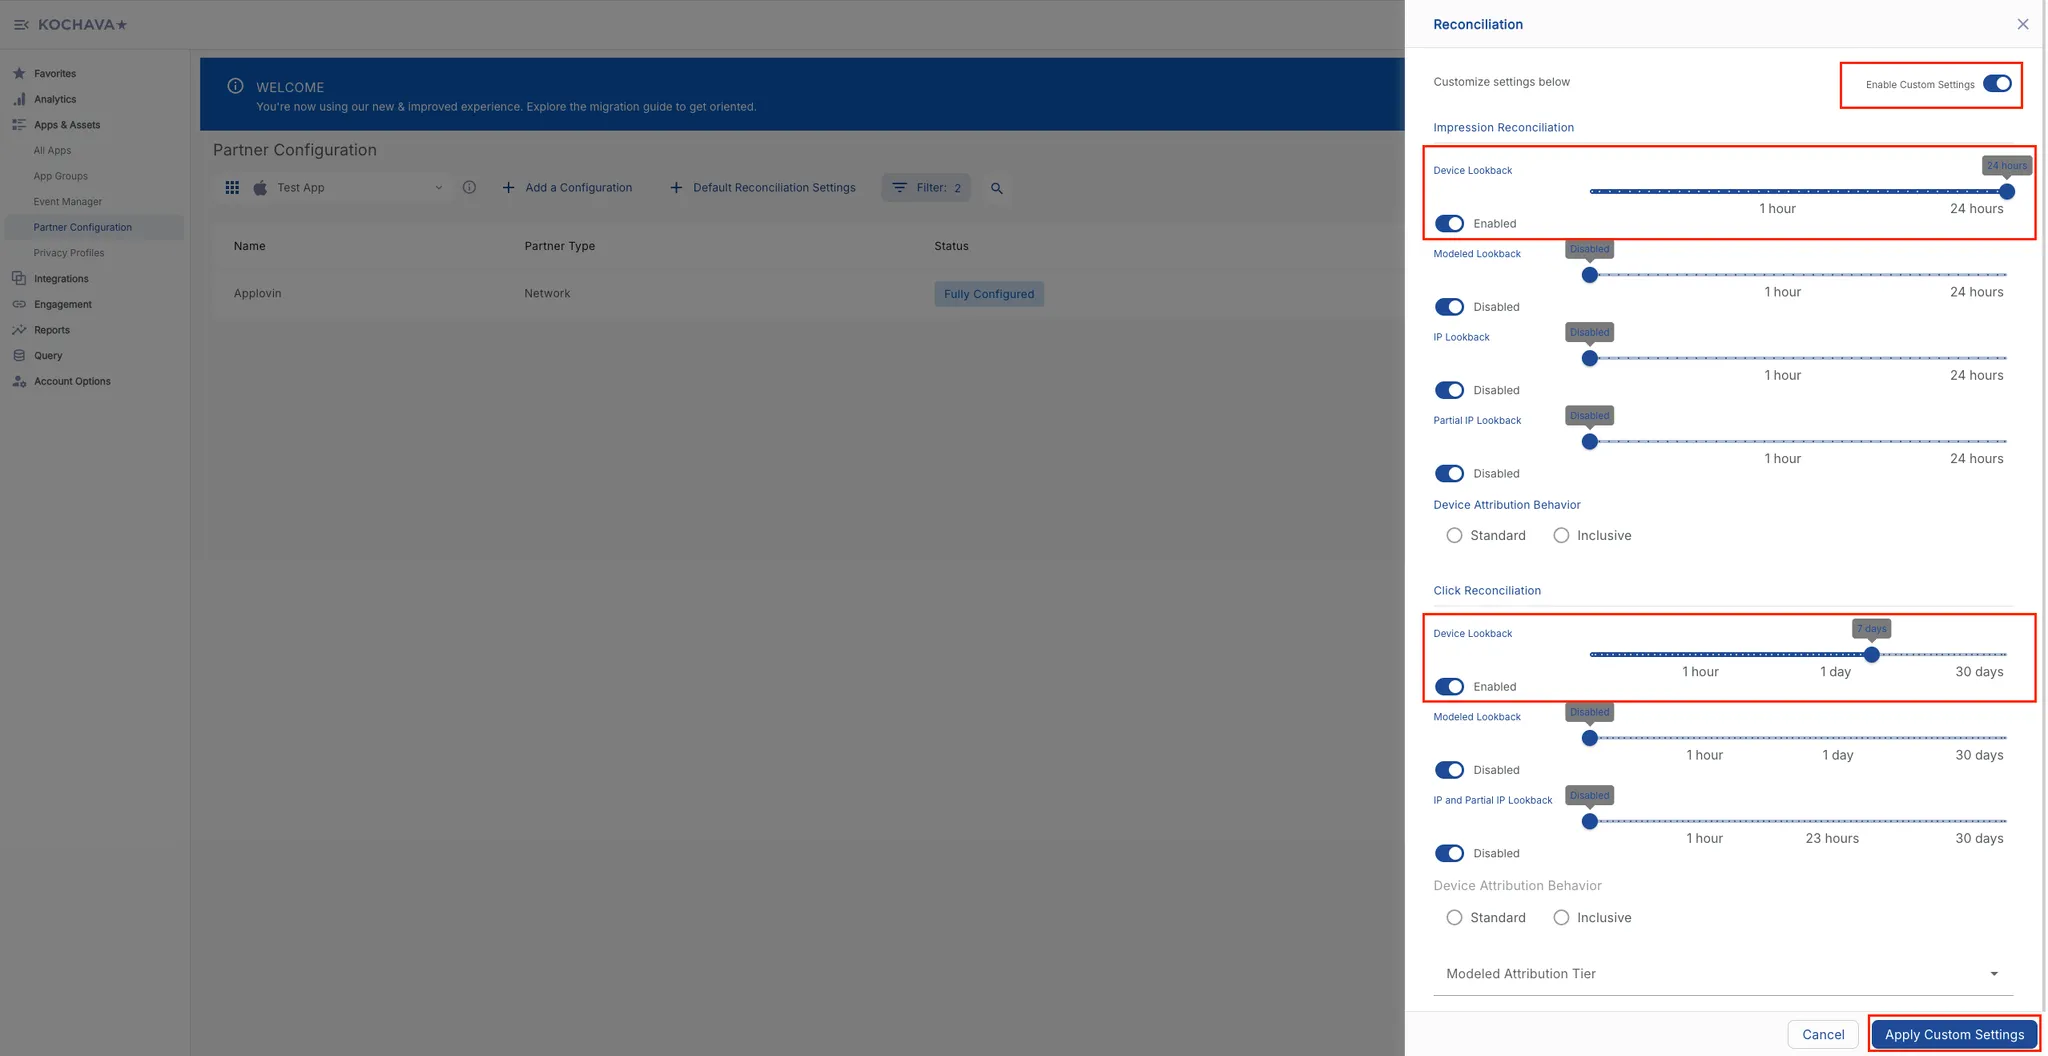
Toggle Enable Custom Settings on.
-
Under the Impression Reconciliation section, set the Device Lookback to 24 hours (minimum) and toggle the switch to Enabled.
-
Under the Click Reconciliation section, set the Device Lookback to seven days (minimum) and toggle the switch to Enabled.
-
Click Apply Custom Settings.
-
-
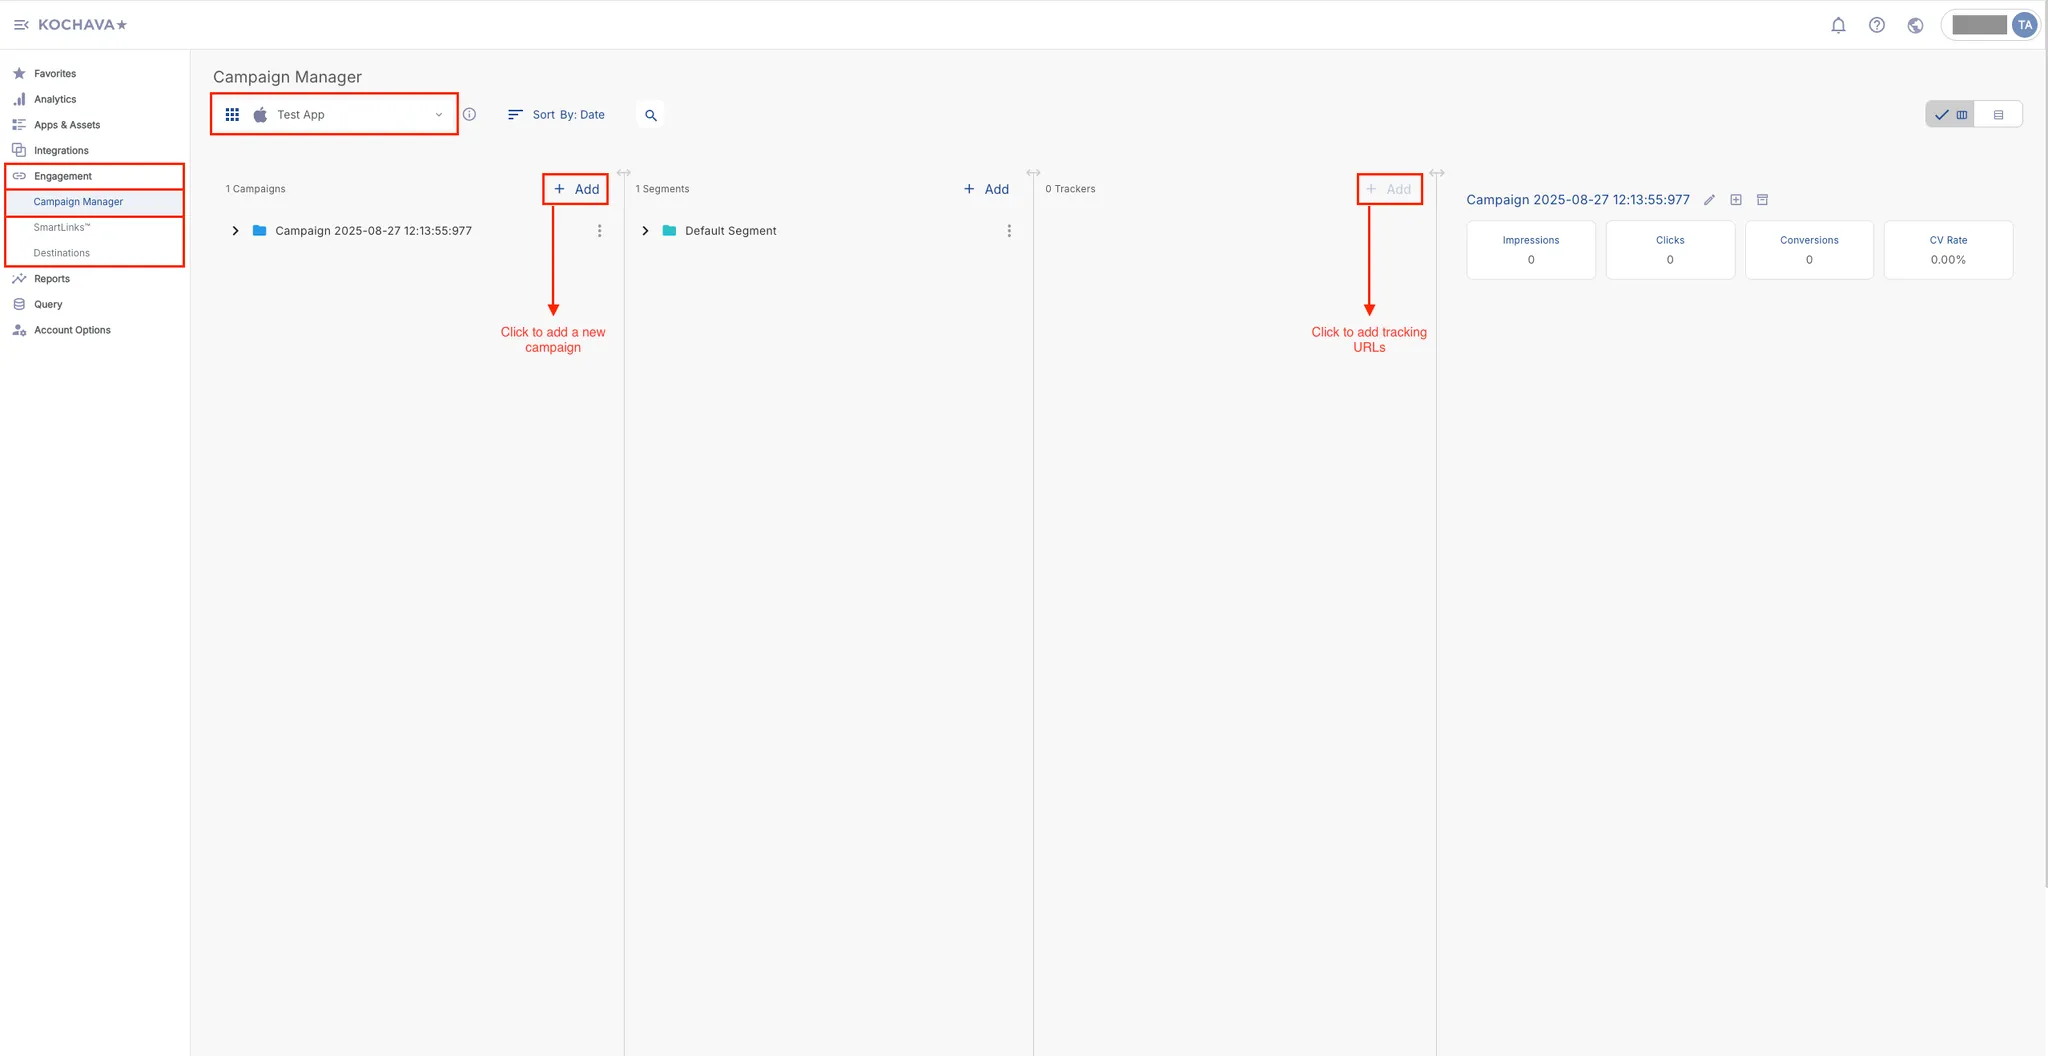
Generate Tracking URLs. To generate click and impression tracking URLs, do the following:
- Select Engagement > Campaign Manager.
- Select an app for which you want to generate tracking URLs.
- Select or add a campaign.
- Click + Add in the Trackers section.