AppsFlyer Tracking
You must completely set up your MMP to ensure accurate data tracking and optimal campaign performance. Complete all the steps listed below before you launch any campaign. Unless otherwise indicated, carry out each step within the AppsFlyer dashboard.
Configuring Attribution
-
Configure Axon by AppLovin as a Partner. To configure Axon by AppLovin as a partner, do the following:
-
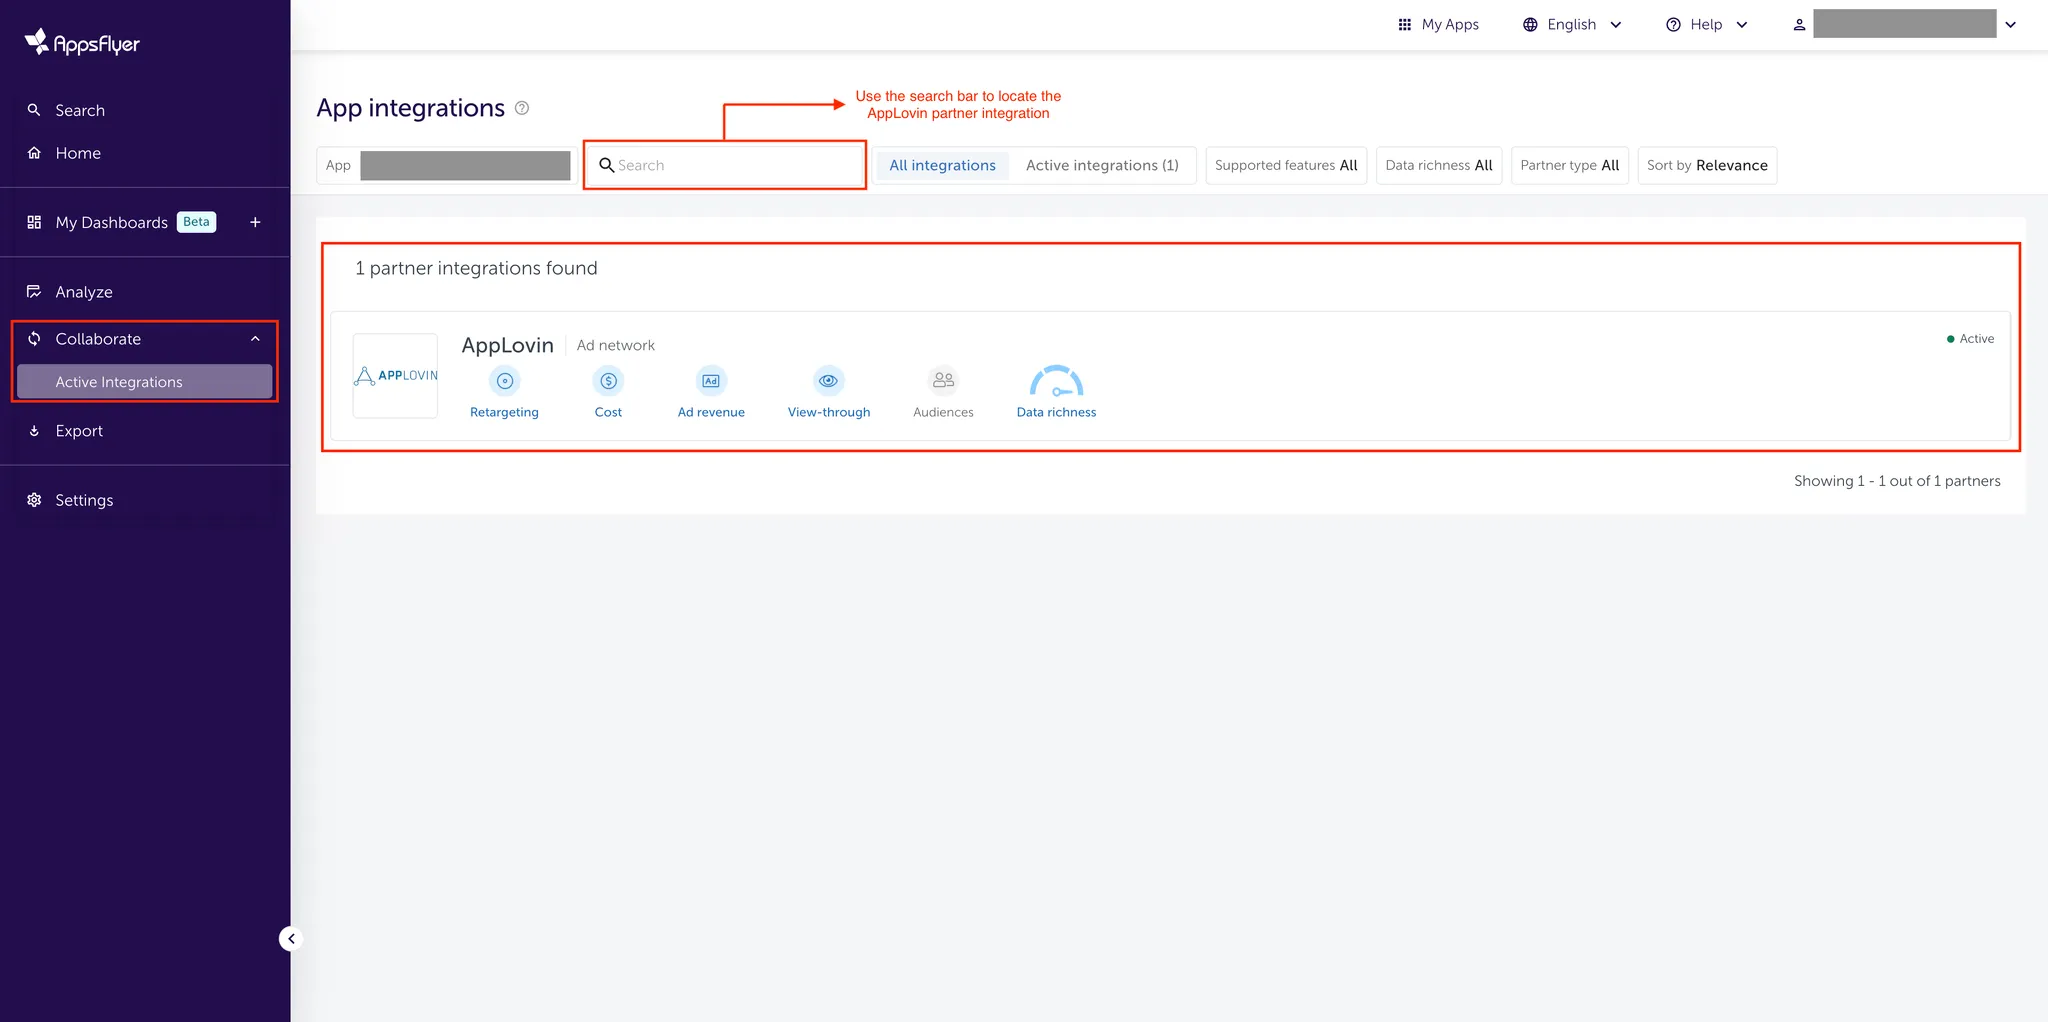
Open appsflyer.com in your browser.
-
Choose which app you want to enable for data sharing with Axon by AppLovin on the AppsFlyer homepage.
-
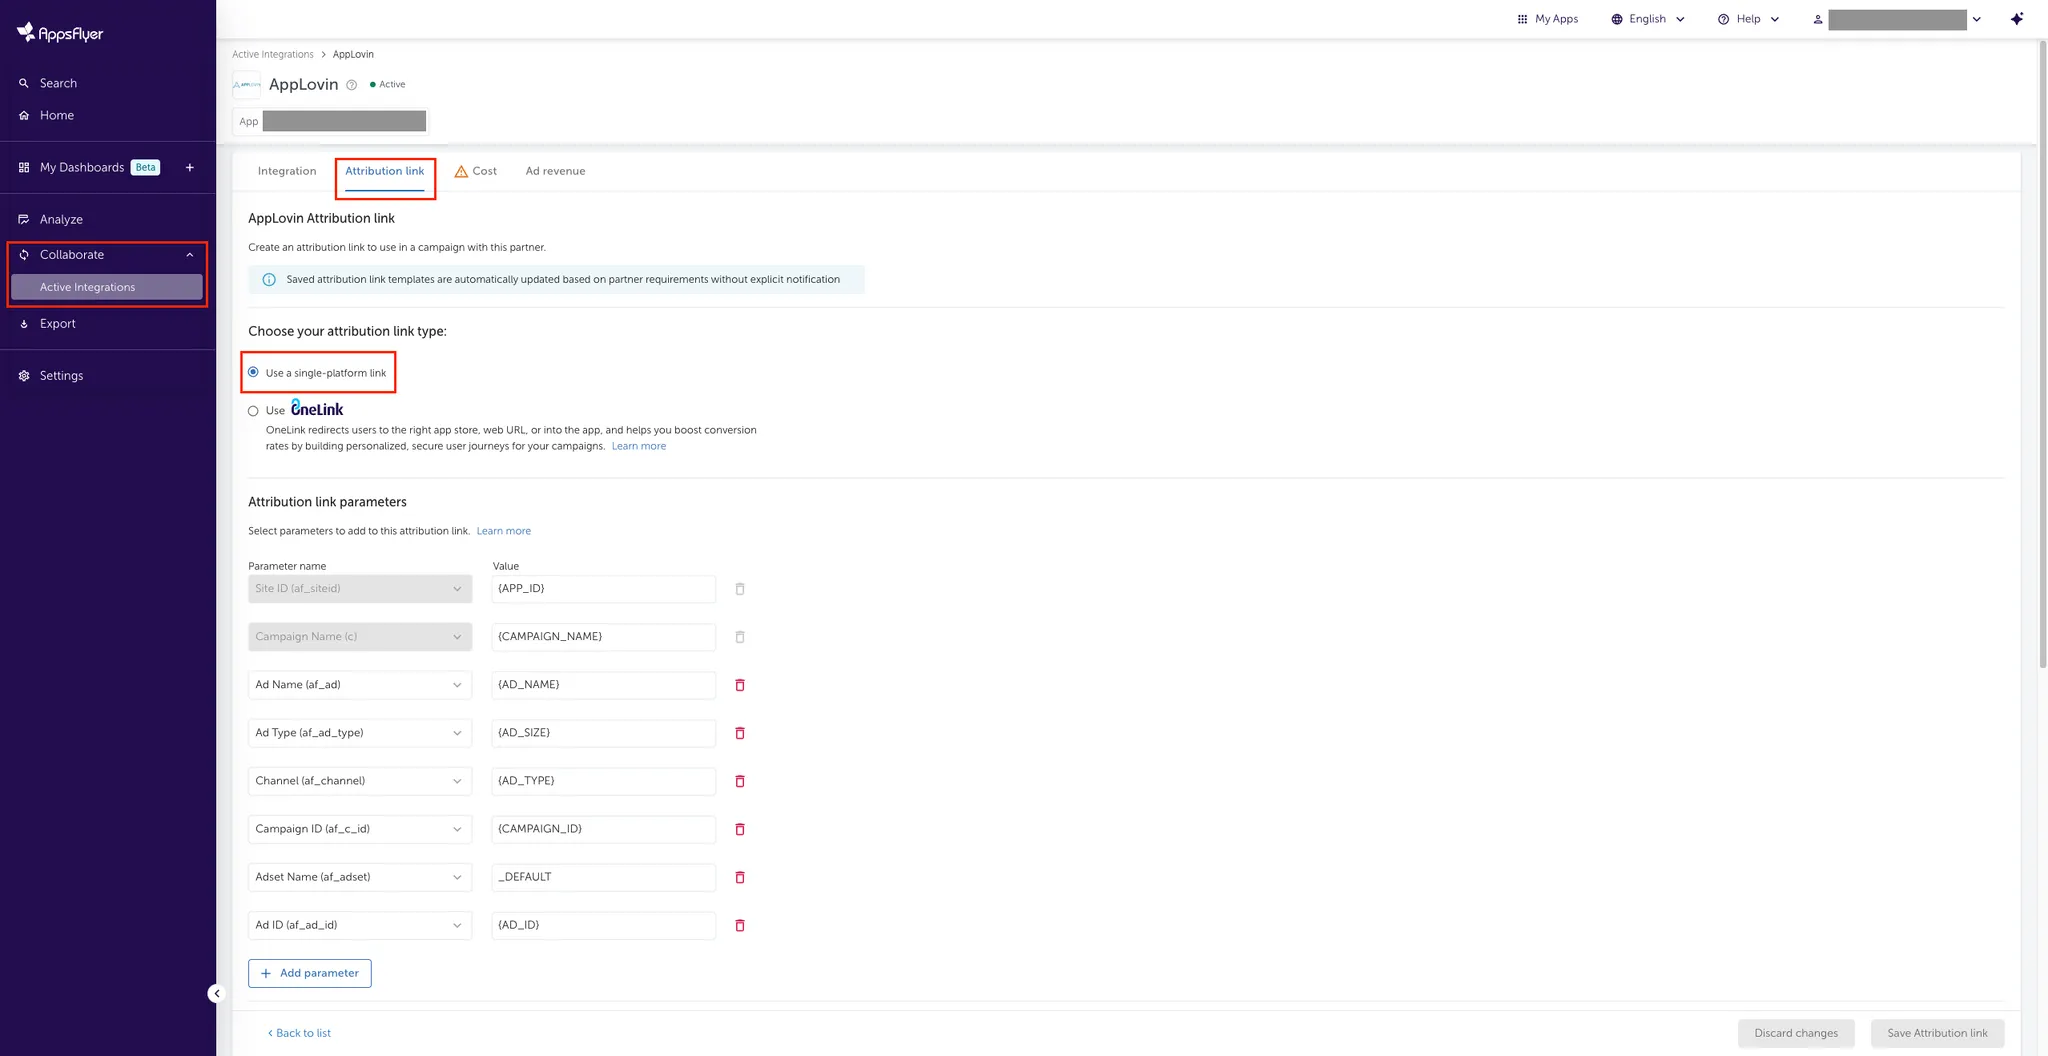
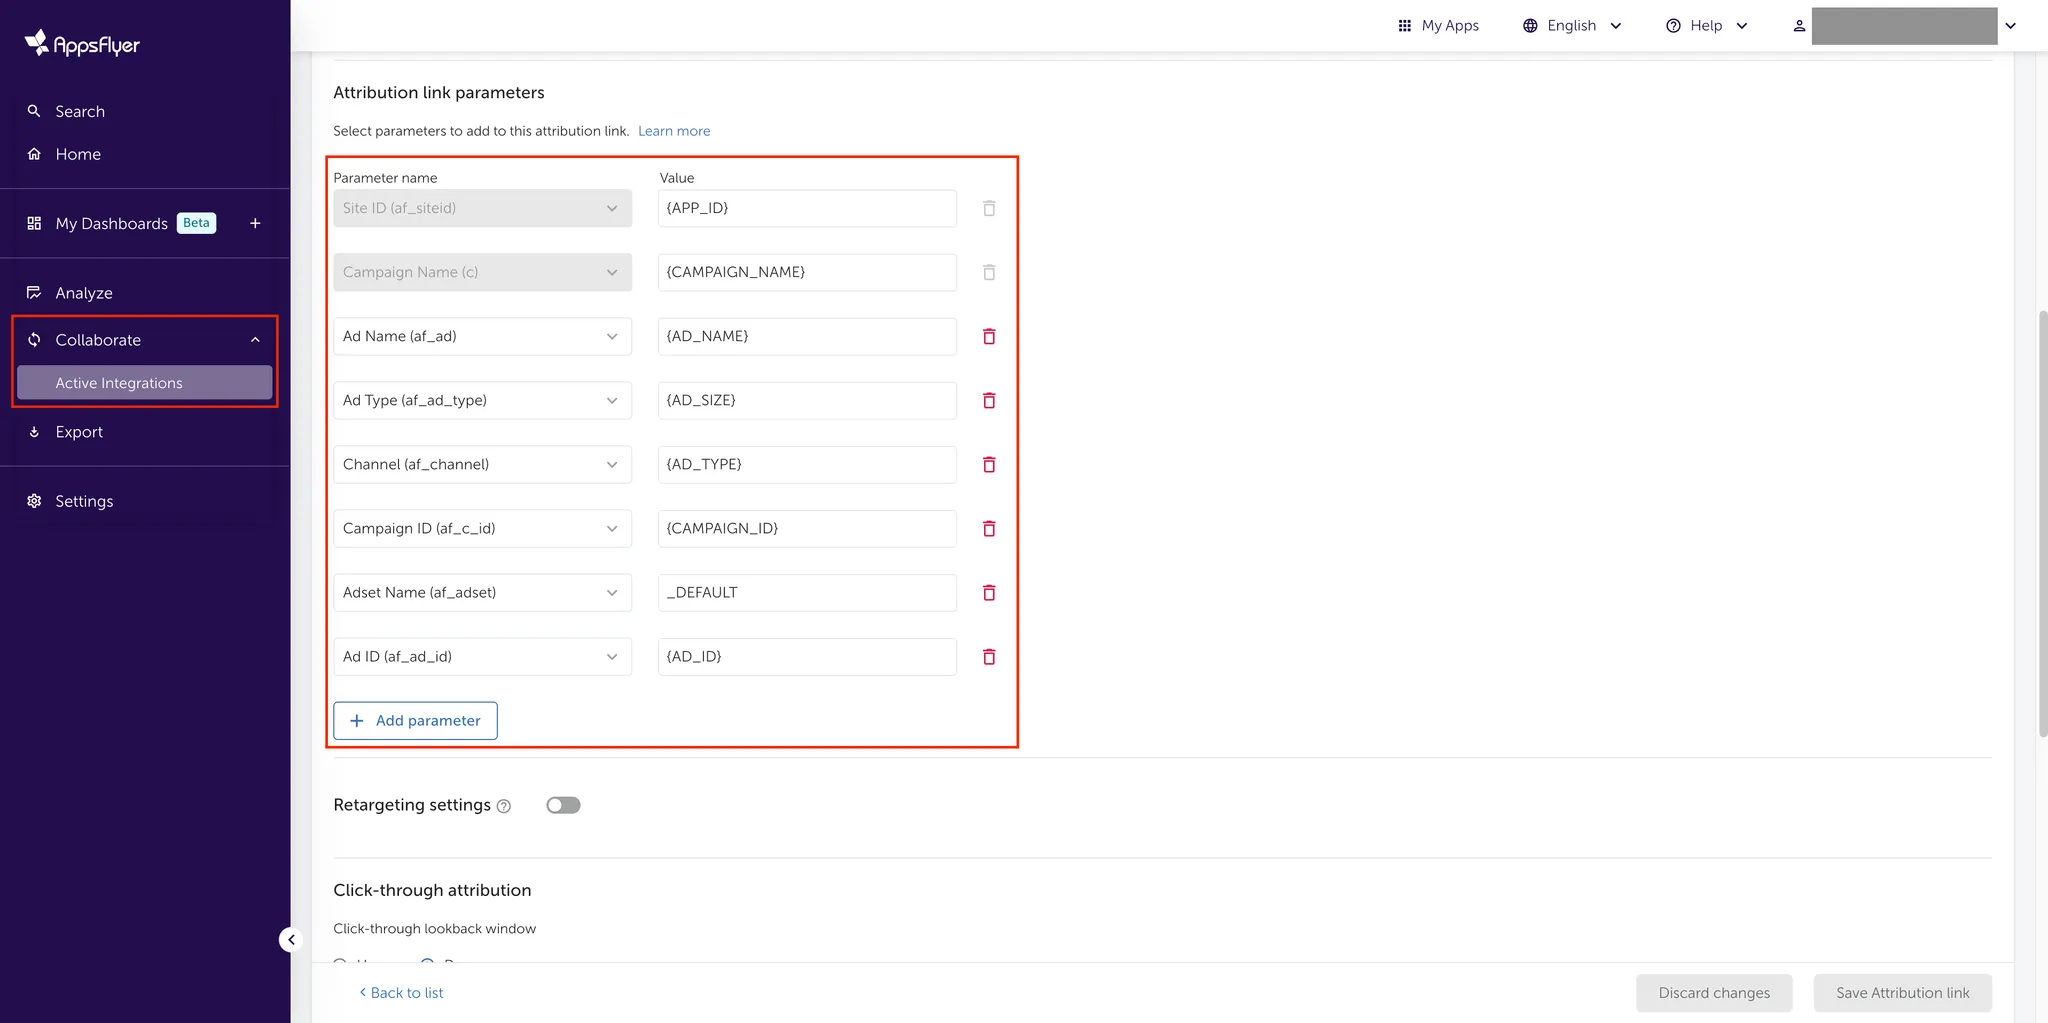
Select Collaborate > Active Integrations.
-
To activate the Axon by AppLovin partnership, search “Axon by AppLovin” using the search bar, then select it from the search results.
-
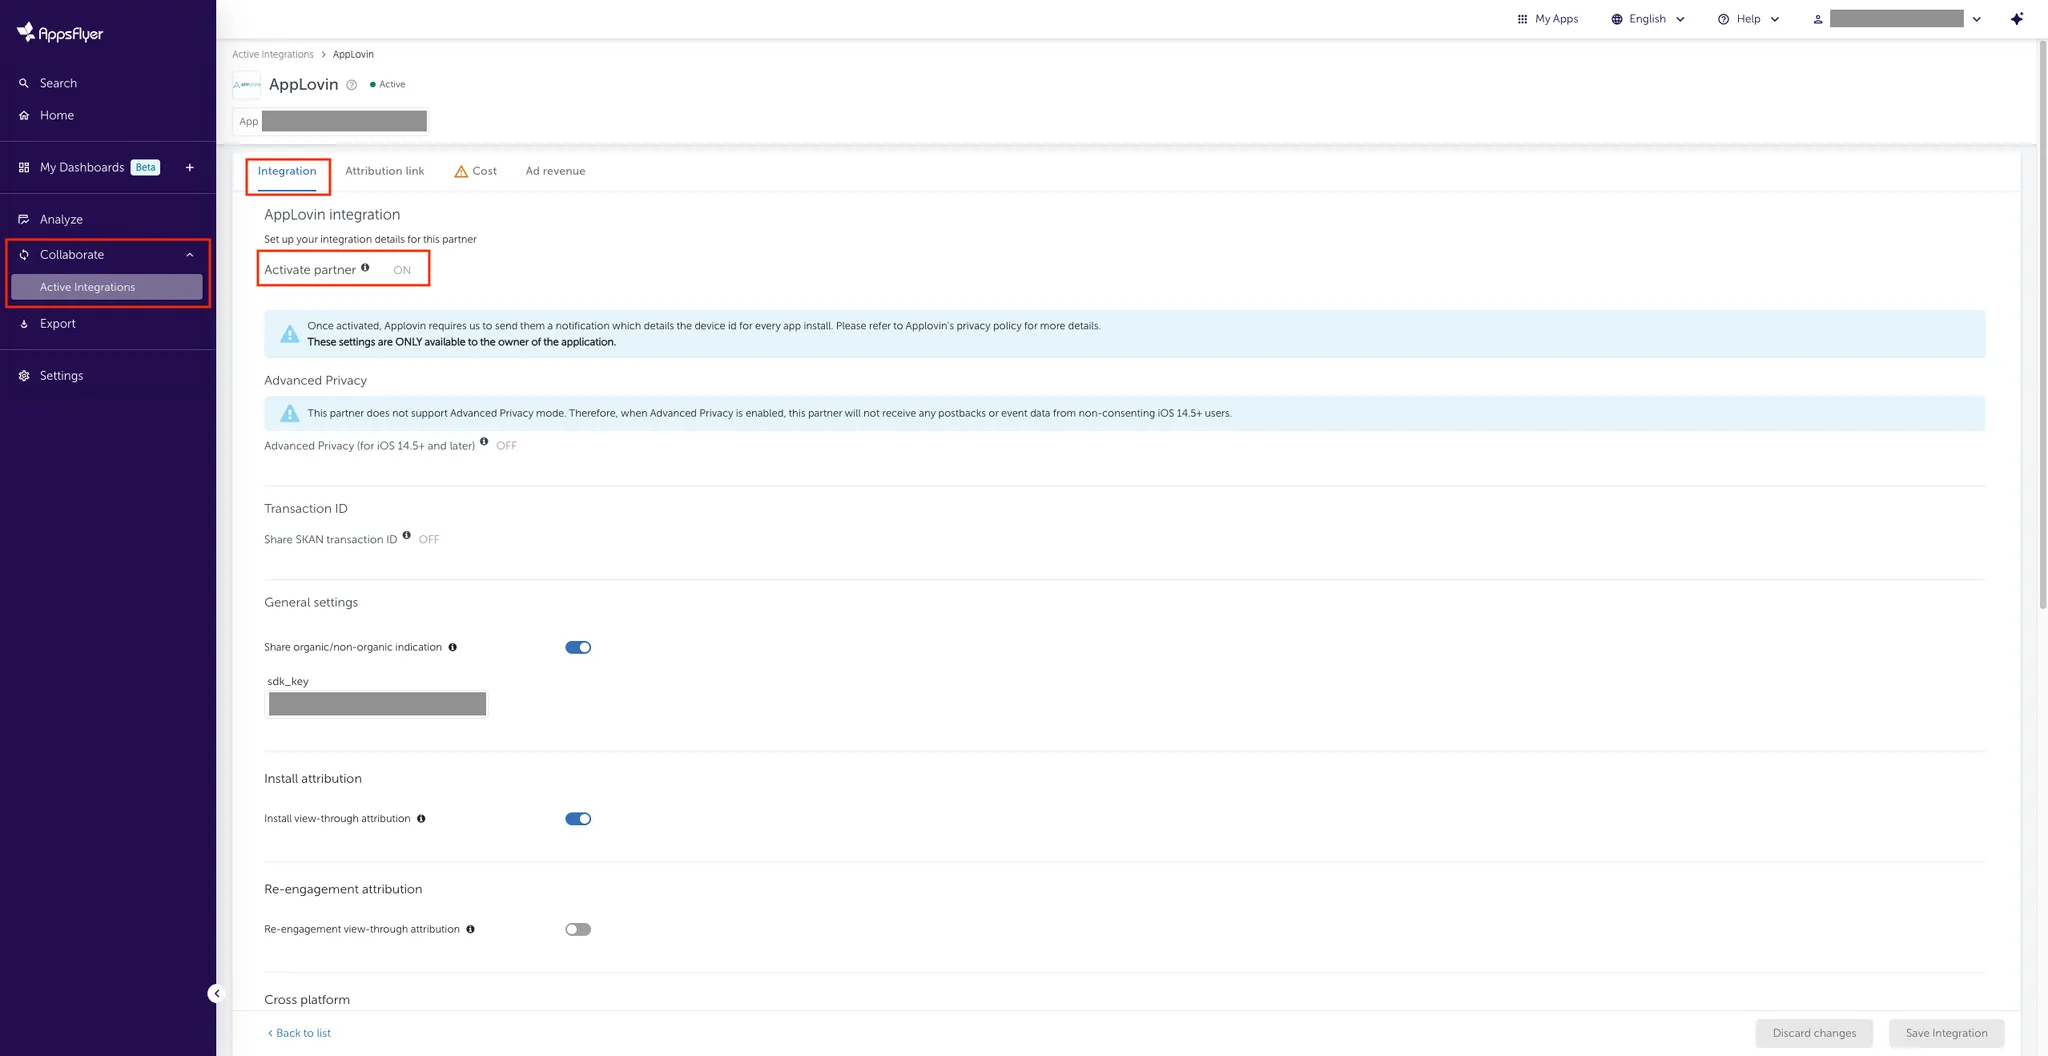
Select the Integration tab.
-
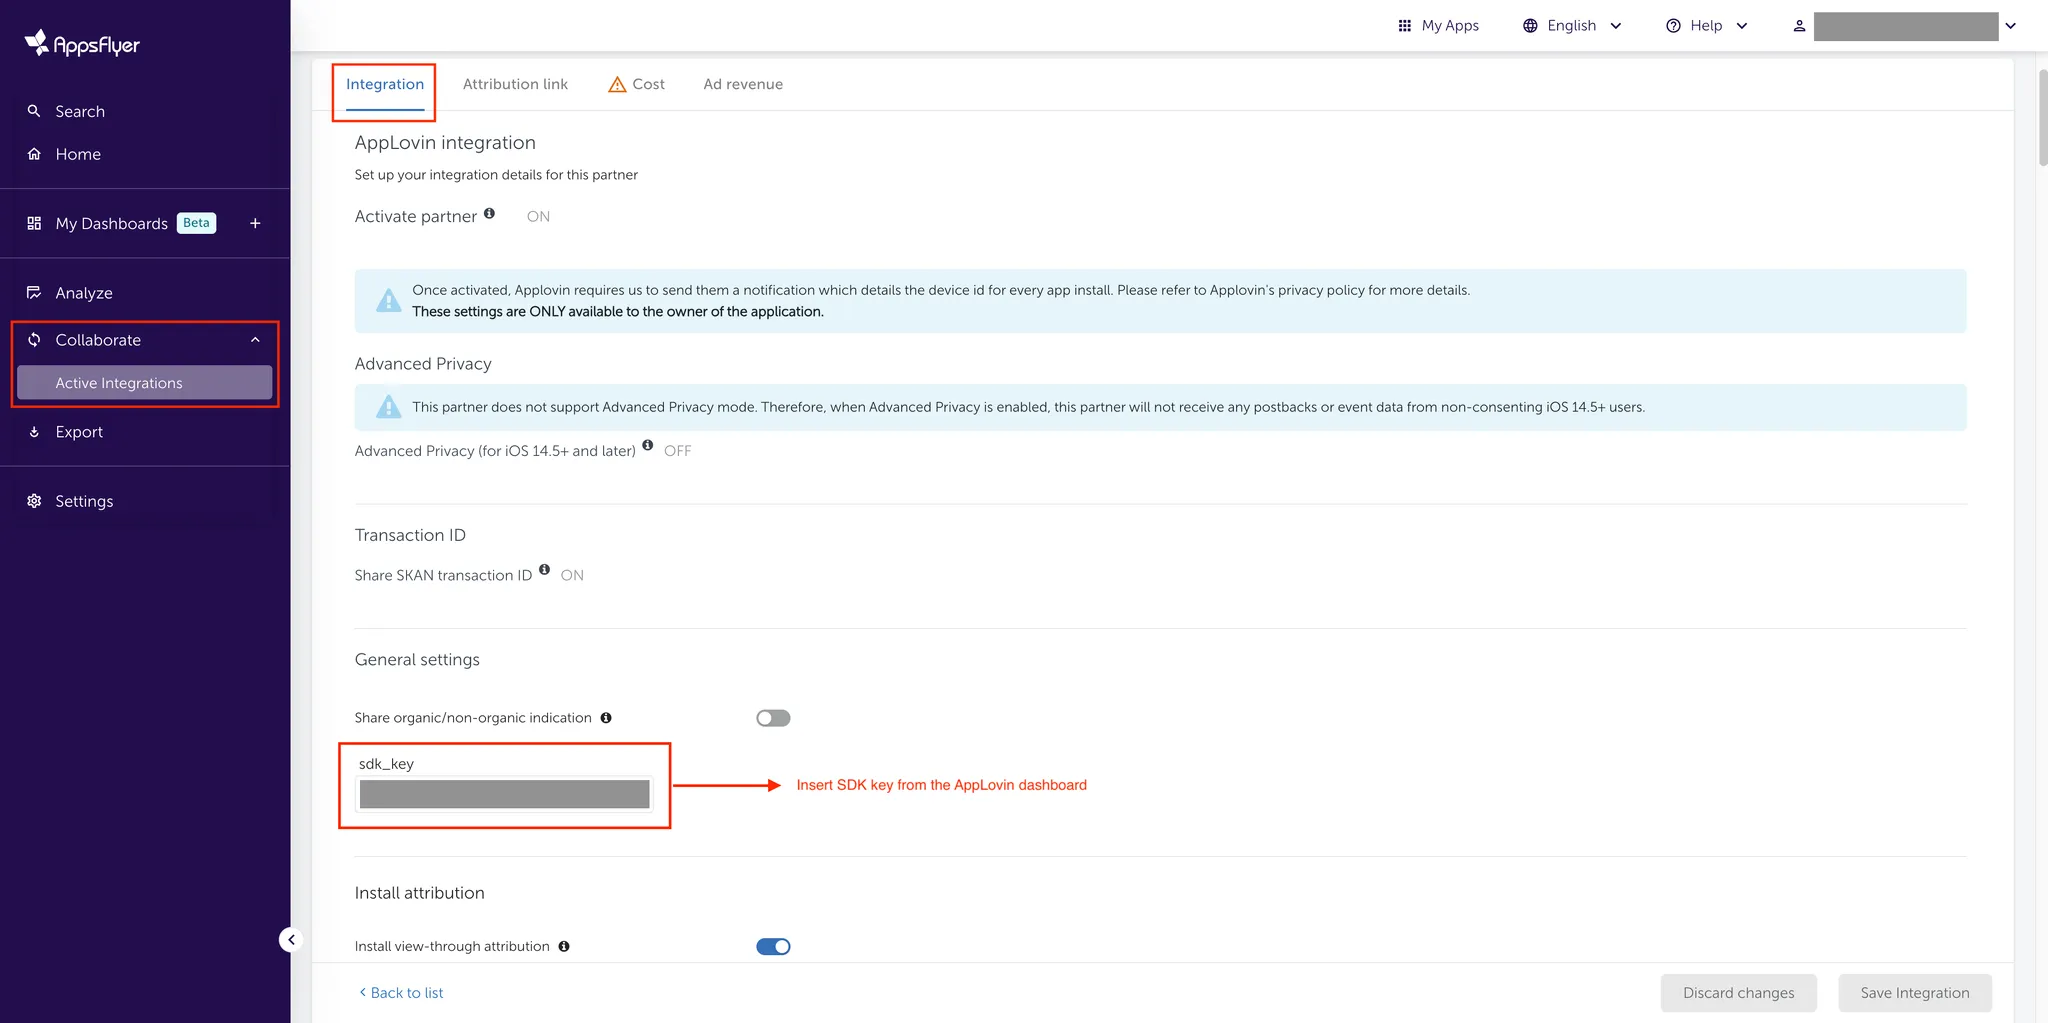
Toggle Activate partner to ON.
-
Click Save Integration.
-
-
Configure Privacy Settings. You can skip this step for Android apps. To configure privacy settings for iOS apps, do the following:
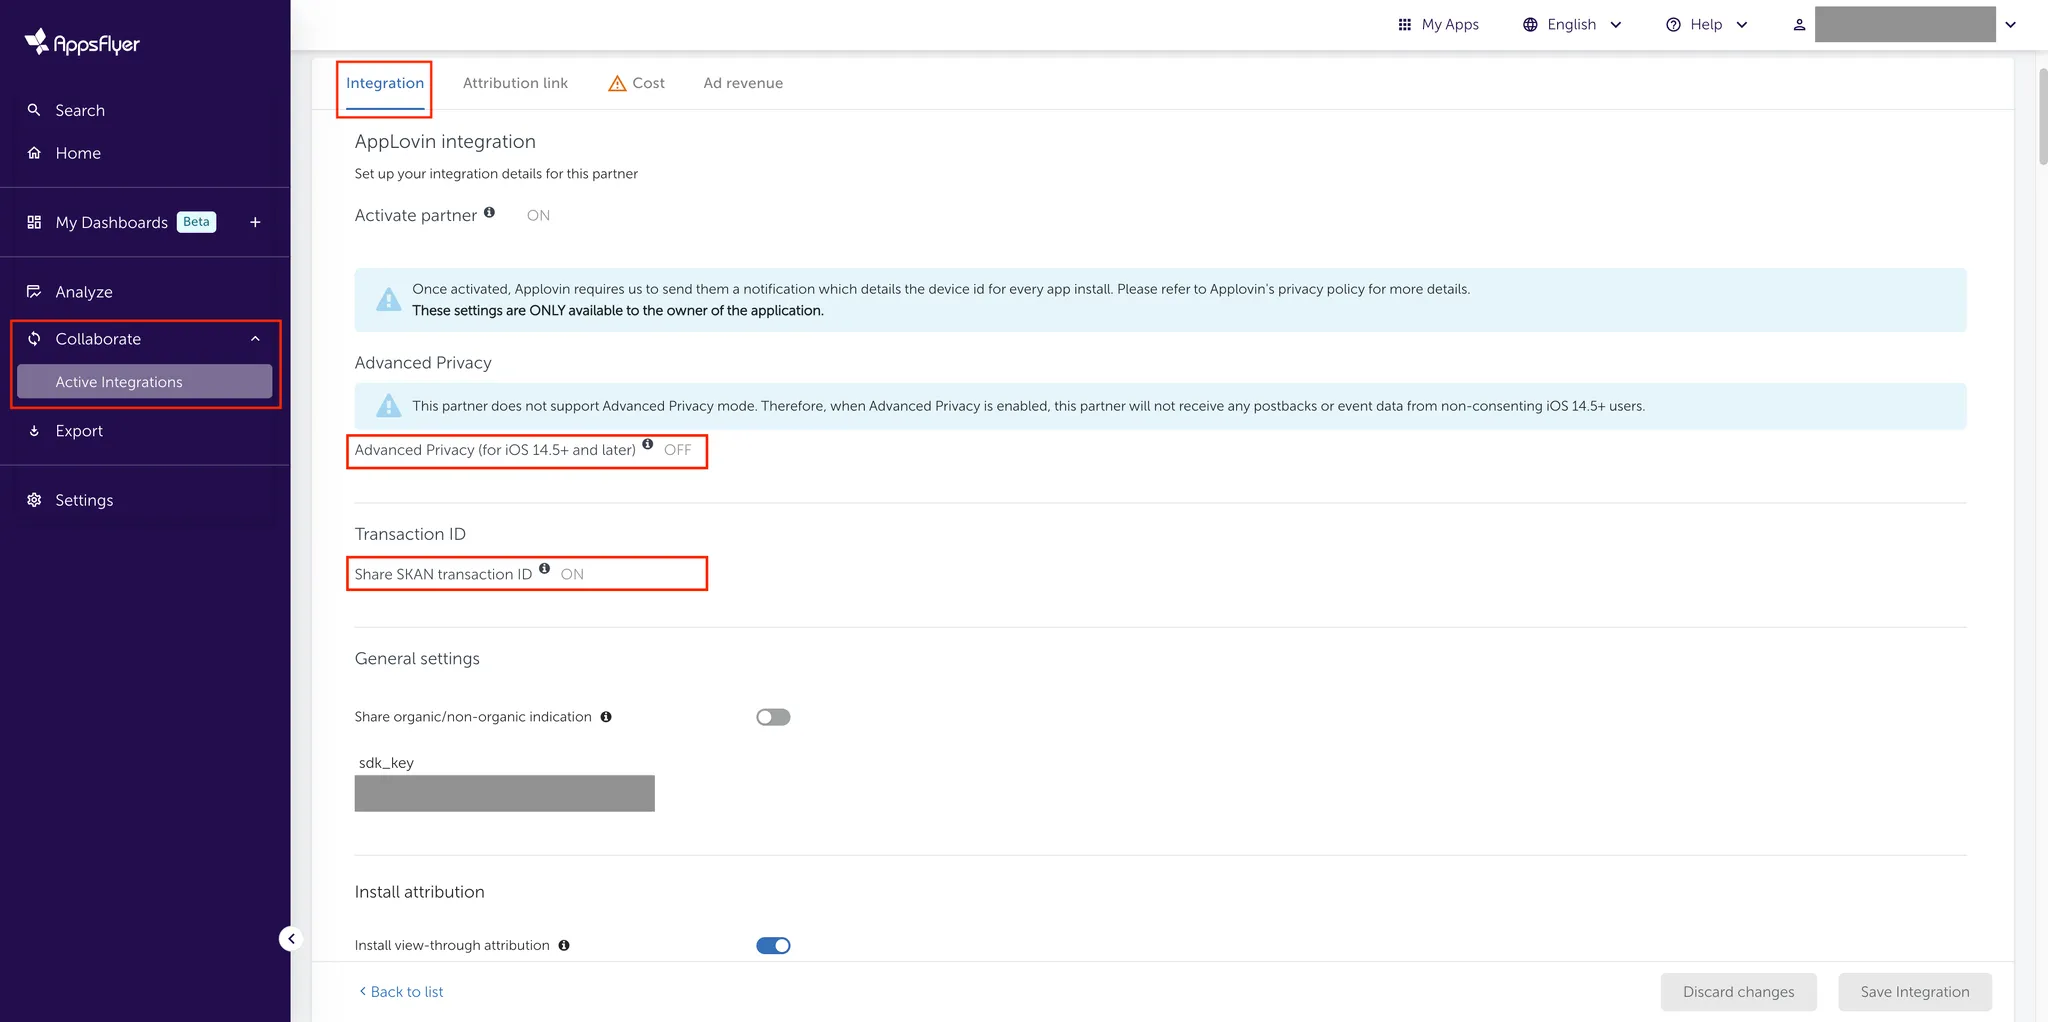
- In the Advanced Privacy subsection, toggle Advanced Privacy (for iOS 14.5+ and later) to OFF.
- In the Transaction ID subsection, toggle Share SKAN transaction ID to ON.
-
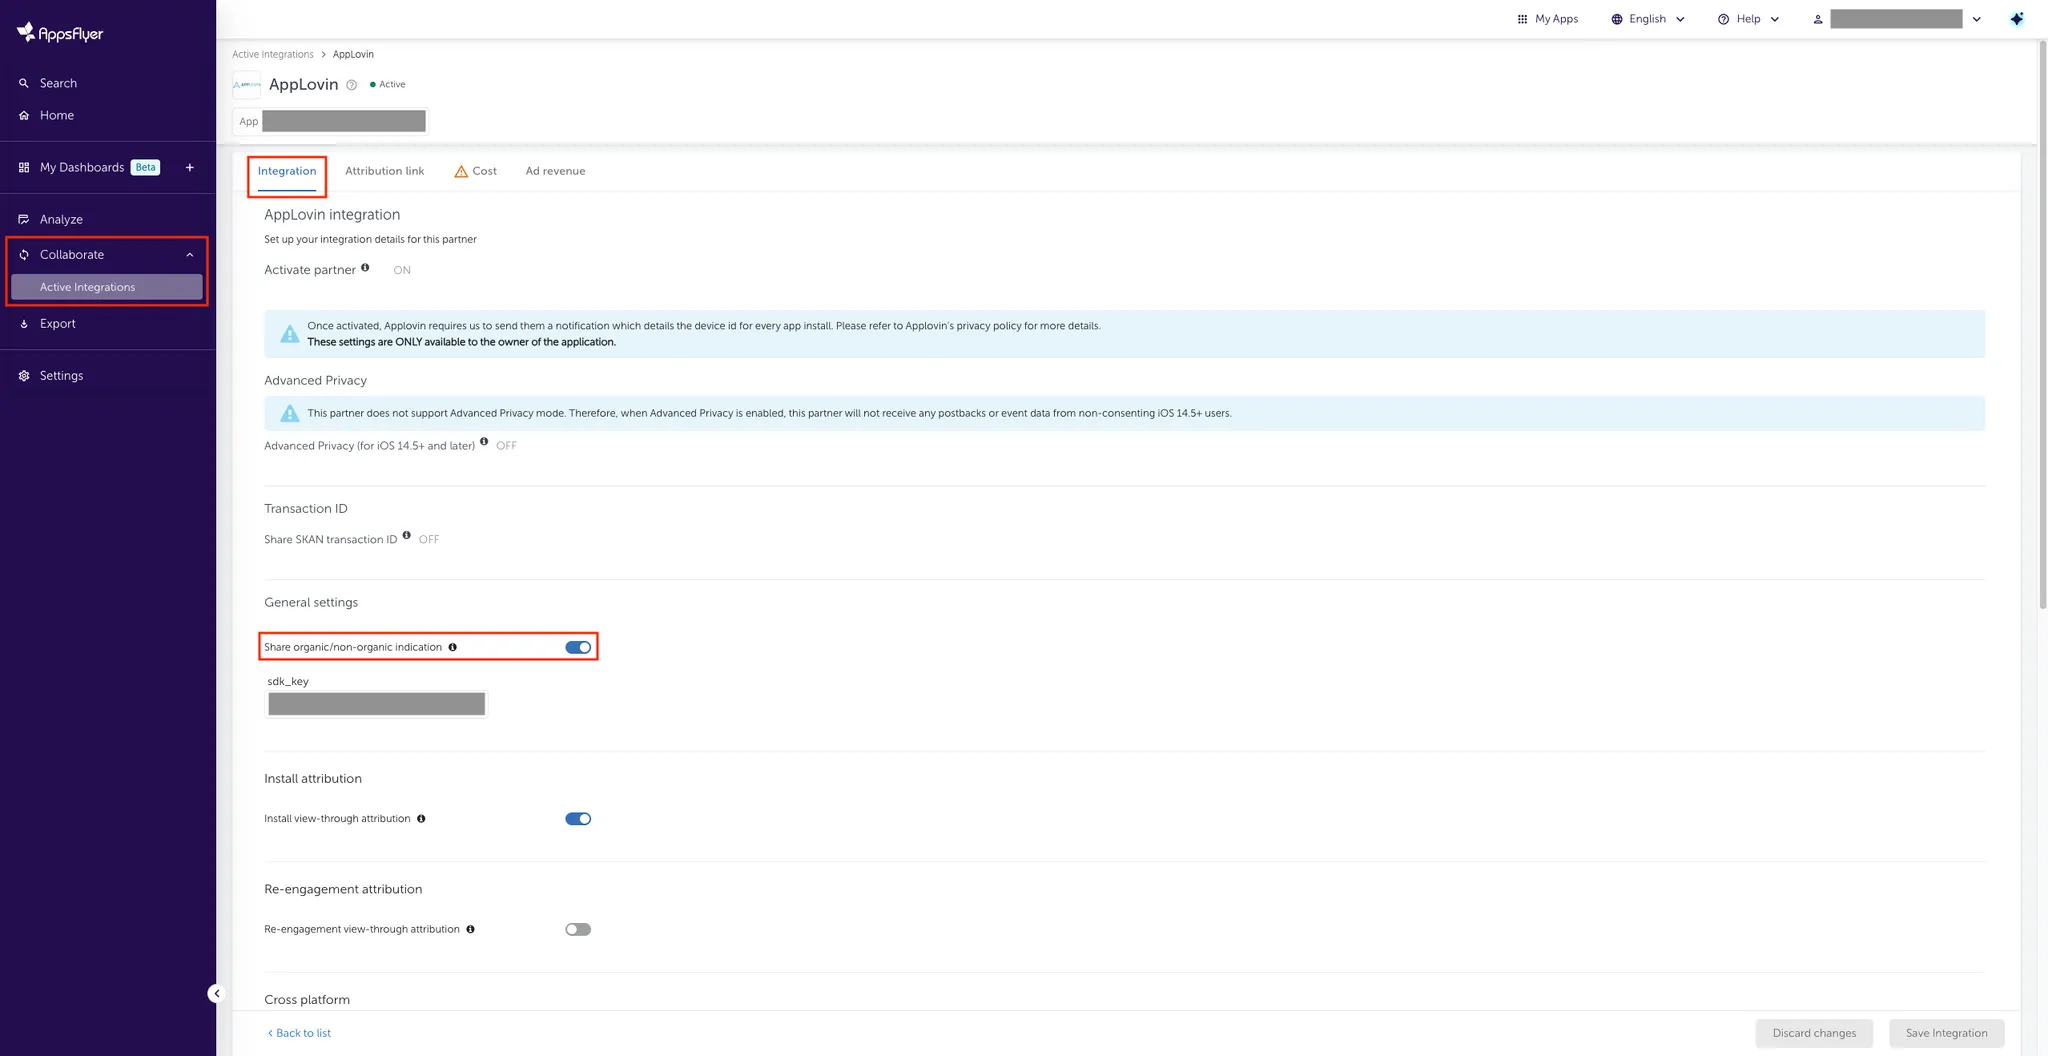
Enable Organic Data Indication. In the General settings subsection, toggle Share organic/non-organic indication to ON for full attribution coverage.
-
Configure SDK Key. In the General settings subsection, enter your Axon by AppLovin SDK key in the sdk_key field. You can find this key in the Axon by AppLovin dashboard under Account > Keys.
-
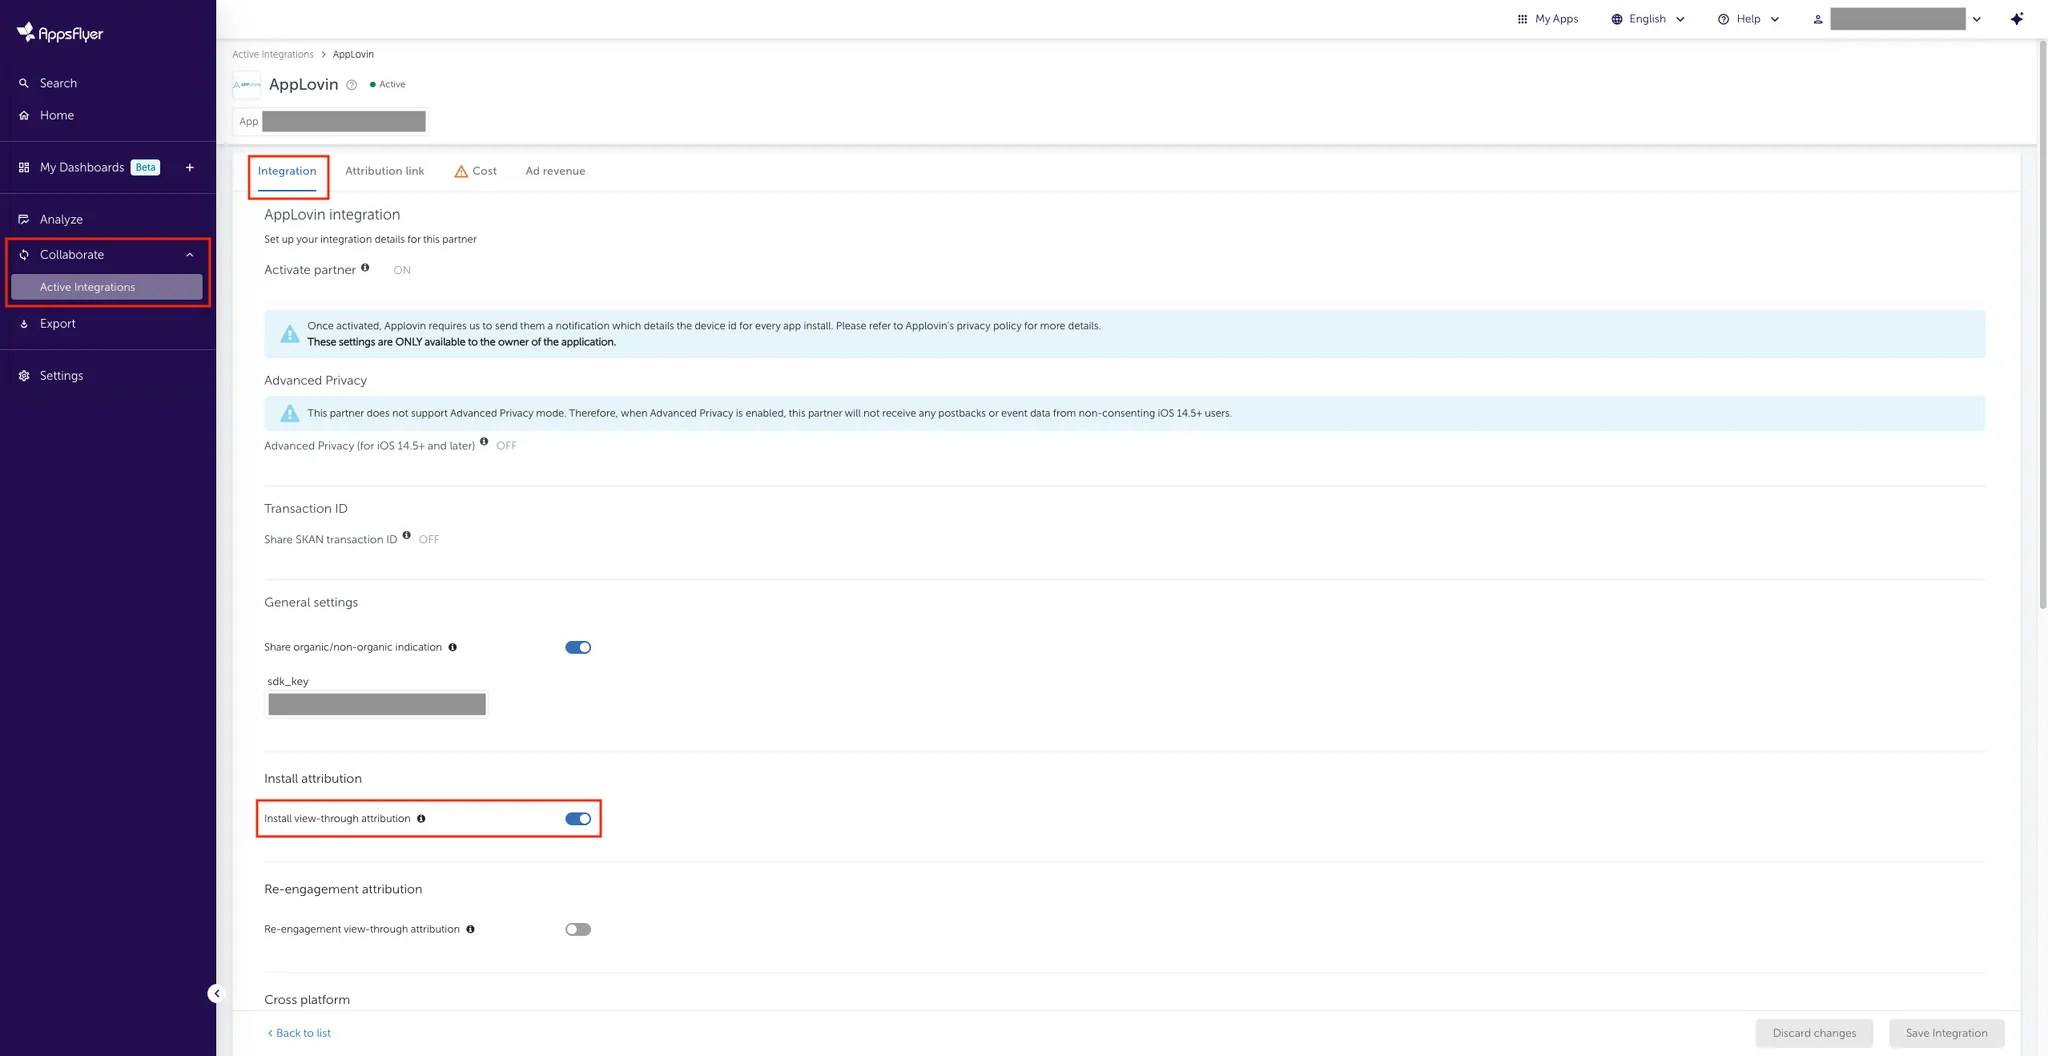
Enable Install Attribution. In the Install attribution subsection, toggle Install view-through attribution to ON to measure view-through ad engagements.
-
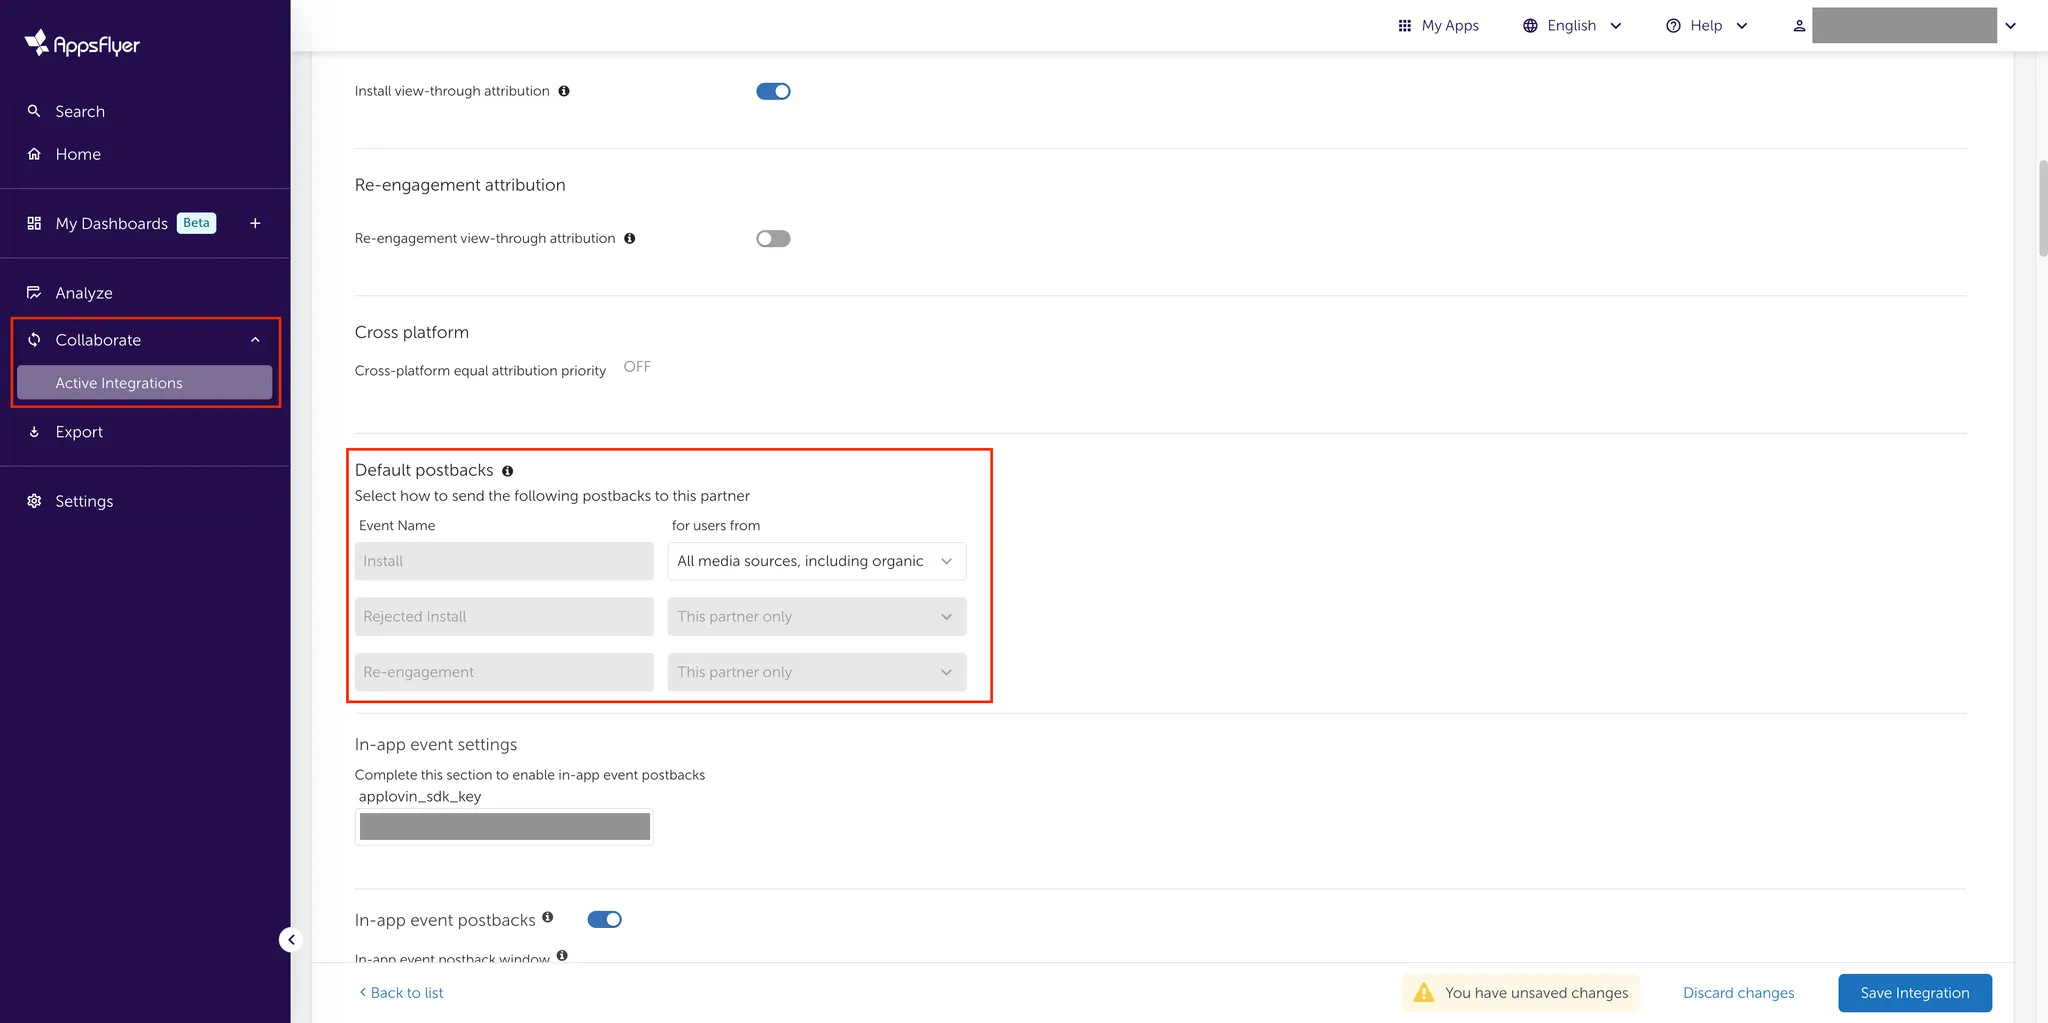
Configure Install Postbacks. Select how to send install postback data to Axon by AppLovin. For each event, set the for users from field to All media sources, including organic.
-
Configure In-app Event Postback Settings. To configure in-app event postbacks such as checkout or other post-install events, do the following:
- In the In-app event settings subsection, enter your Axon by AppLovin SDK key in the axon_sdk_key field. You can find this key in the Axon by AppLovin dashboard under Account > Keys.
- Toggle In-app event postbacks to ON.
- Set In-app event postbacks window to at least six months.

-
Map In-app Event Postbacks. In the In-app event postbacks subsection, map all postback events by selecting and completing the required details for each field: AppsFlyer event, mapped to partner event, for users from, and including. In the mapped to partner event field, you can map events as landing, checkout, or postinstall. Set your AppsFlyer events according to the following table:
Events mapped to partner event for users from including any app open events landing All media sources, including organic No values & revenue any revenue events checkout All media sources, including organic Values & revenue all other events postinstall All media sources, including organic No values & revenue 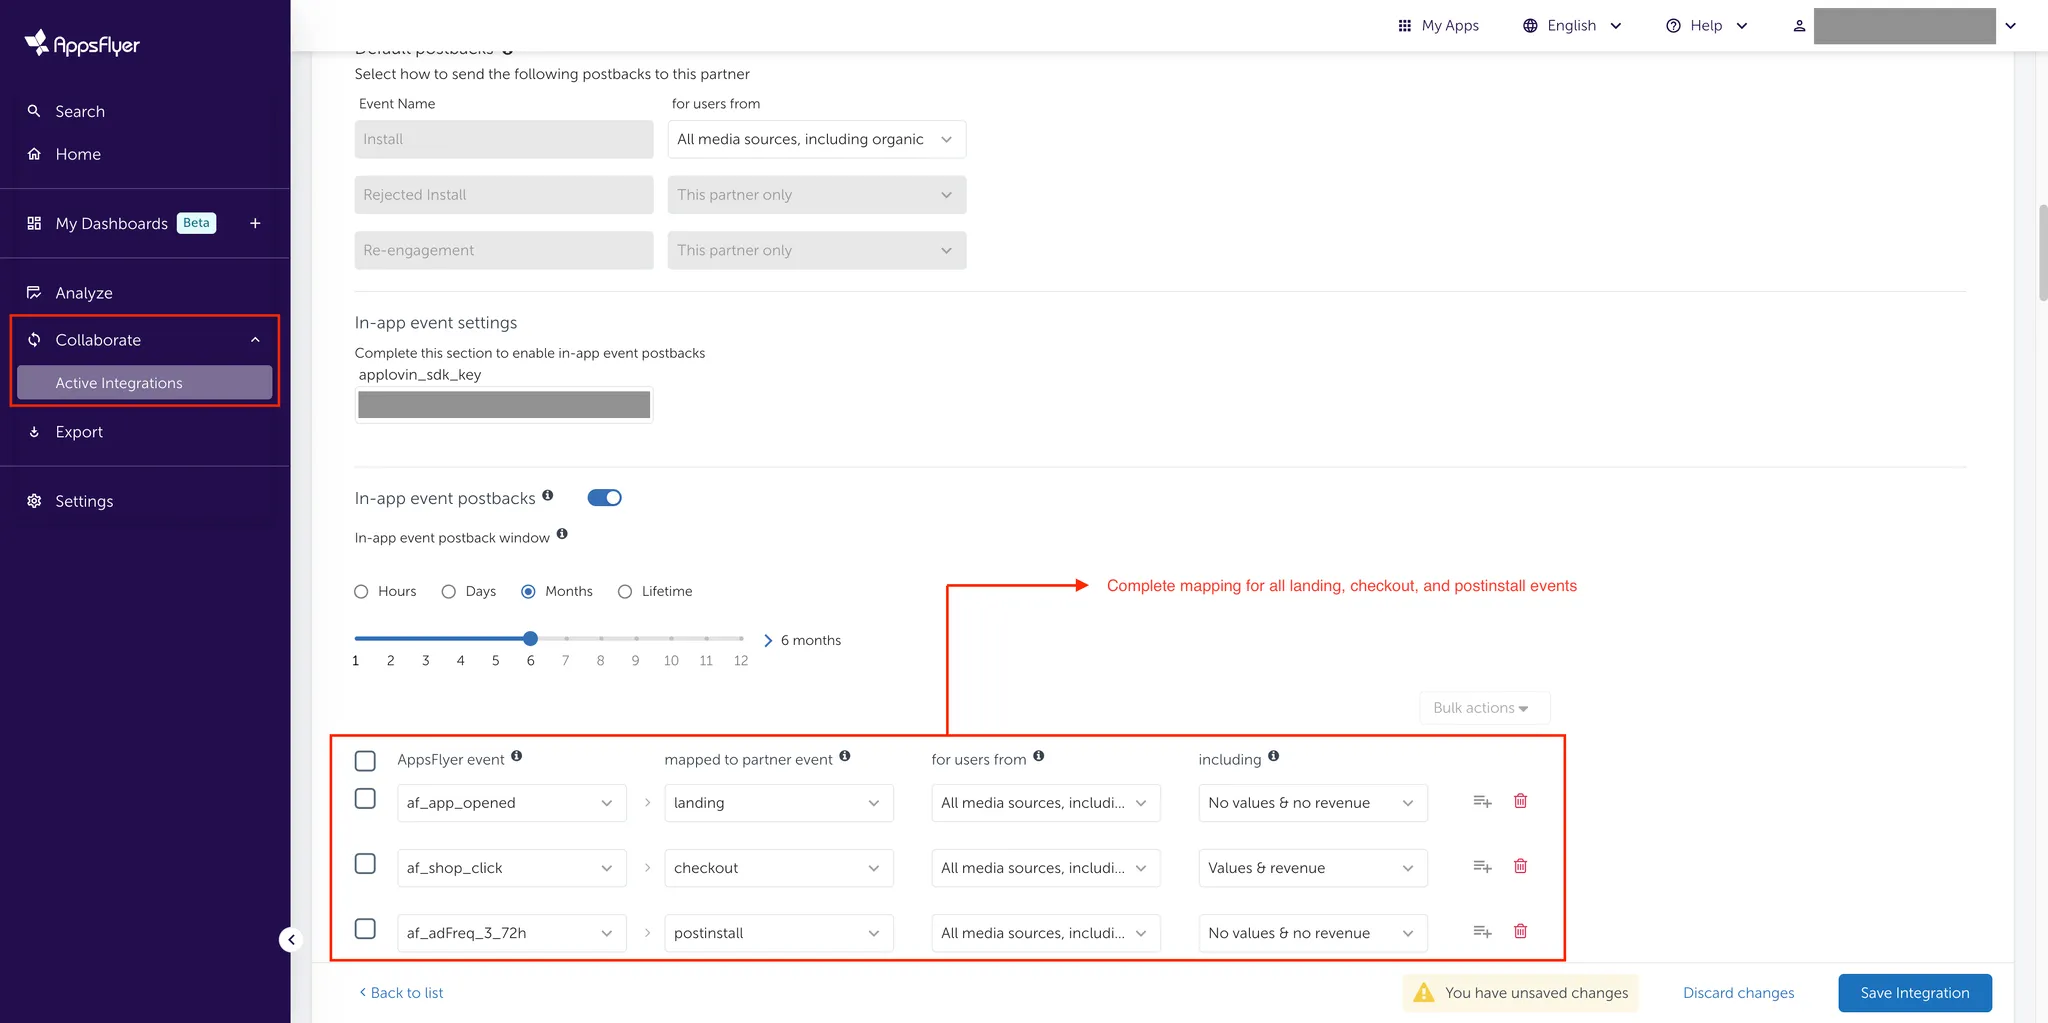
-
Configure Attribution Link Type
- Select the Attribution link tab.
- In the Choose your attribution link type: subsection, choose Use a single-platform link.
-
Configure Tracking URLs. In the Attribution link parameters subsection, select Parameter names and their corresponding Values to auto-populate your click and view-through tracking URLs.
-
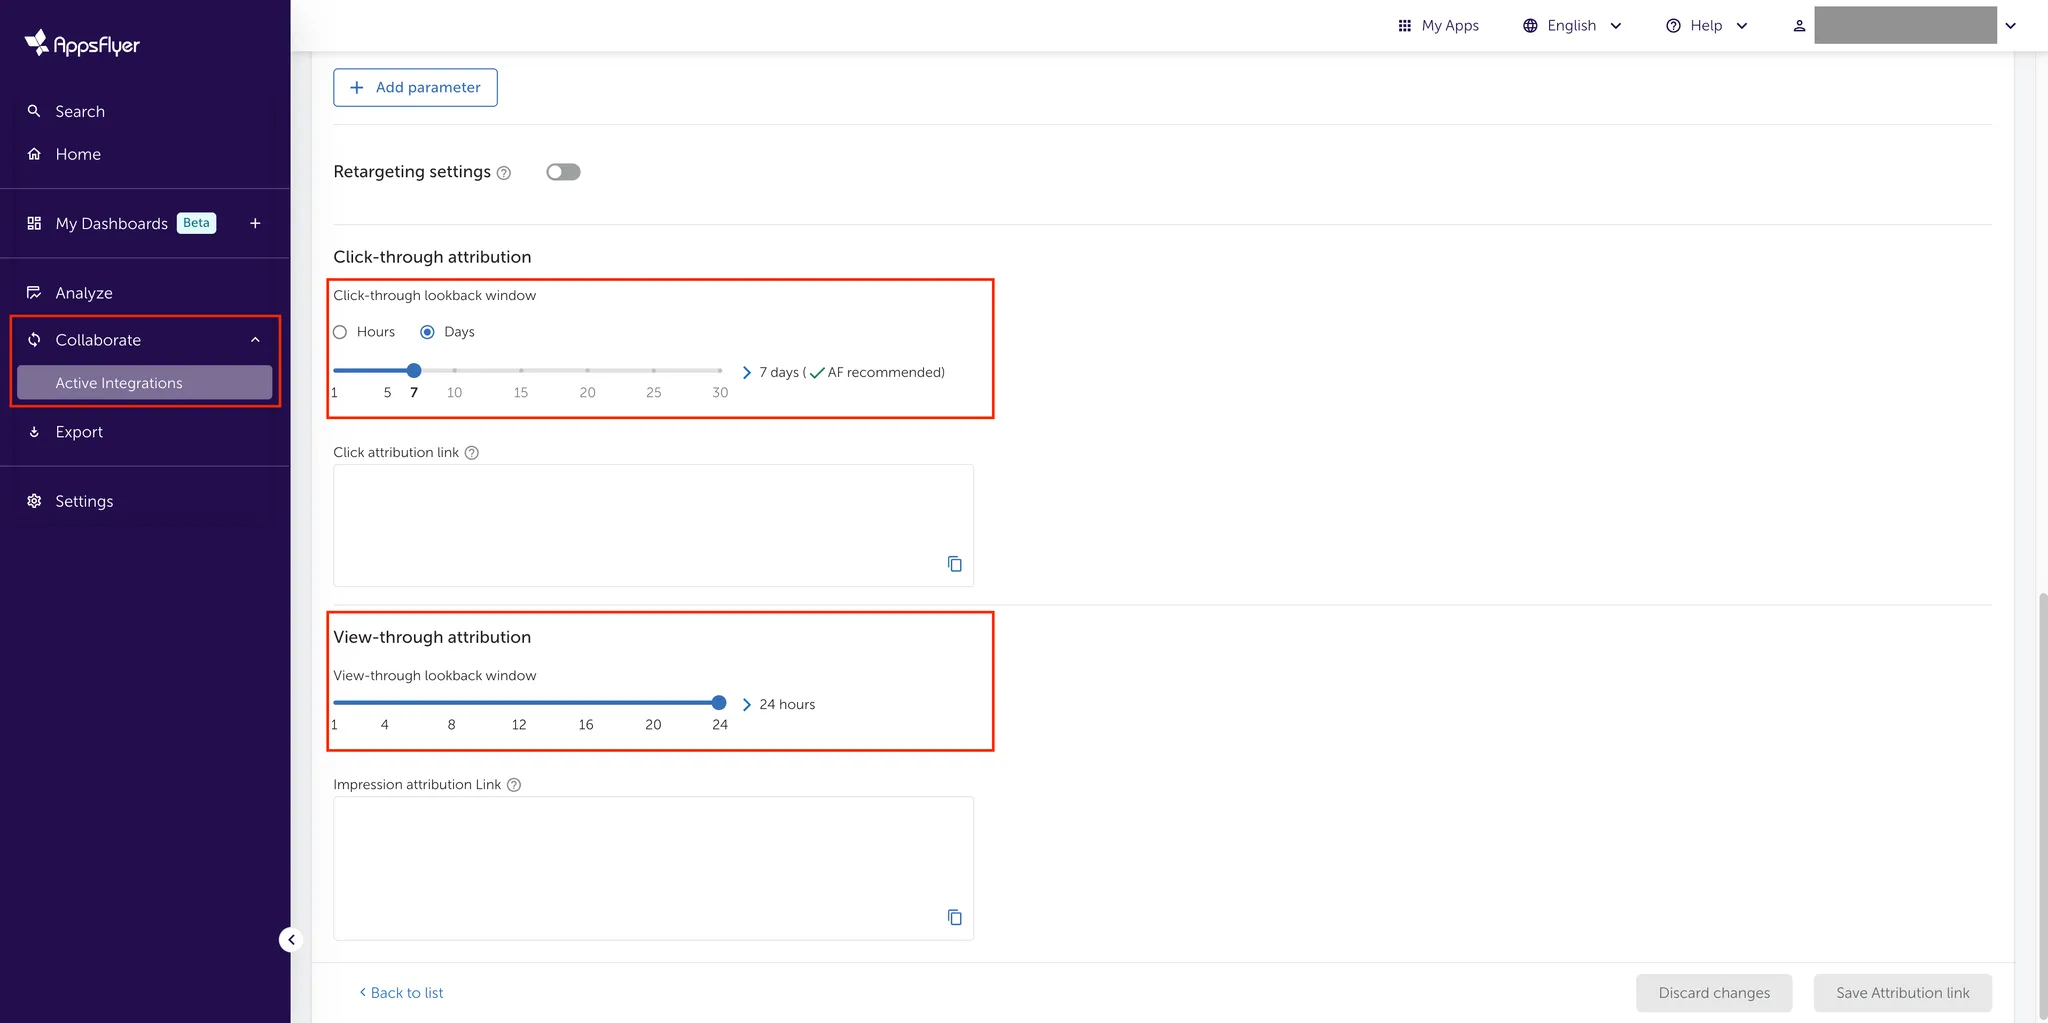
Set Attribution Windows.
- In the Click-through attribution subsection, set a 7-day Click-through lookback window (minimum).
- In the View-through attribution subsection, set a 24-hour View-through lookback window (minimum).
- Click Save Attribution link
Importing Cost Data into AppsFlyer
AppsFlyer can pull AppLovin cost data directly from AppLovin’s reporting API. To set this up:
- Make sure all AppsFlyer tracking URLs contain “
&af_c_id={CAMPAIGN_ID}”. - Select the Cost tab where you can configure settings to import cost data into AppsFlyer.
- Toggle Get cost data on.
- Enter your Axon by AppLovin Reporting API Key in the API Credentials section. You can find your AppLovin Reporting API Key in the Axon by AppLovin dashboard under Account > Keys.
- Enter the Android Package Name or iOS Bundle ID.
Note that the package name must be in the
com.example.PackageExampleformat for both iOS and Android. - Select Save Cost.
![]()